Luminar AI lets you turn your ideas into reality with powerful, intelligent AI. Download the photo editor and see how you can completely transform your photos in a few clicks.

Step 5
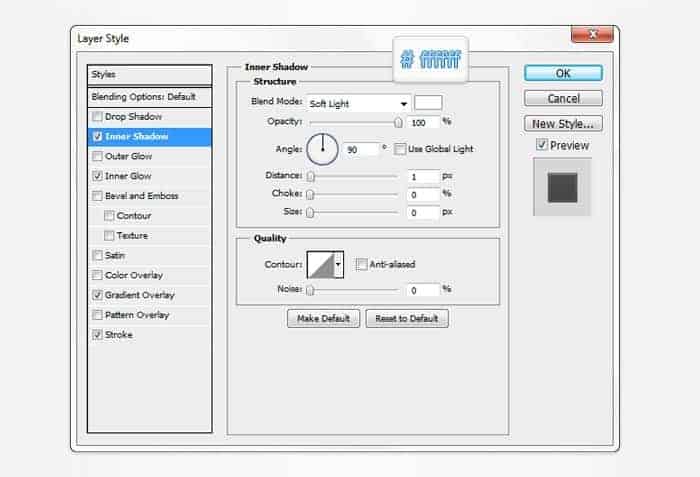
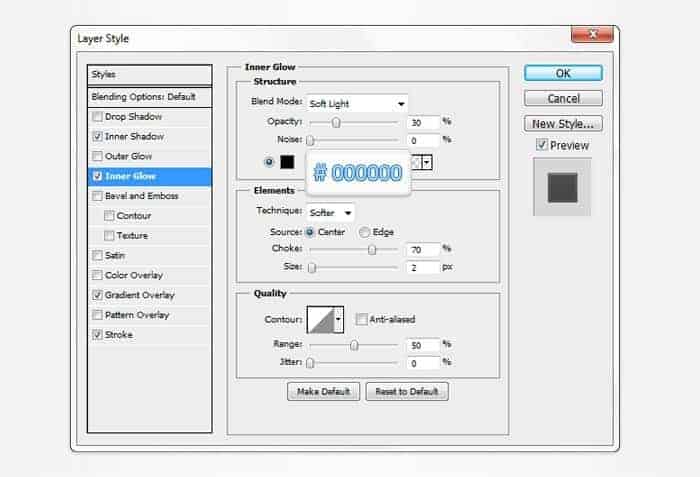
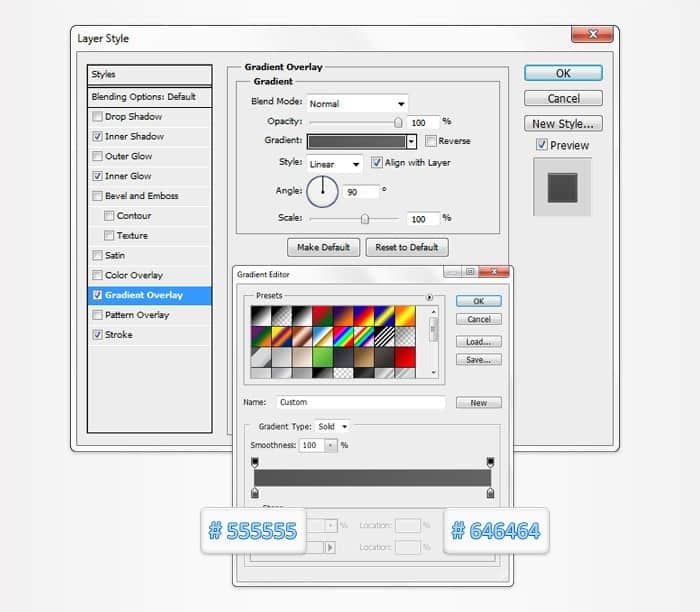
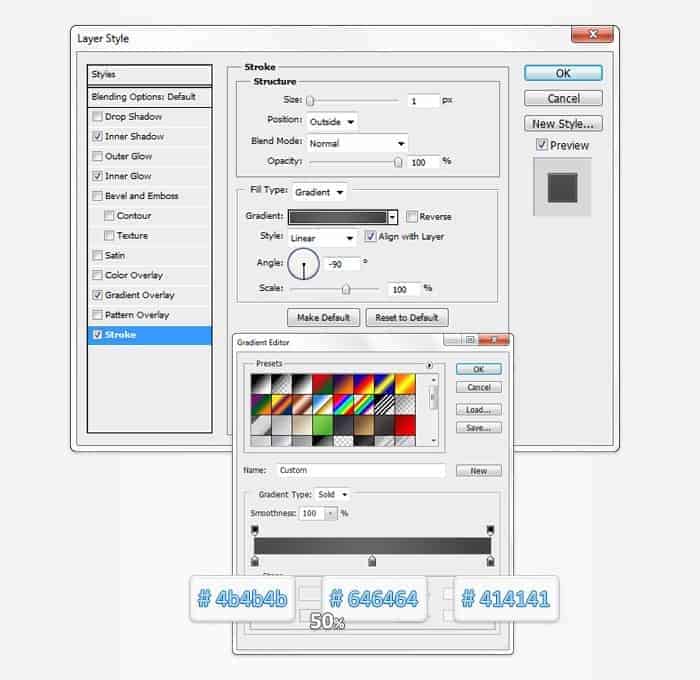
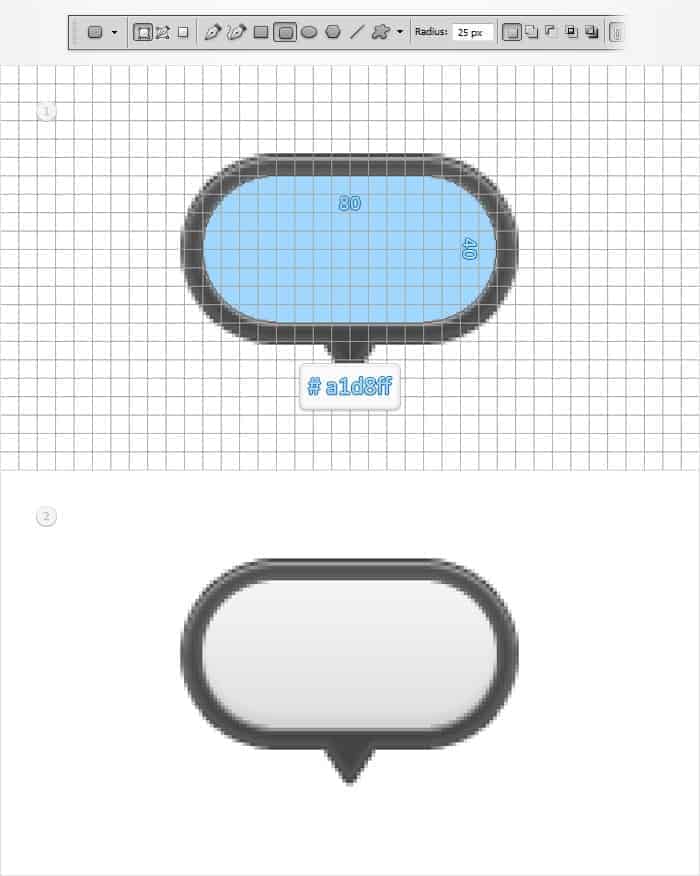
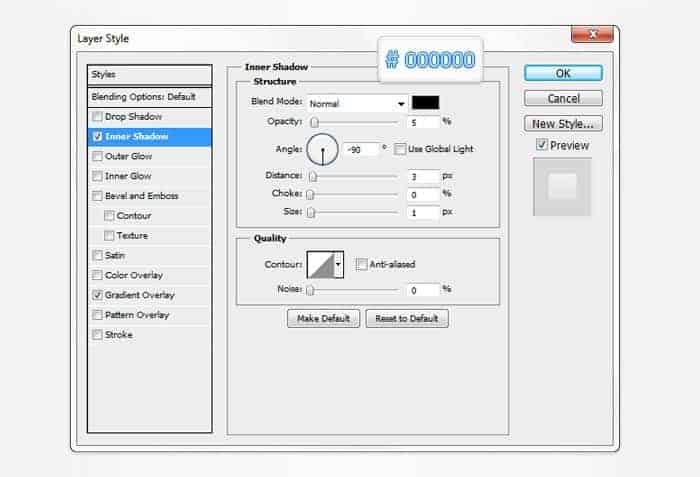
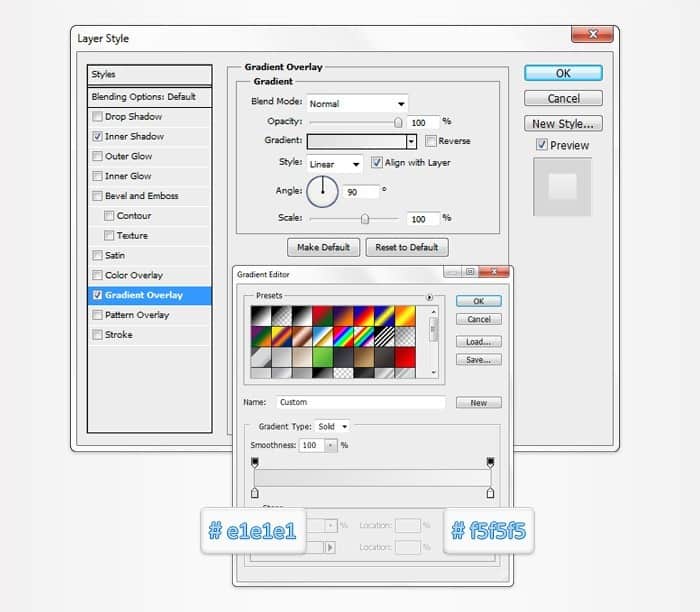
Set the foreground color at #a1d8ff and pick the Rounded Rectangle Tool. Make sure that the radius is set at 25px, create an 80 by 40px vector shape and place it as shown in the first image. Open the Layer Style window for this new shape and enter the properties shown in the following images.
Step 6
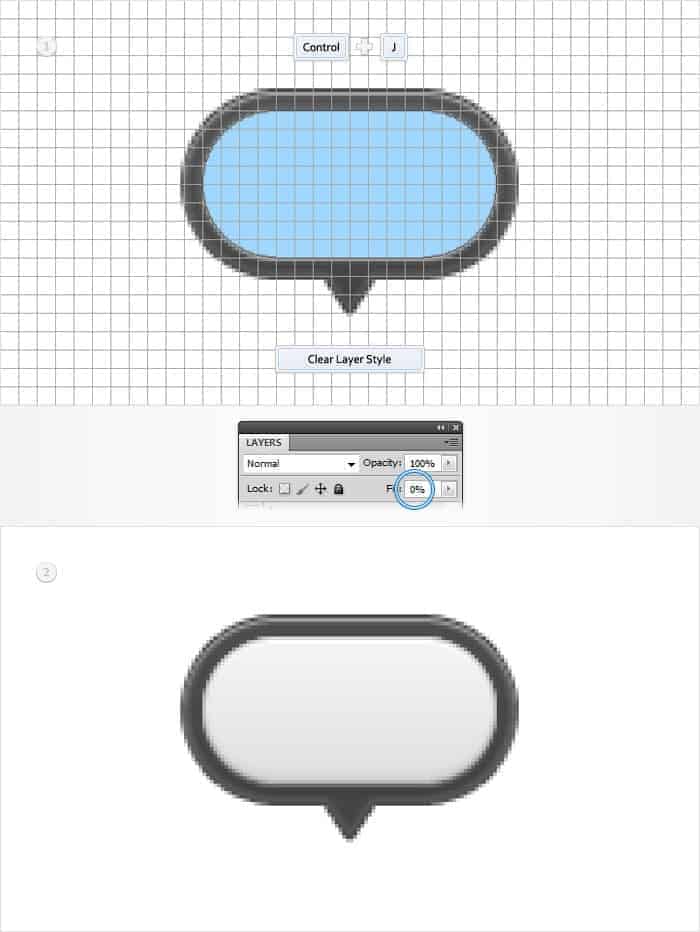
Duplicate the vector shape made in the previous step (Control + J). Focus on the Layers panel, right click on this copy and go to Clear Layer Style. Select this copy, lower its Fill to 0% then open the Layer Style window and enter the properties shown in the following images.
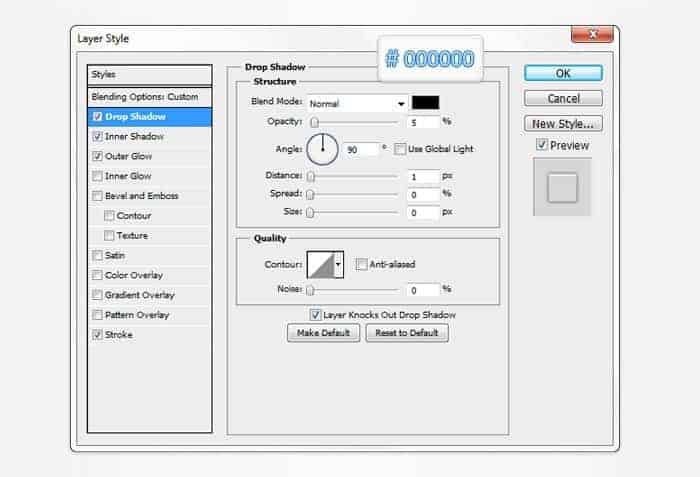
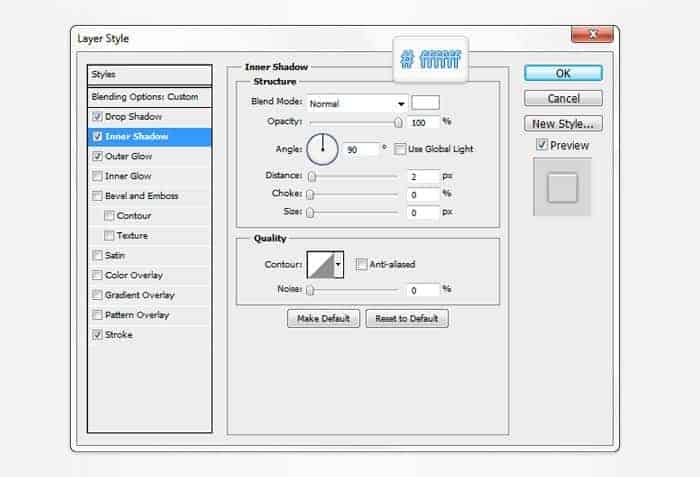
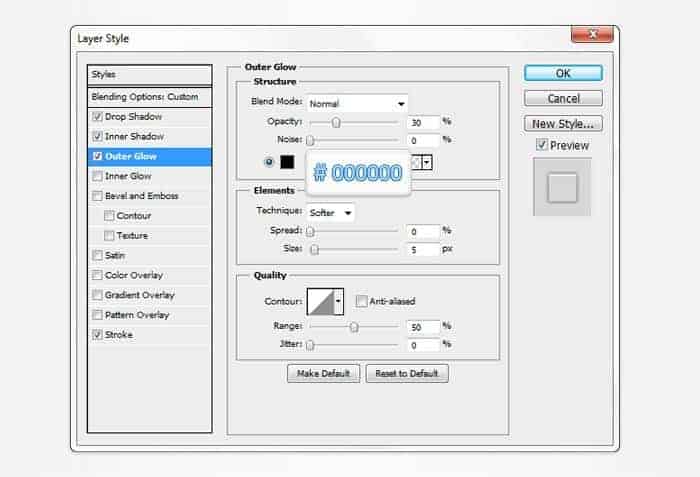
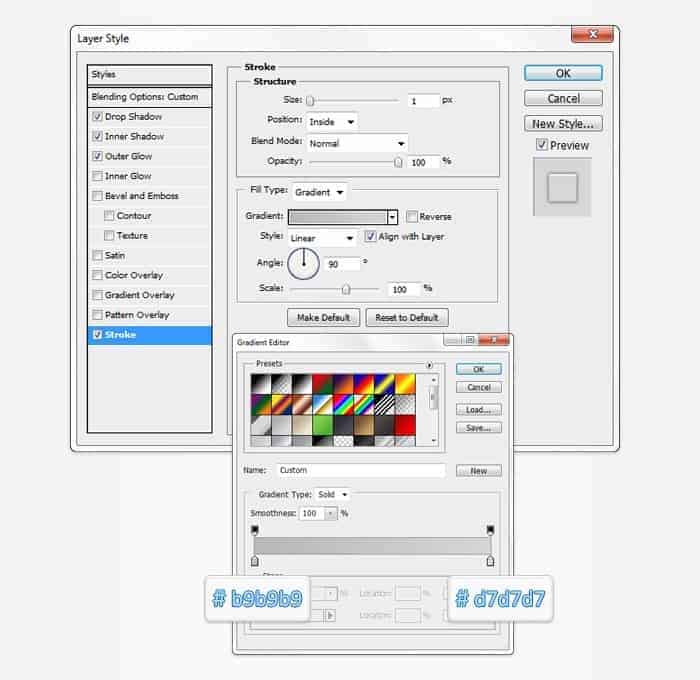
Step 7
Set the foreground color at #dcdcdc, pick the Rounded Rectangle Tool and set the radius is set at 5px. Create a 70 by 40px vector shape and place it as shown in the first image. Open the Layer Style window for this new shape and enter the properties shown in the following images.
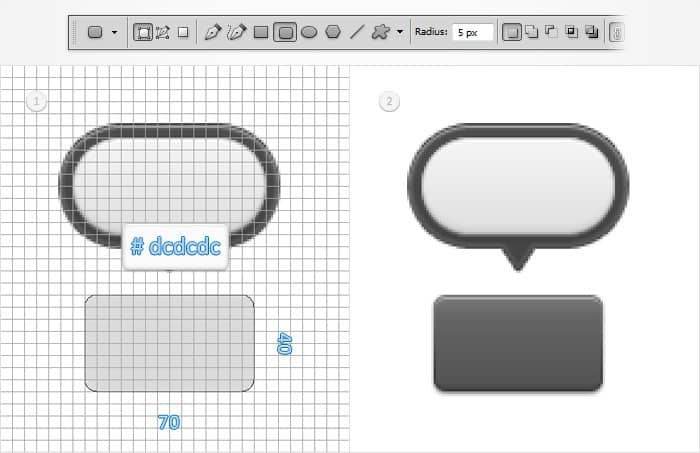
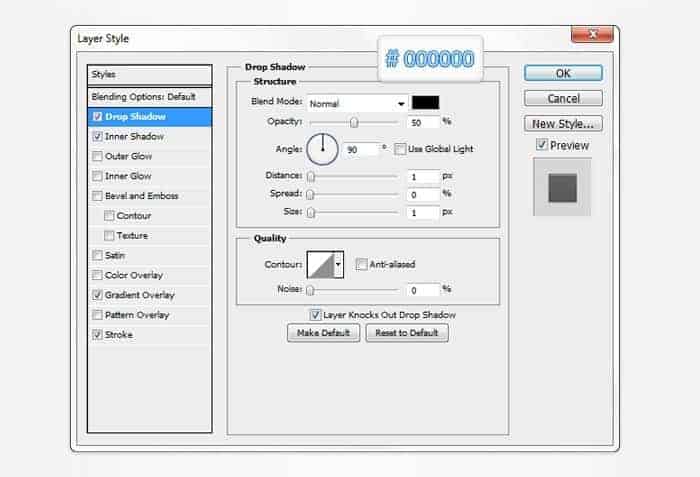

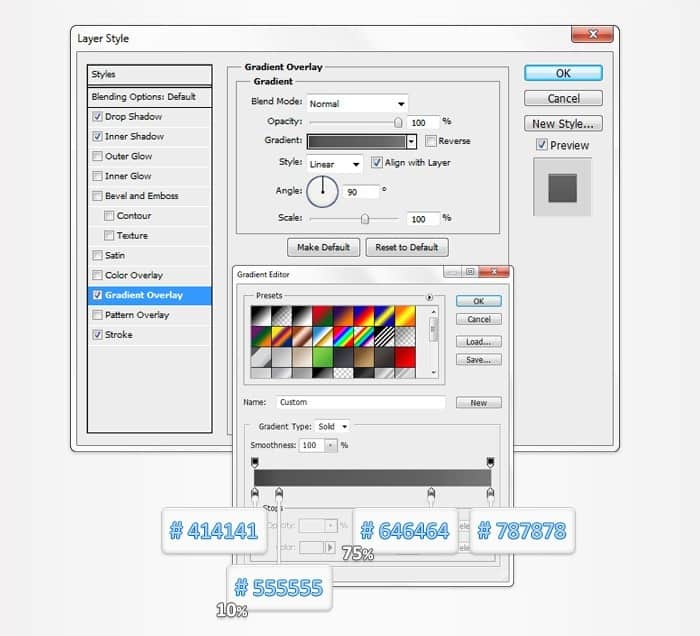
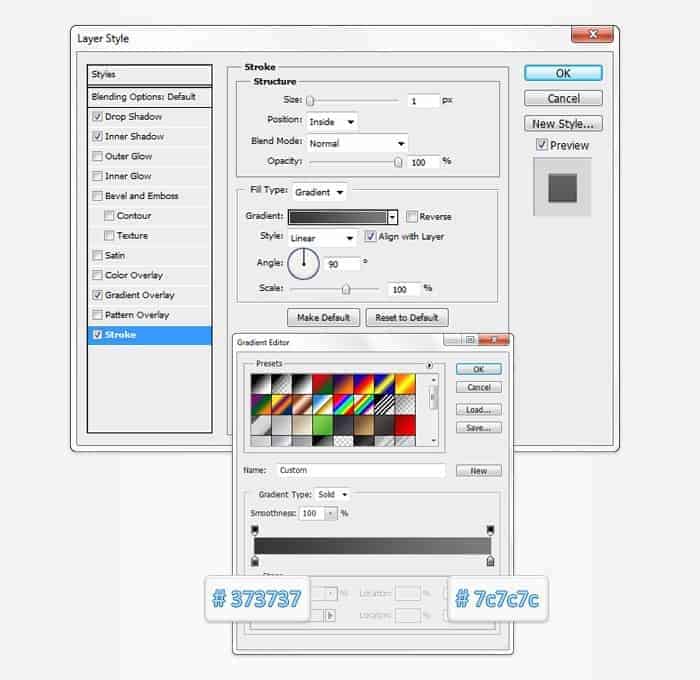
Step 8
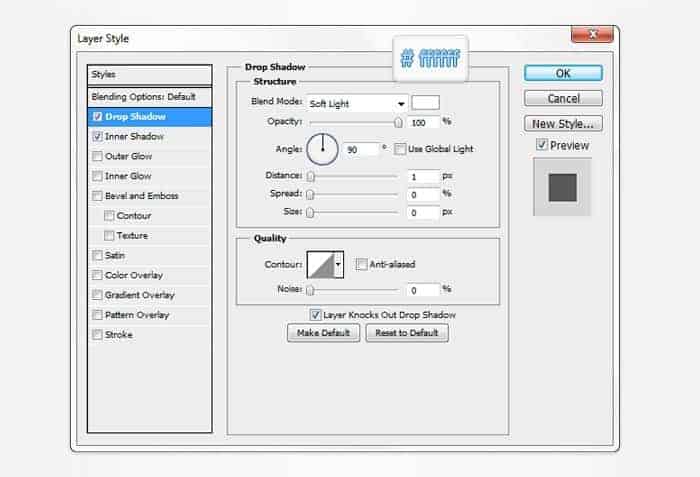
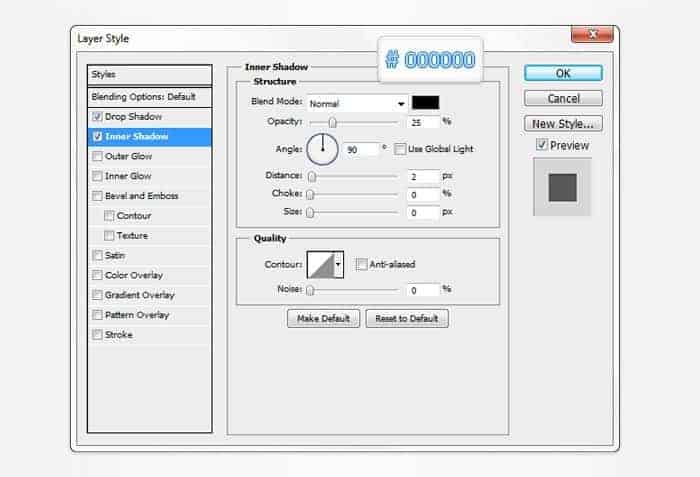
Using the Type Tool add the "Share" piece of text and place it as shown in the first image. Use the Lobster font with the size set at 15pt and the color at #414141. Open the Layer Style window for this little piece of text and enter the properties shown in the following images.
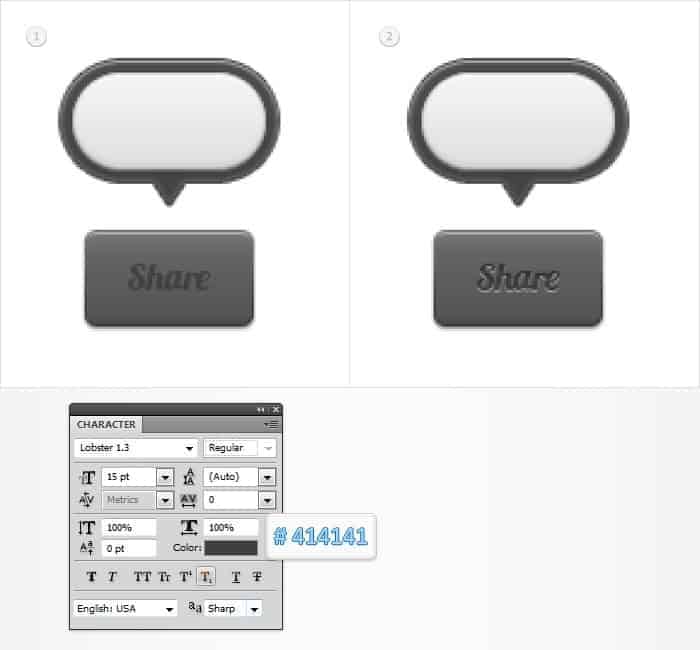
Step 9
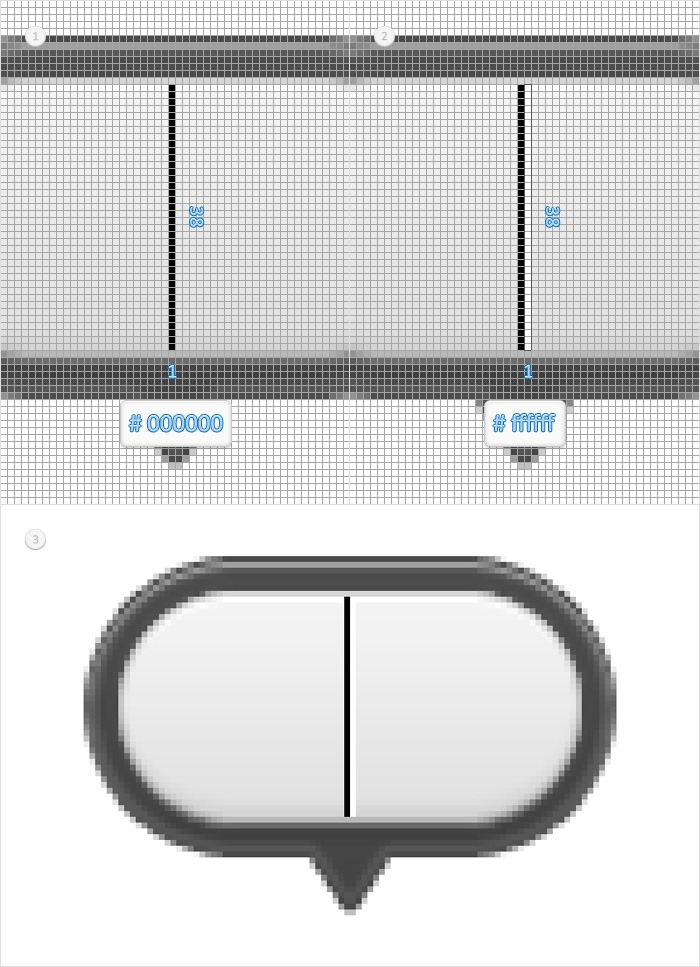
For the following steps you need a grid every 1px. Simply go to Edit > Preferences > Guides, Grid & Slices and enter 1 in the Gridline Every box. Set the foreground color at black, pick the Rectangle Tool, create a 1 by 38px vector shape and place it as shown in the first image. Make a copy of this thin rectangle, move it 1px to the right and replace the black used for the color with a white.
Step 10
Focus on the Layers panel and open the Layer Style window for the black rectangle made in the previous step. Enter the properties shown in the second image and click OK. Move to the white rectangle made in the previous step, open the Layer Style window and enter the properties shown in the third image.

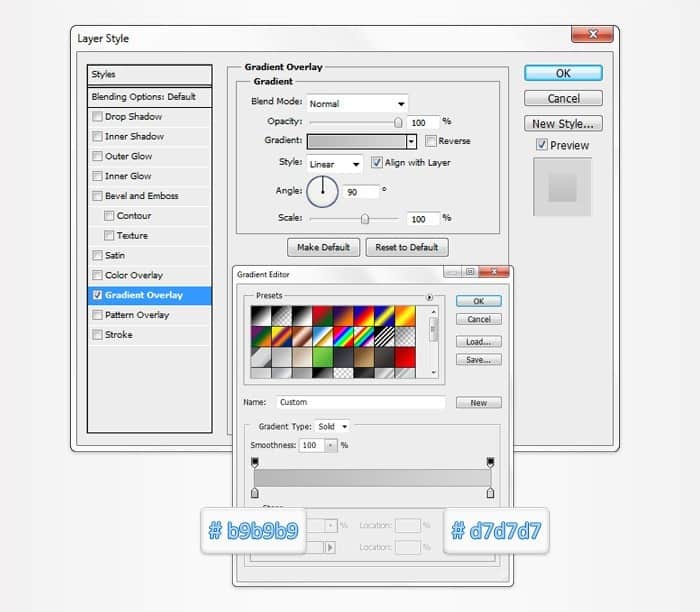
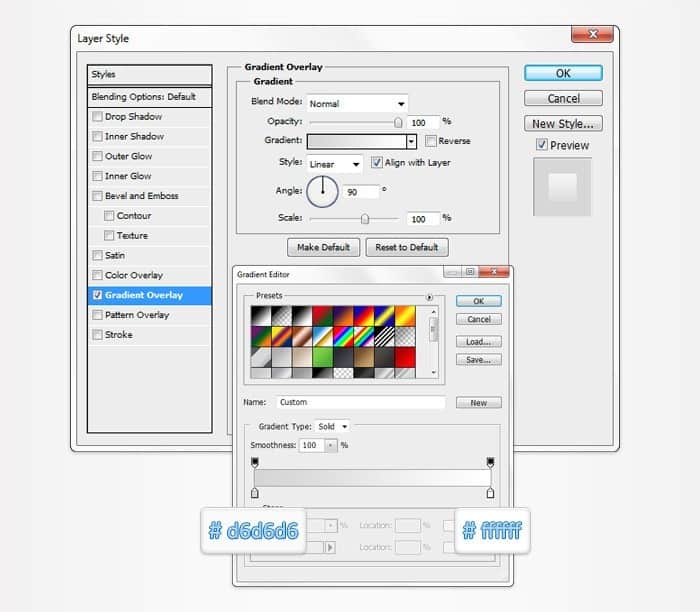
Step 11
Set the foreground color at #4865a7, pick the Rounded Rectangle Tool, set the radius at 3px and create a 9 by 19px vector shape. Make sure that this new shape stays selected and switch to the Rectangle Tool. Check the Subtract button from the top bar and draw a 6 by 16px vector shape as shown in the second image.



14 comments on “Create a Pixel-Perfect Social Icon Using Vectors”
This was a tougher one to follow. However, the end result is perfect! Thanks!
Have nice work ..............go on.
Really great tutorial!
Easy to follow and easy to understand!
Thank you!
Bafta!
it's useful.. but not clear expansion here
Rubbish tutorial. I don't know at which level this tutorial is aimed at, but the author is assuming that anyone having a go at this tutorial knows exactly where all the tools, and facilities, in photoshop are. In short very hard to follow, not very good in fact
I agree, im struggling to understand how they got the second vector shape (subtraction) perfectly centered inside the other vector shape. This is step 1 and 2!
Needs a better breakdown.
No layer styles for this???
Thanks! I might try
Where are Layer Styles settings?
this sux
Thank you very much.
Thx!!!
Thank's a lot for this tutorial. It's very very useful :)
Thank you dear for this wonderful article. I use Pixelmator but this is turning me gung ho for Photoshop.