Make your artwork look like they're from an alternate universe. These Cyberpunk presets work with Photoshop (via the Camera Raw filter) and Lightroom. Download all 788 presets for 90% off.
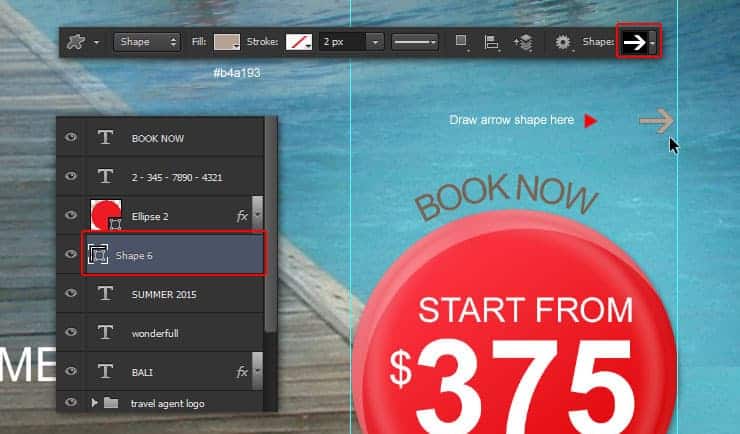
Step 71
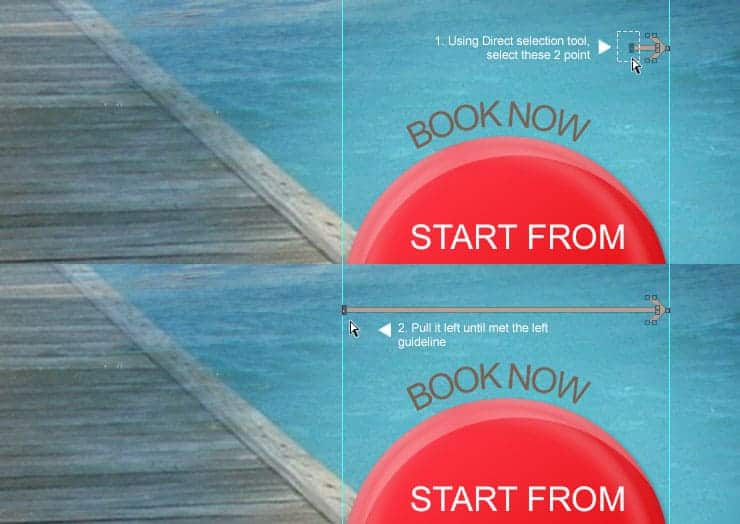
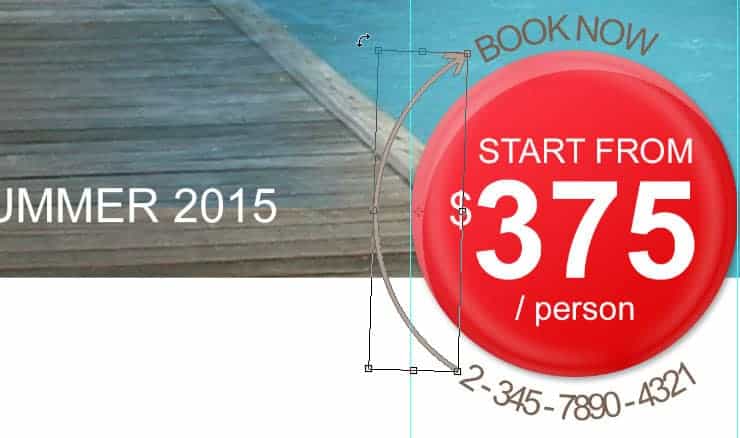
Grab Direct Selection tool, click and drag to select two points on the left side of the arrow. Once selected, drag those points all the way to the left until it reached the left guideline.
Step 72
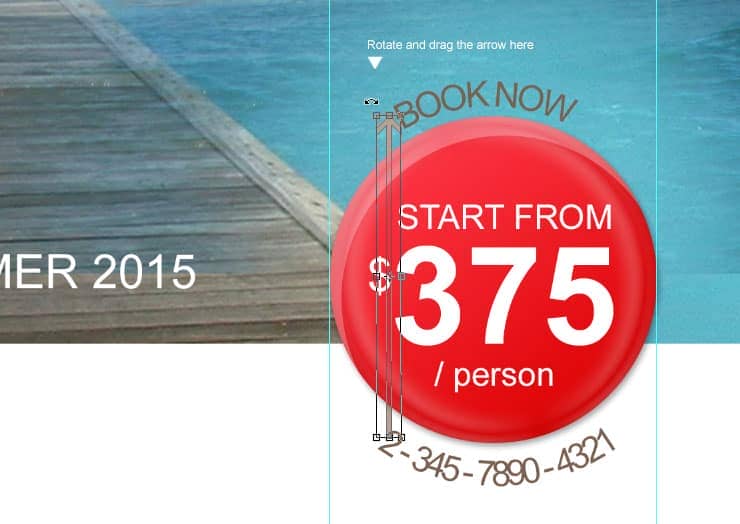
Call the Free Transform command, and then rotate the arrow in the up direction. Don't hit the Enter button yet.
Step 73
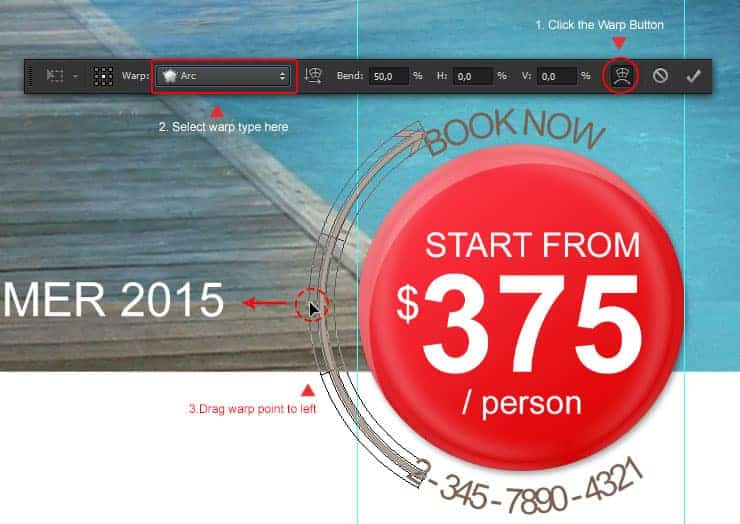
Click the Warp button. Select the Warp type: Arc, and then drag the warp point to the left. This will warped the arrow shape as seen in the image below. Hit Enter to apply the transformation.
Step 74
If the arrow is too large or too much curve, adjust it once again using the free transform command.
Step 75
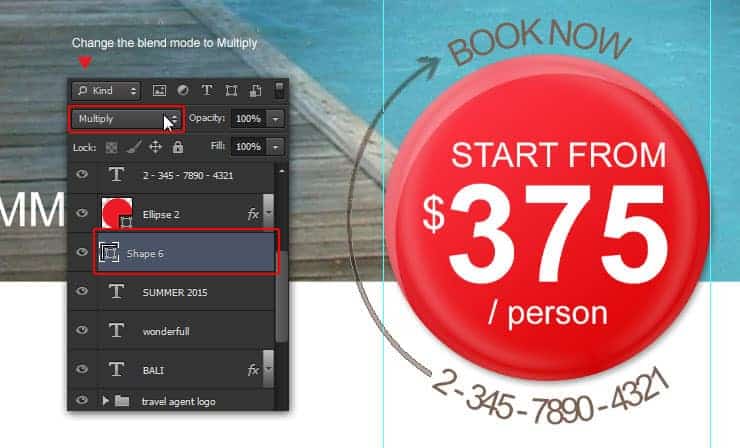
Change the arrow Blend Mode to Multiply. This will render it into dark translucent arrow.
Step 76
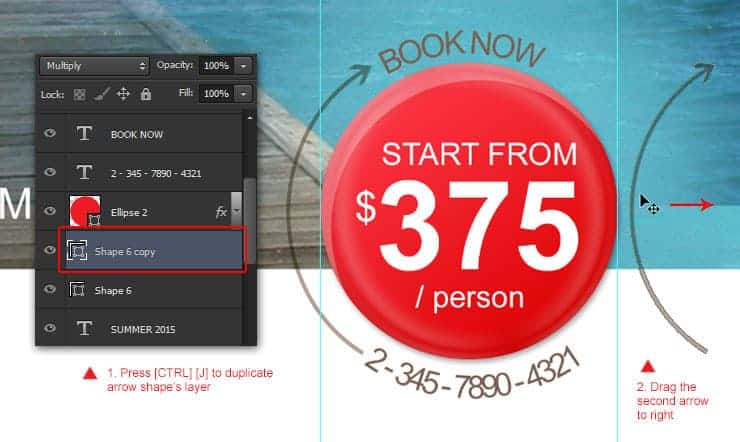
Duplicate the arrow layer by pressing Ctrl+J. Drag this second arrow to the right side of red circle.
Step 77
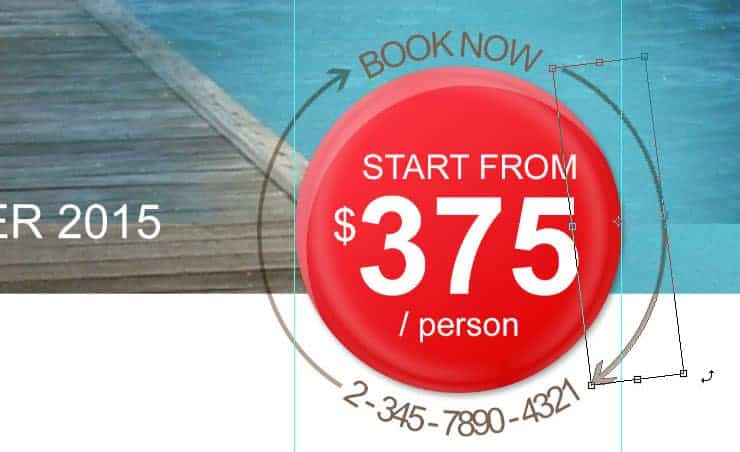
Call the free transform command once again, rotate the arrow into down direction. Hit Enter to apply transform rotation.
Step 78
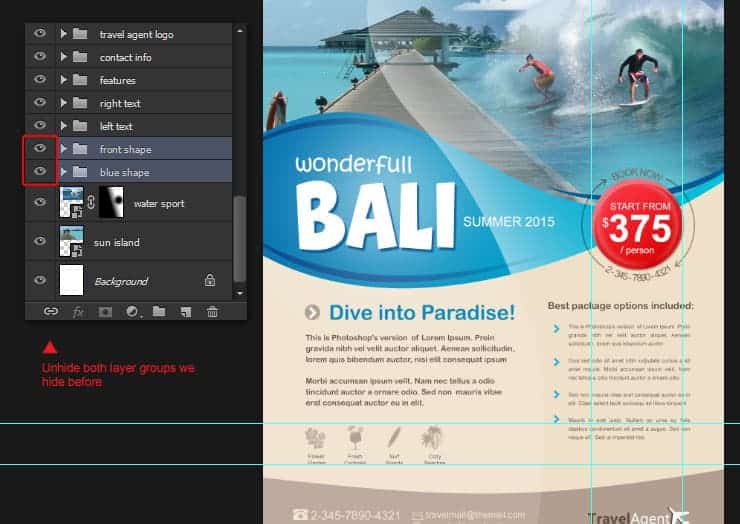
Unhide the front shape and blue shape group folder. We are done with the travel brochure frontside! Now we can continue design for the travel flyer backside.
Step 79
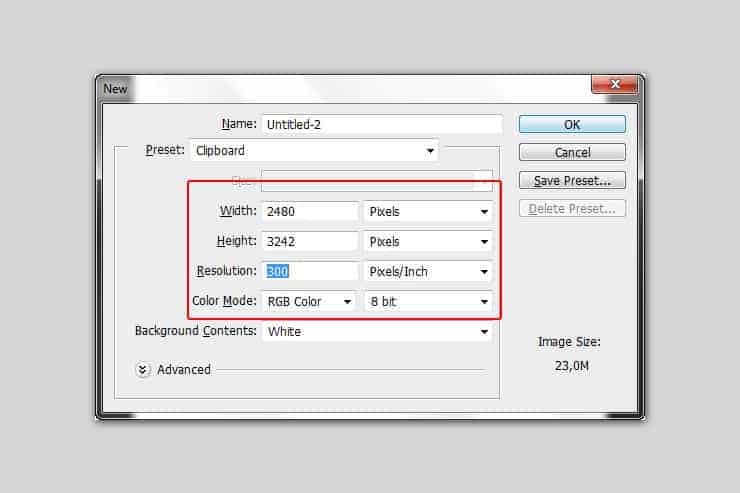
Within Photoshop, create a new document with 2480 pixels width and 3242 pixels height. Set the resolution to 300 ppi.
Step 80
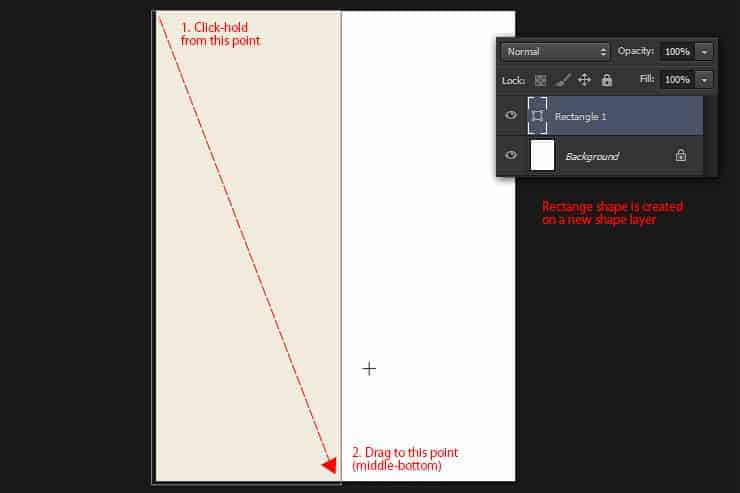
Draw a canvas height rectangle shape, but half the canvas width. Set the rectangle color to a light brown color (#f0ebdc).
Step 81
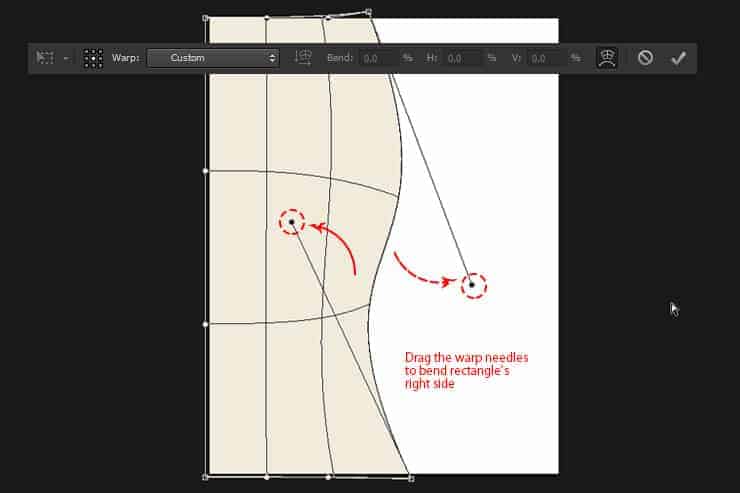
Go to Edit > Transform > Warp command. Use the warp needle to bend the rectangle's right side, making it looks like a waving flag. Hit Enter to apply warp command.
Step 82
Still in the same shape layer, draw another rectangle in the middle of the canvas horizontally.
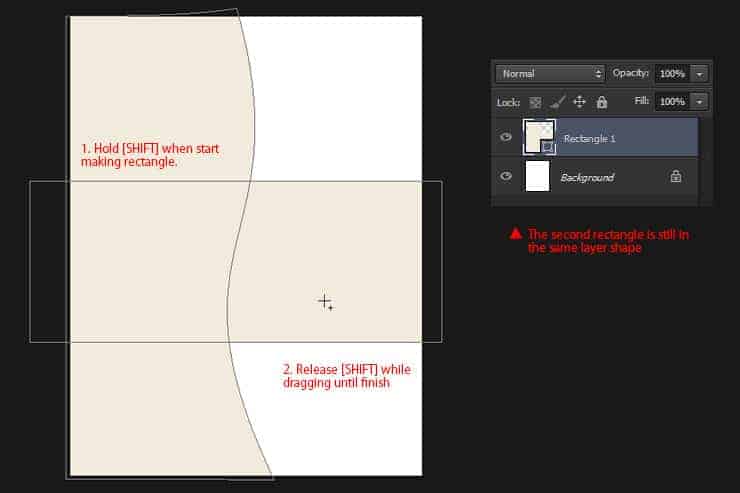
Step 83
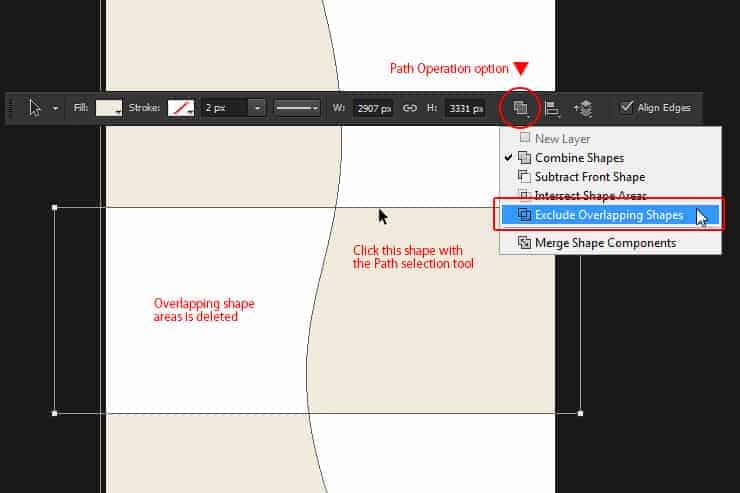
Click the horizontal rectangle with Path Selection tool. From the option bar, change the Path Operation to Exclude Overlapping Shapes. This option will "Delete" any overlapping areas from both rectangle shapes.
Step 84
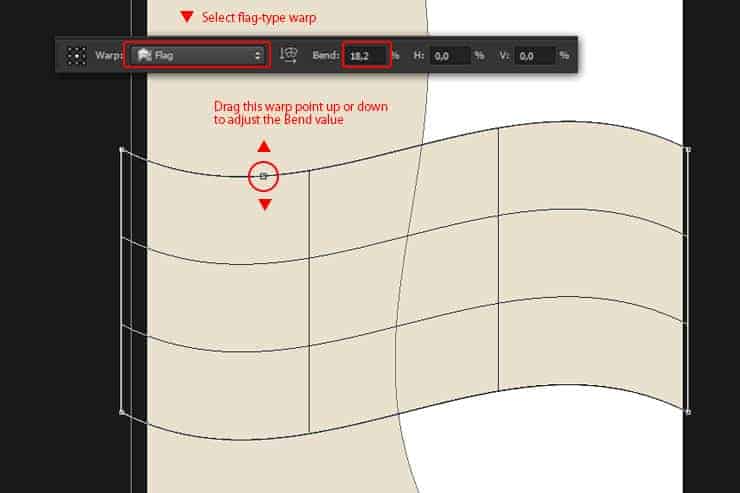
Go to Edit > Transform Path > Warp. Select warp type: Flag from the option bar, we can adjust the Bend value by dragging up or down the warp point.
Step 85
Grab the Magic Wand tool, check the Contiguous and Sample All layers from the option bar. Click white area in the top right corner to select it.


14 comments on “Create Your Own Travel Brochure Using Only Photoshop”
hi every one lol XD ヅ
hi every one
hey
who dis
legendary Austin
HI I WOULD LIKE TO KNOW HOW TO CREATE A SHAPE ON TOP OF ANOTHER LAYER ON THE TUTORIAL IS NOT CLEAR WHAT TO DO.
Fantastic tutorial. Love your work you are truly talented
ok
This tutorial go against Alaluh,,,, Very not good. You will pay ffore this,,,
Day is now,,, ready for achmed you bete
First of all how dare you make this awful tutorial. I just thirty minutes of my life making a gosh darn arrow that's small /:(
Thanks, very helpful!!!
Hi, Wayang Puppet link takes me to 410-Image Not Available. Do you have another link to the image? Thanks.
Sorry, I meant Shrine Temple link takes me to a 410 page.