Turn any photo into a dot grid artwork with these Photoshop actions. You'll get great results with dots that change size. They get larger in brighter areas and smaller in darker areas. Free download available.
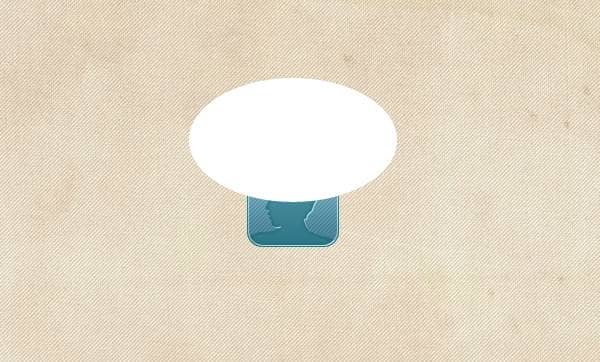
After creating the ellipse apply the following Layer Styles on it:
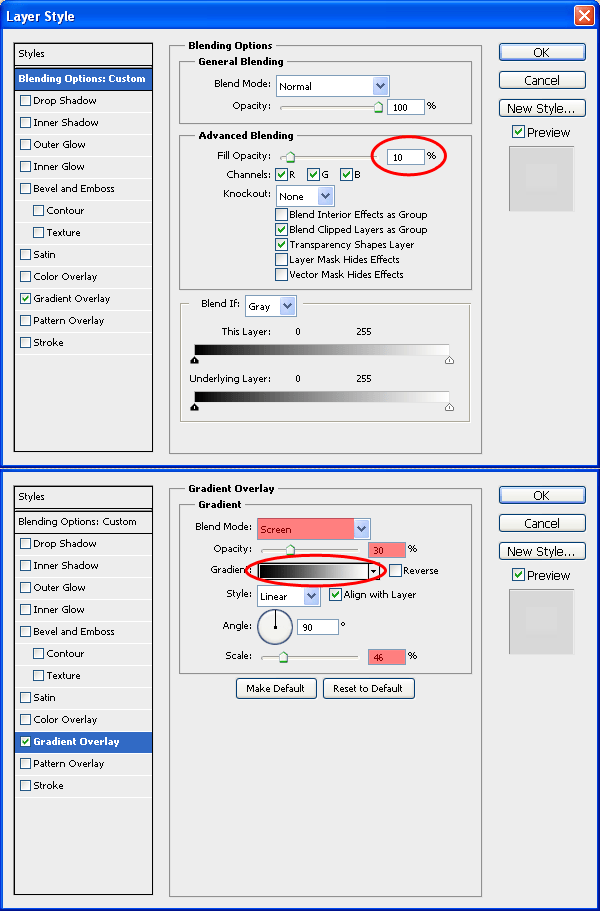
If you finished applying the Layer Styles on the Highlight layer you're almost done! The only thing you have left to do is to apply a Layer Mask on the layer and to apply a Drop Shadow effect on the bottom layer.
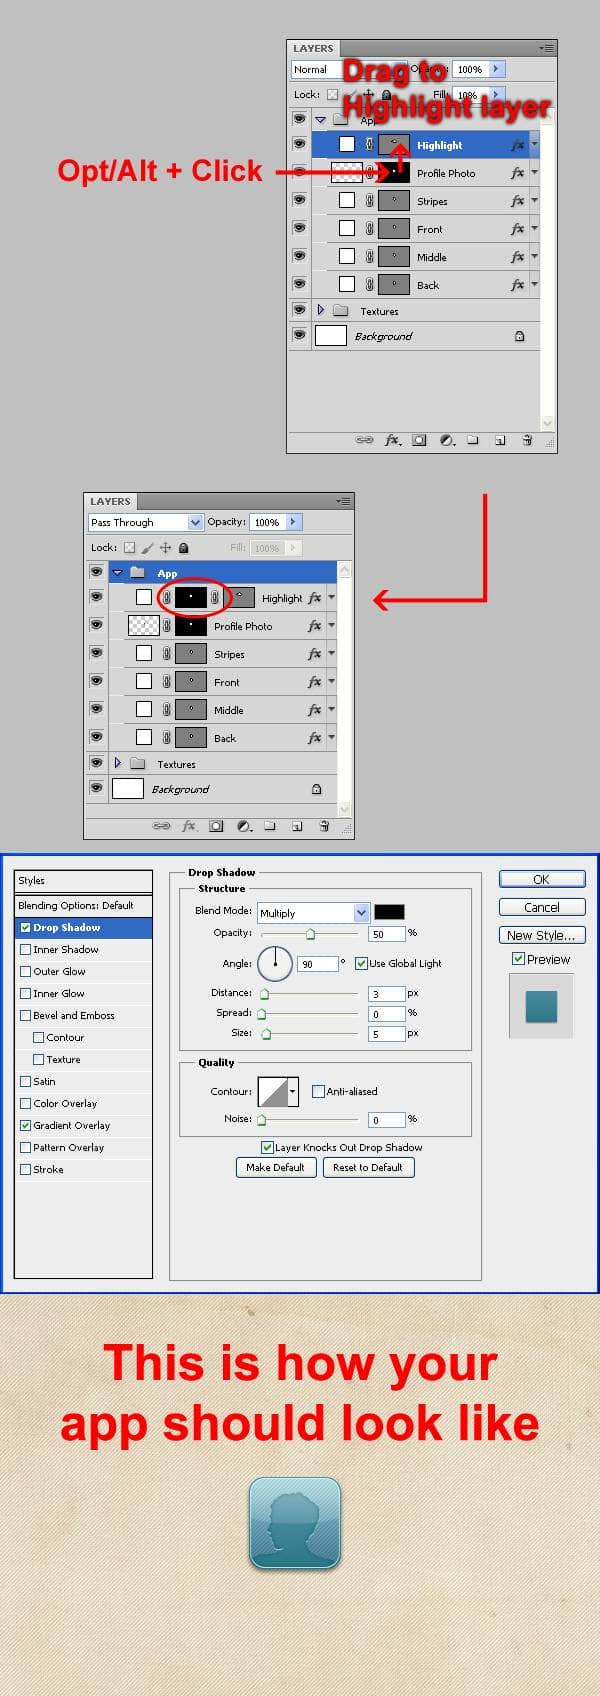
Click and drag, while holding Opt/Alt, the Layer Mask's thumbnail of the Stripes layer on to the Highlight Layer. After applying the Layer Mask double click the bottom layer and go to the Drop Shadow section. Apply the next settings:
Step 5: Creating the Download Button
Before we start creating the Download Button, go to the Futura Font link in the resources and download the following weight of the font: Light, Medium, Bold, and Extra Bold.
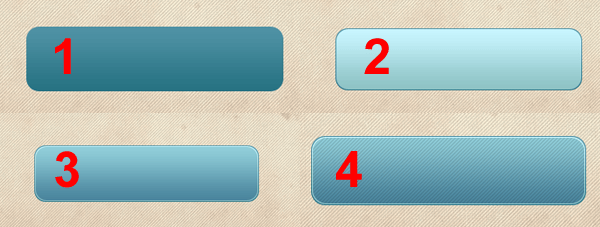
Let's get started! Now, we will create the button with the same technique I showed you in Step 3. Create three new rounded rectangles with these sizes: A. 302px on 76px, B. 300px on 74px, and C. 298px on 72px. Apply on the three rectangles the Layer Styles we used in Step 3. Then, duplicate the top rectangle and apply the Settings and Layer Styles we have applied on the Stripes layer earlier.
Select the type tool. Use the Futura Font and select the Extra bold weight. Type "Free Download!". Use font size 22pt. Then, apply the style which we used on the Profile Photo. And after applying the styling options align all the layer horizontally and vertically. Just apply the Drop Shadow effect, that we applied on the bottom layer of the app, on the bottom layer, and you should get this:
If you got the result I did, group the button layers and name the group "Button".
Step 6: Type the Download Description Text
Select the type tool again. Use the Futura font with Black color, Light weight, and 30pt size. now write: "Download the new iDeitch App for FREE.". Change word "iDeitch"'s weight to Medium.

Step 7: Create the iTunes Store Icon
First create a rounded rectangle. width 147px, height 48px, and background color #6d6d6d. Then type "Available on the iPhone"' using Myriad Pro, in size 7.5pt and "iTunes Store" in size 18pt. Then create another, smaller, rounded rectangle which will be the iPhone later. Set its width to 18px and height to 32px. Then, Create a rectangle above the rounded rectangle which represents the screen of the iPhone (13px on 19px). After that create a circle which stands for the menu\back button (3px on 3px). Afterwards, load the selection of all the layers (except the background) and apply an Invert Layer Mask by Opt/Alt clicking the Layer Mask button. Then load again the selection of the screen and the menu button and fill the selection with White in the Layer Mask of the Background. And finally, group all the layer and name the group "iTunes Store"
