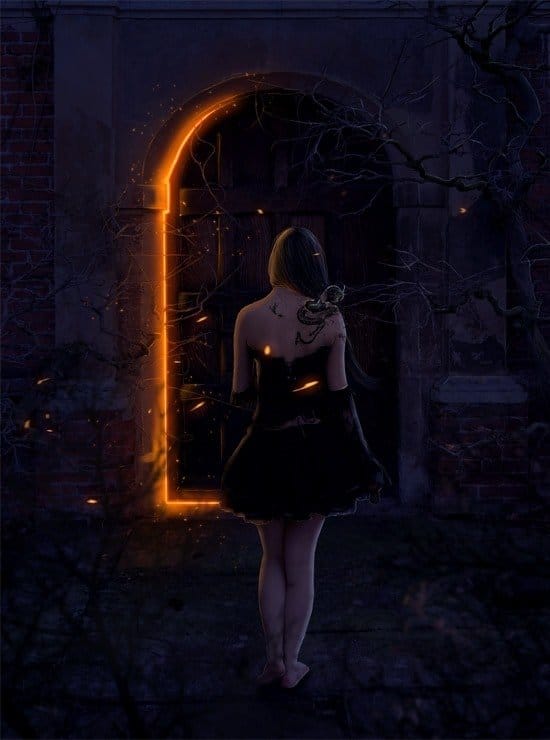
What you’ll be creating
You will be creating photo manipulation fulfilled with symbols – like fire, night and dragon. Everything here is a symbol of transformation. You will be playing with particles and fire :). You’ll need Photoshop CS5 or newer to follow this tutorial.
Tutorial Resources
- Dragon Pack 1– Lill-stock
- Creepy Door– AustriaAngloAlliance
- painting the nail blister– ScaryStock
- Hanging Branches 02– Alz-stock
- Wicked 16– Noree-stock
- Debris Brush Set– Zigabooooo
- Debris Brushes– Dacmaniac
Step 1
Let’s start. Choose from top menu File > New (or Ctrl + N), create 1200 x 1600 pixeldocument.
Step 2
Drag and place “Creepy door” stock to your file. Transform it as shown below.
Step 3
Now you will make night scene. Start from creating adjustment layer (marked shortcut or Layer > New Adjustment Layer) and pick Exposure.
Step 4
Colors in the picture are flatty. For fixing it add adjustment layer with Brightness/Contrast (marked shortcut or Layer > New Adjustment Layer > Brightness/Contrast).
Step 5
Now drag and drop to your file model stock – “Wicked 16”. Remember about proportions – she can’t be taller than the doors! :) Also, keep in mind the perspective. The model hasto be placed lower than door line.
Step 6
Add layer mask by shortcut. Mask background from model stock.
Step 7
Add new layer (Shift+Ctrl+N, Layer > New > Layer… or marked shortcut). Click on the created layer with RMB. Choose Create clipping mask. Clipping masks use the contents and transparency of a layer below.
Step 8
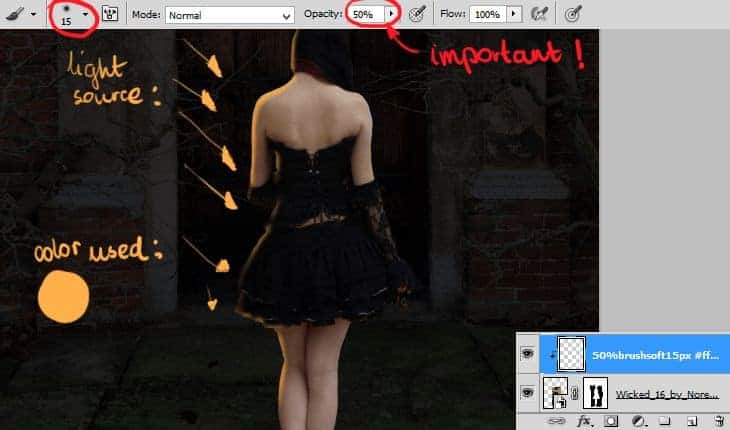
Pick soft, 15px, orange brush, set its opacity to 50%. With gently strokes draw lights of your model on created, clipping layer. I’ll set light source from doors, by the left side of picture.

Step 9
Add new layer (Shift+Ctrl+N, Layer > New > Layer… or shortcut). Click on the created layer with RMB. Choose Create clipping mask – like before. Then, set blending mode of this layer to Screen!16 responses to “Born of the Dragon – Create this Symbolic Gothic Composite in Photoshop”
-
Hi, this tutorial helped me learn things, and was cool. The only 3 things about it made me frustrated.
1. You only used one specific color code and the rest of the colors were hard to get right.
2. The 1px soft brush for the hair strands did not work for me. It was too big and pixelated and I wasn’t sure what effects you used..? Maybe I missed it.
3. I couldn’t use trees. it was hard to follow the tutorial properly. I use a different door. One you used not available.
thank you for this tuorial and keep up the good work.
-
This tutorial was cool, but frustrating for me because it was hard to find the exact colors, because you only gave one specific color code. Also I’m not sure exactly how you did the hair, mine wasn’t working well at all. I was using a soft round 1px brush and it was too pix-elated and it was too big . Here is what I came up with . I didn’t use the trees because It didn’t go well
with the door (because the one you used wasn’t available) . Thank you for making this tutorial. Keep it up. -
Amazing tutorial!
-
Great tutorial, I tried to make Something like that. Thanks
-
nice tut, just lost a bit in translation, if you know what i mean.
But thanks anyway !!!! -
This is really fantastic. The unlimited access makes it even better
-
Great tutorial. Thanks!
-
Looks amazing. Thank you, I want to try this and have read through the tutorial. Can you please tell me what you mean by click RMB. I know all the tools in Photoshop (using CS5) but RMB is new to me. thank you.
-
RMB = right mouse button
-
I think RMB = right mouse button :)
Great tutorial, thank you. I tried it, but I got some trouble with the orange color, it isn’t like yours. Can you tell me the color-code? It looks really dark and it is not “shining” on my manipulation.
Thank you for this tut :)
-
-
very nice
-
(y) Thanks
-
Very nice article. I will learn from this a huge resource. Thanks for share.
-
lel
-
so nice thanq i learned a lot of the tutorial love al your work on this site
-
so cool.Thanks for your tutorials


Leave a Reply