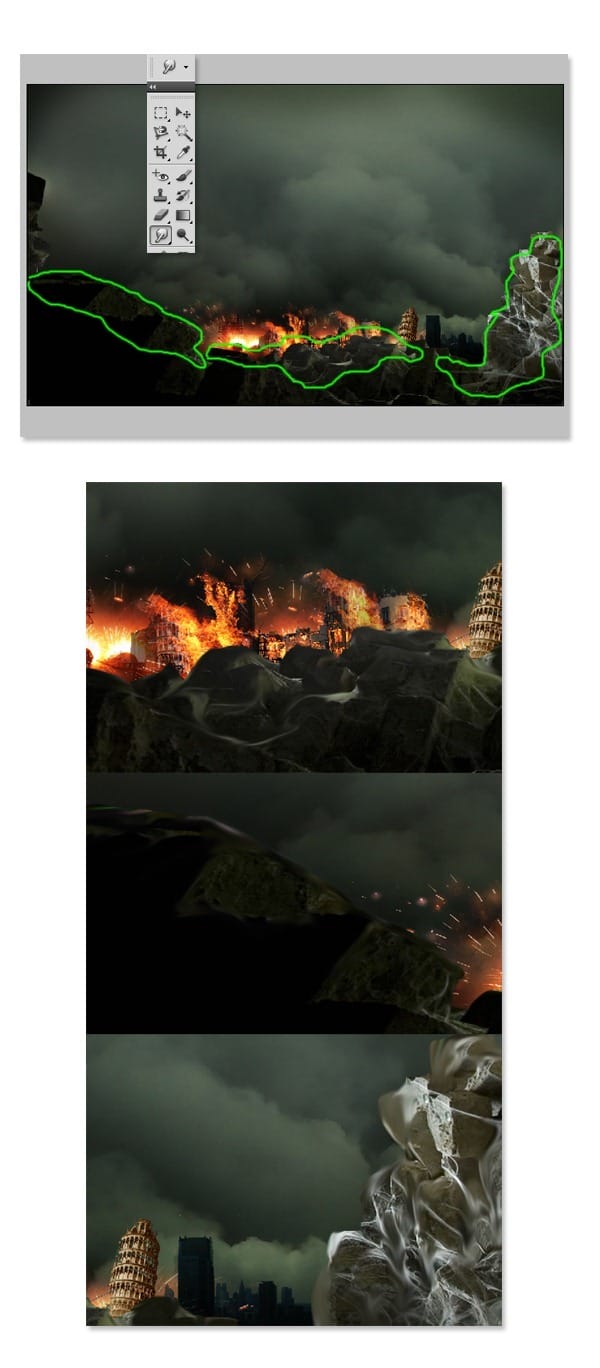
Step 22
Now go back to the foreground group layer. I decided to blur to the foreground especially to the edge parts. To do this, I used Smudge tool. Take the Smudge tool. Choose a soft brush and set the strength to 70-80. Smudge the parts of the foreground.
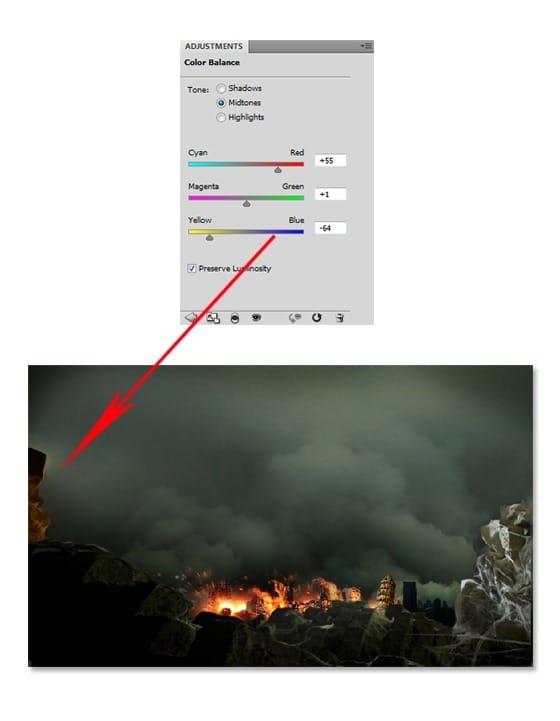
Step 23
Then I adjust the color of the left foreground with Color Balance.
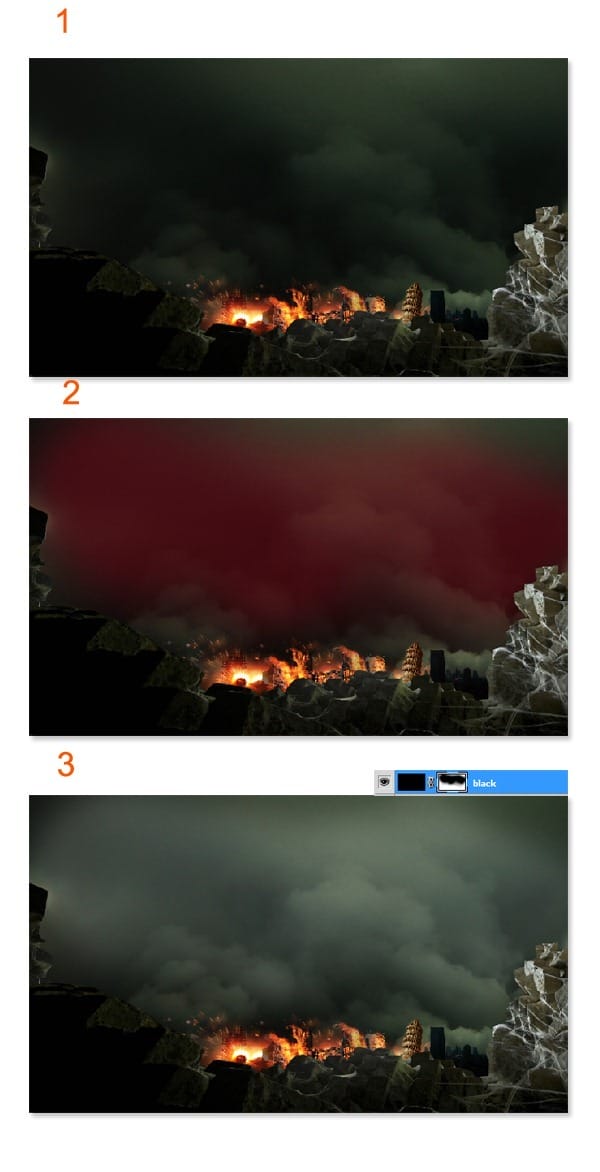
Step 24
Finally, I decided to add black gradation to the main foreground. Select the main foreground layer. Create a new layer above it and give this new layer a clipping mask. Activate the Brush Tool. Use a very soft round brush set at 20% opacity to stroke the part of the main foreground to give it the gradation.
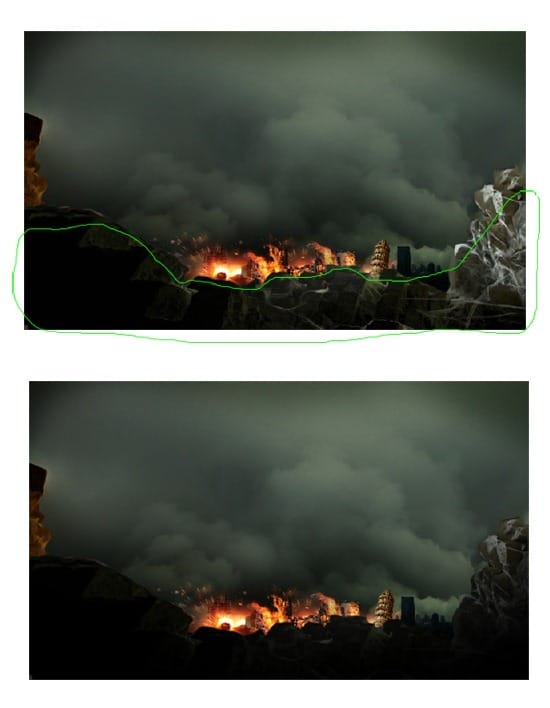
Step 25
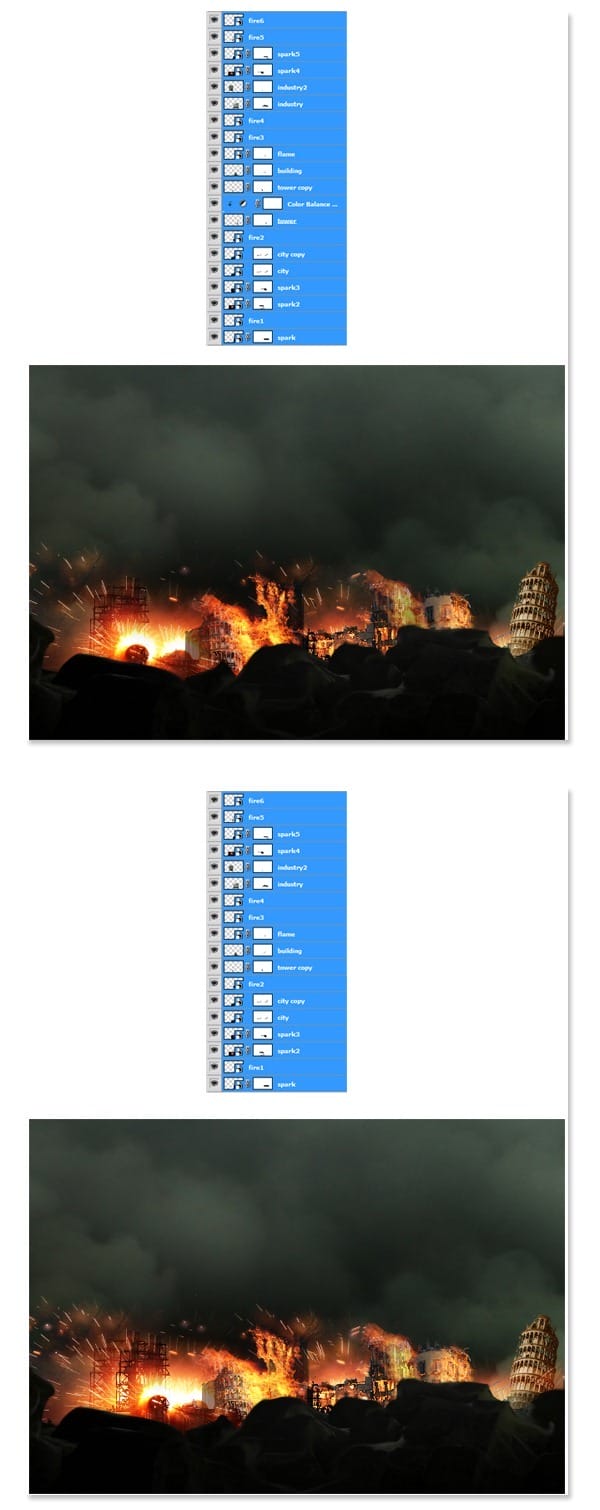
Next, select all the city, spark, fire and flame layers. Hit Ctrl+G to group them. Then, duplicate the group. Scale the duplication group just a little bit. Finally, delete the tower layer in the duplication group. Please see the illustration below:
Step 26
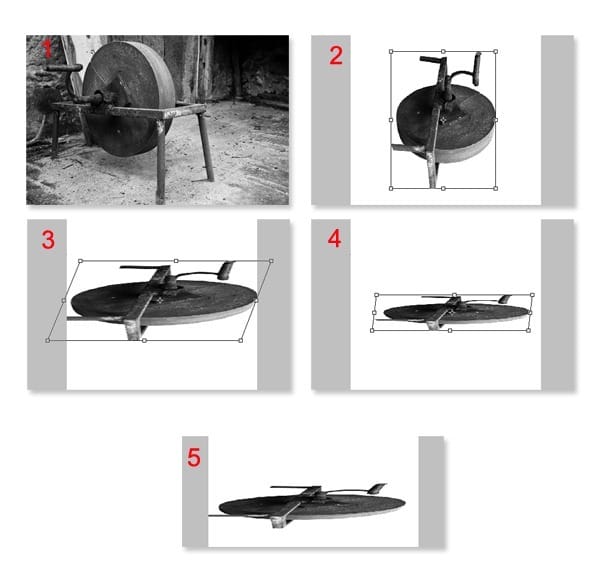
We will add a space craft to the scene. To achieve this, we will transform the provided stock picture. Please do the followings: Open the stock picture. Extract the picture from its background (illustration 1). Next, hit Ctrl+T to activate Free Transform Tool and rotate the extracted picture like the one in the illustration 2. After that, right click on the document to show Free Transform option. Choose Perspective and do transformation to get the result like the one in illustration 3. Distort the shape to get the result as shown in illustration 4. I had the final result like the one in illustration 5.
Step 27
What I did next was flipping the shape vertically. I duplicated the shape and moved the duplication down to the left a bit to get the final shape like the one in illustration 3. Finally, I cleaned out unnecessary parts. Please see the illustration picture for your inspiration. Hit ctrl+E to merge the layers.

Step 28
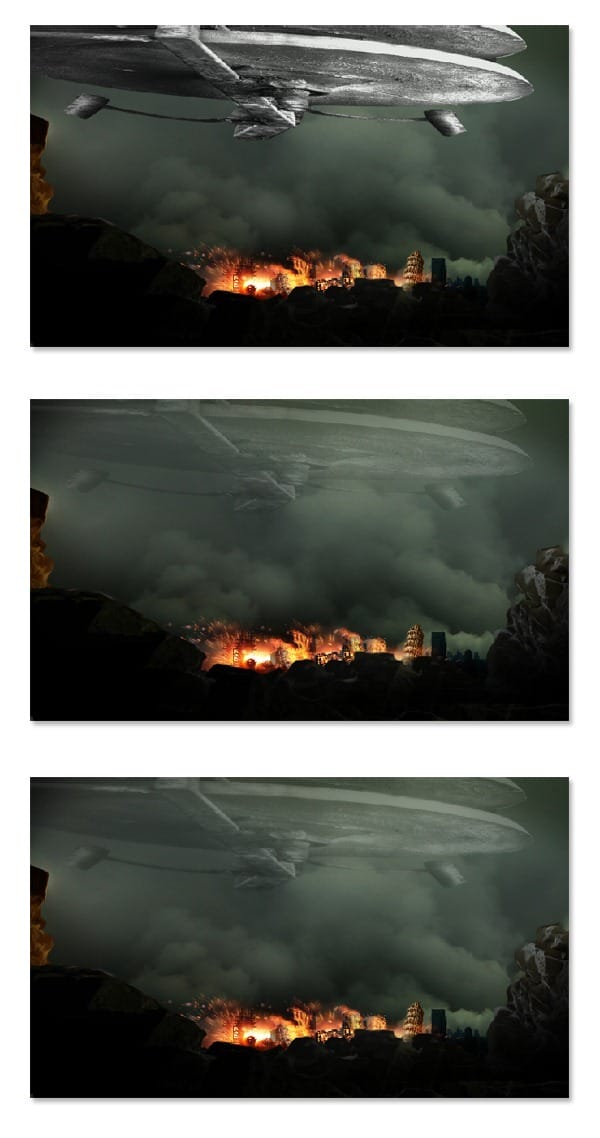
Click and drag the space craft to the canvas. Set its blending to normal at 20% opacity. Duplicate the layer and set the duplication layer to soft light at 20% opacity.
Step 29
I decided to give light to the space craft. Create a new layer. Activate Brush Tool to choose a very small soft round brush and hit F5 to show Brush Preset. Set the Spacing of brush stroke at 166%. Make sure to set the foreground color to white. Now choose Pen Tool to create path on the craft. Right click the path. When the path option window comes up, hit Stroke Path. Choose brush for the tool. Please see the illustration picture for the inspiration of what to do for this step. Finally, group the space craft and neon layers. I named this group space craft.
4 responses to “Create a City Destruction Photo Manipulation in Photoshop”
-
I would definitely be interested in getting that set!
-
Very Nice. Thanks for tuts.
-
thanks this is beautiful work my frend….
-
Nice one pal…


Leave a Reply