Luminar AI lets you turn your ideas into reality with powerful, intelligent AI. Download the photo editor and see how you can completely transform your photos in a few clicks.
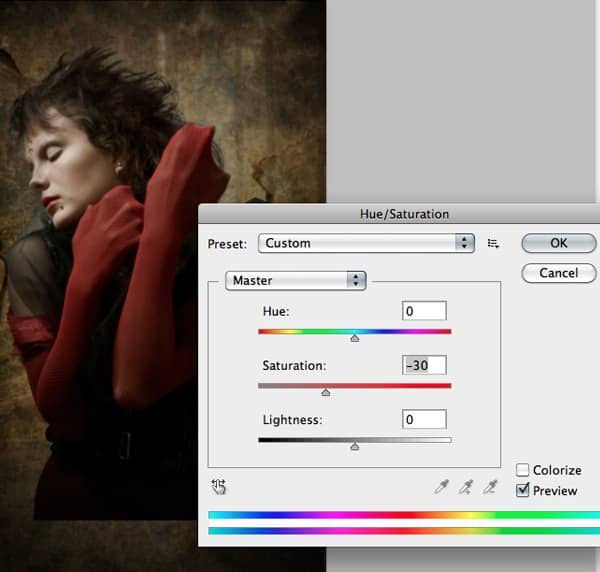
Step 7
In this step we will be creating an adjustment layer of Brightness/Contrast to blend the scene together with even color correction.
-Select Brightness/Contrast from the Adjustment Layers dropdown list at the bottom of the layers pallet, then set the Brightness of the layer to -45.
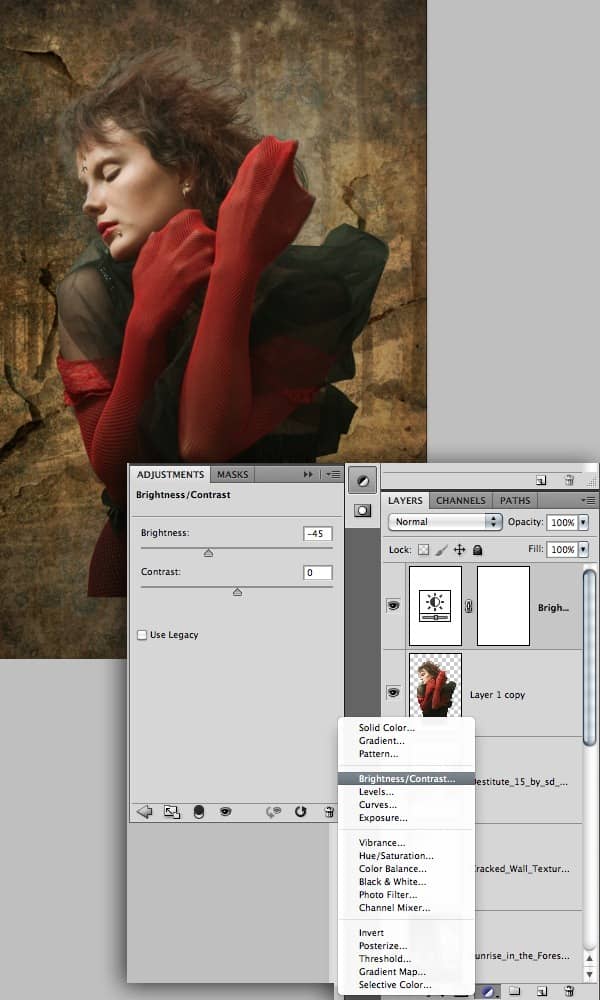
Step 8
As we can see the edges of the hair is lacking sharp details, hence to achieve the desired effect select the Burn Tool (O) and paint the edges of the hair to get the sharp details of hair.
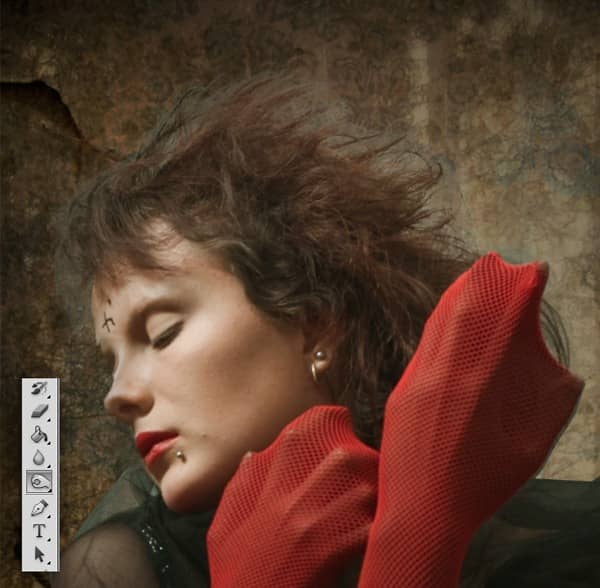
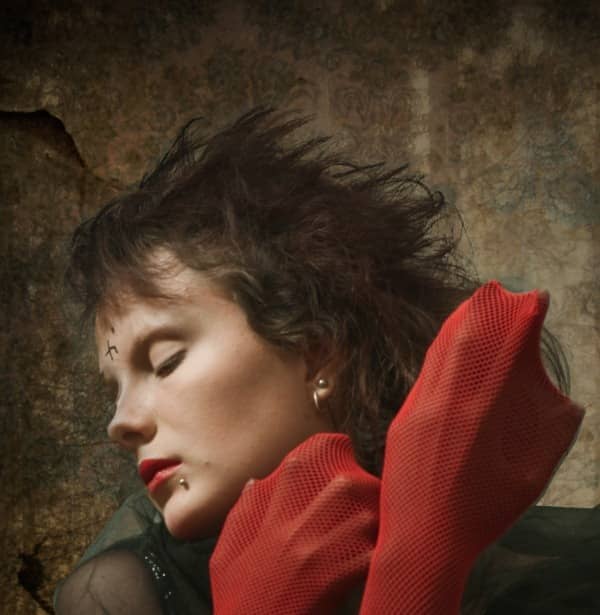
Step 9
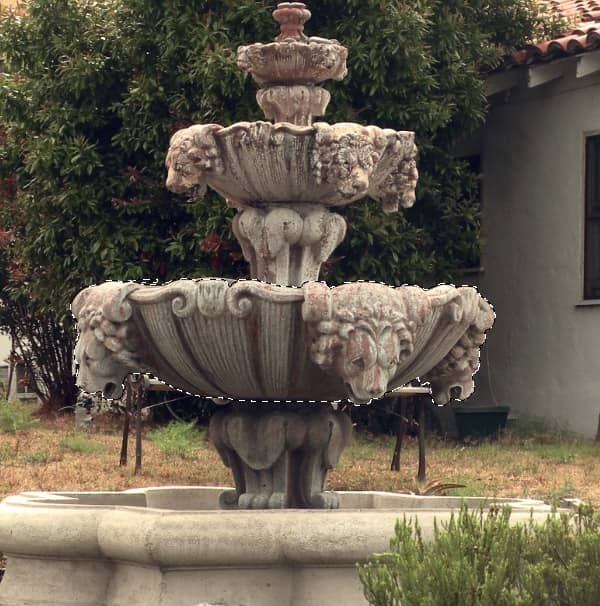
: In this step we are going to create a fountain tub under the women.
- Mask out the Fountain into a new layer using the Pen Tool(P).
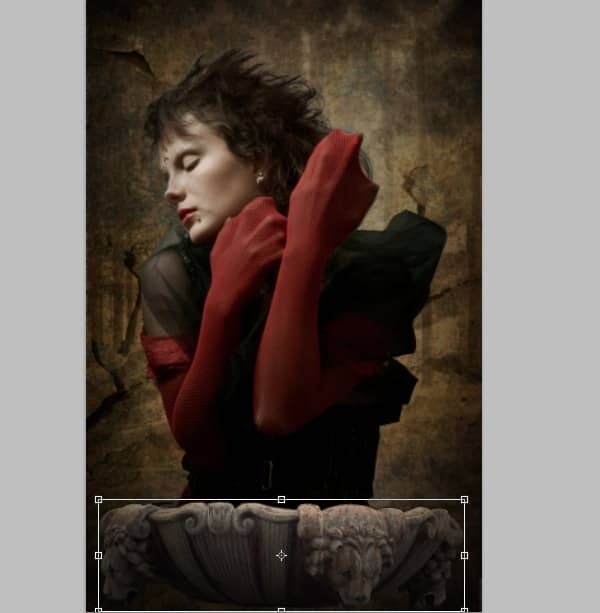
2) Now import it onto the working canvas and place it under the model as shown.
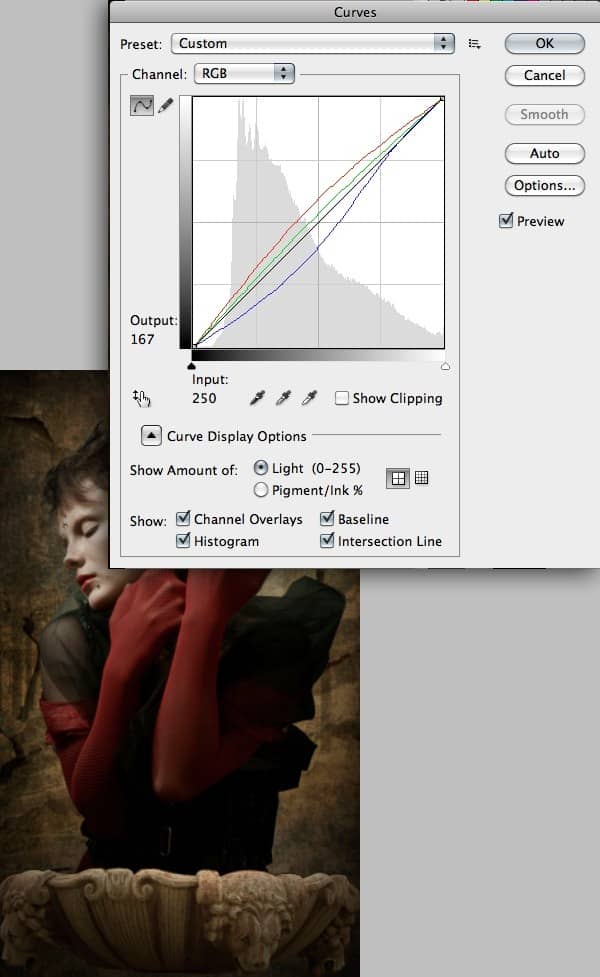
3) Now color correct the fountain using the Curves.
Step 10
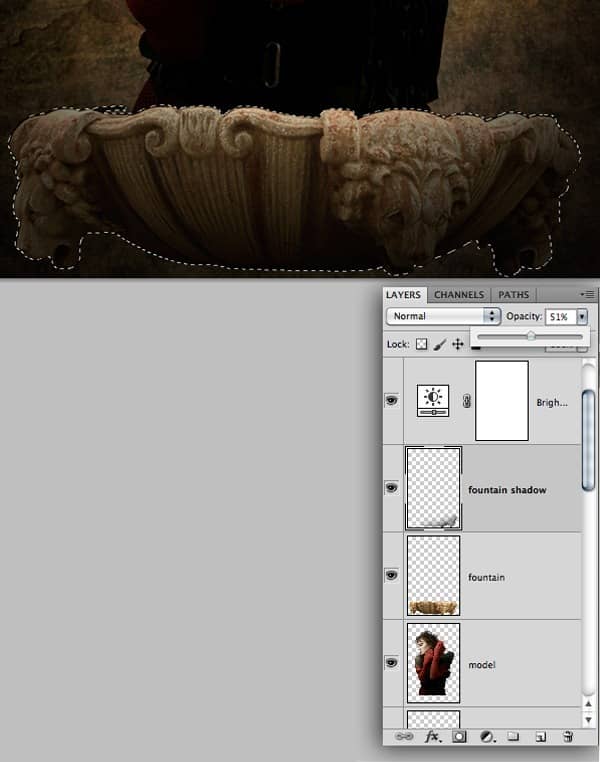
As we can observe that the light is being focused from the top left, we need to create shadow to the fountain tub to match it with the scene's lighting.
-Now select the mask in shape of the fountain tub and create a new layer above the fountain layer and paint some shadow as shown using the Brush Tool (B).
Step 11
In order to illustrate the gap between the background the model we need to create the shadow of the model casting on the background.
- Duplicate the model image and convert it into a silhouette using the Levels.
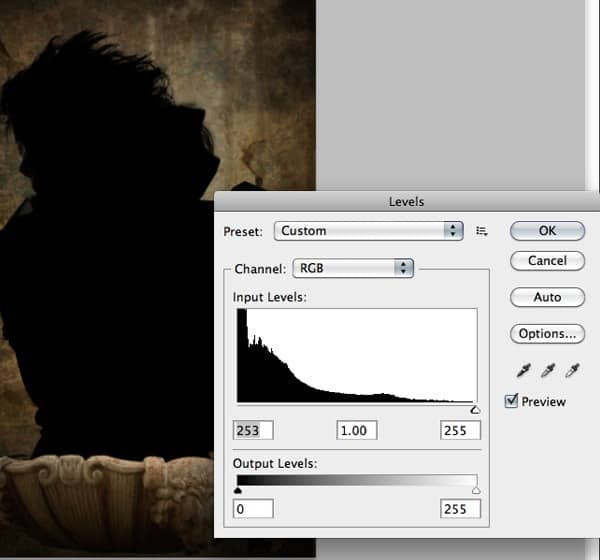
2) Now place the shadow layer under the original model layer and move it slightly towards the right as shown.
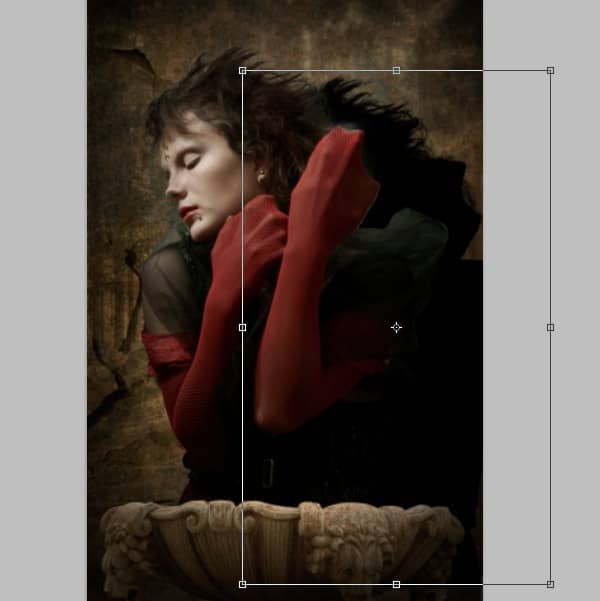
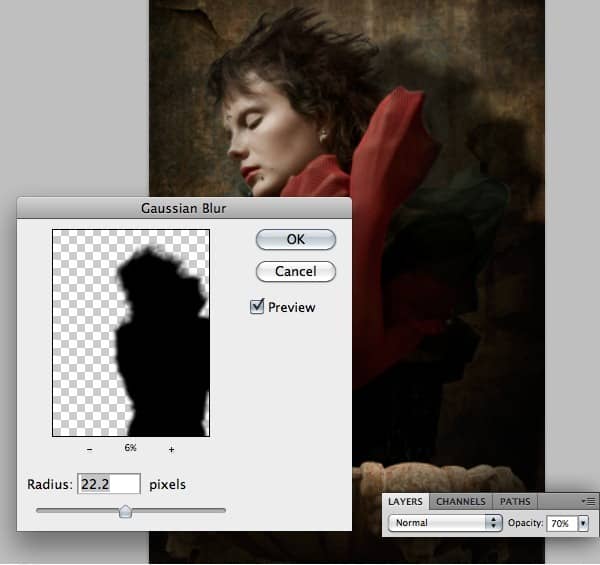
3) Since there is some distance between the model and background the shadow doesn't appear sharp hence lower the Opacity of the shadow layer to 70% and add a Gaussian Blur of Radius=22.2px.
Step 12
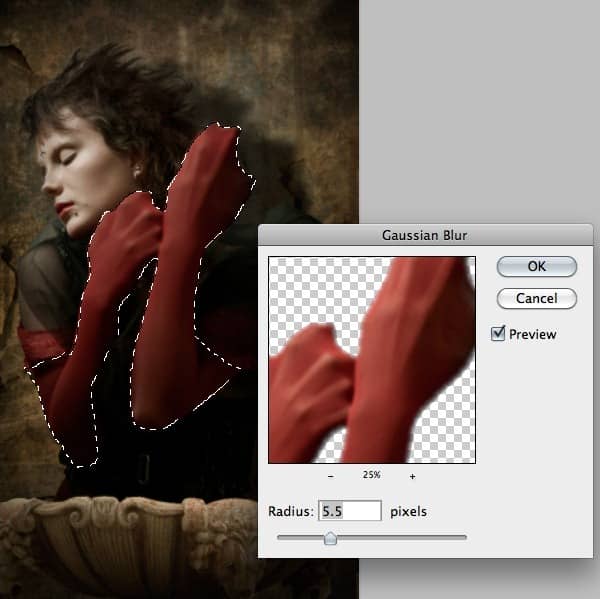
In this step we are going to clean the texture of the glove's cloth material and make it smooth.
- Select a mask in the shape of the gloves as shown using the Pen Tool (P) and separate the selection into a new layer.
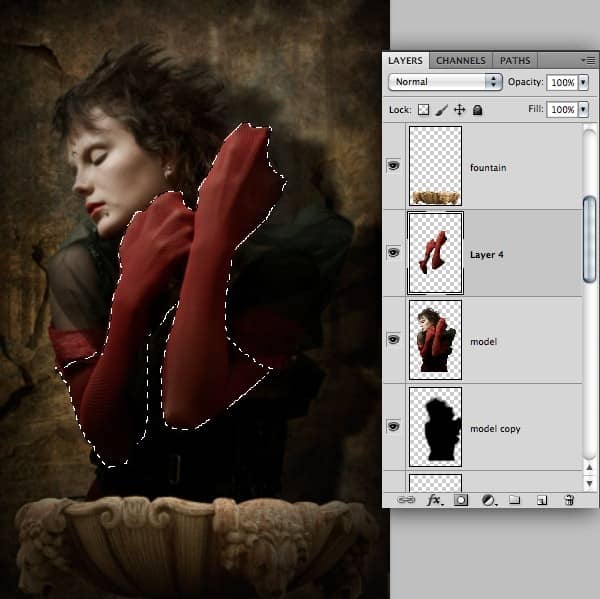
2) With the gloves layer selected go to Filter>Blur>Gaussian Blur and add a Gaussian Blur of Radius 5.5px.
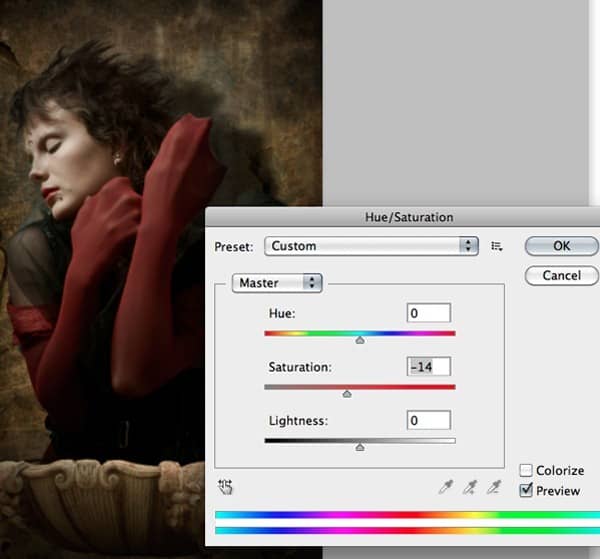
3) Now by using the Hue/Saturation de-saturate the gloves layer to -14.
Step 13
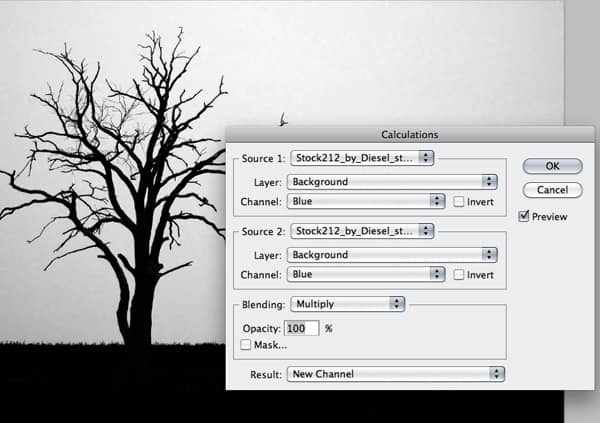
In this step we are going to use another advanced cutting technique to separate the tree from its background without loosing any details.
- Select the Blue Channel from the Channels pallet and go to Image>Calculations and select Blue in the Channels drop-down list. After pressing OK there will be an Alpha layer created in the Channels pallet.
2) With the Alpha layer selected go to Image>Adjustments>Levels and set the levels as shown to make the image a complete silhouette.
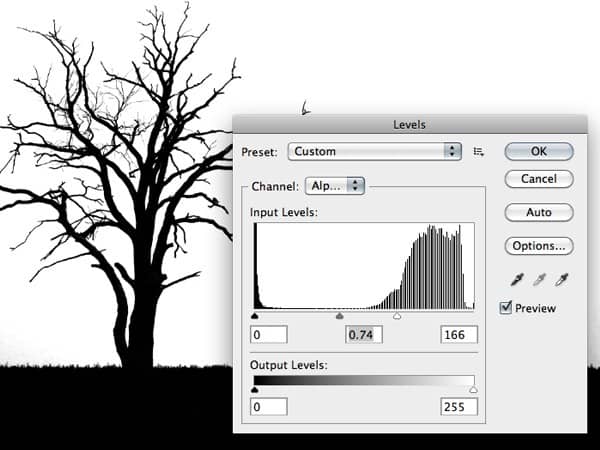
3) Now go to Select>Load Selection and select the Alpha from the Channels drop-down list and press OK to select the mask around the tree.

One comment on “Create an Eerie Portrait Photo Manipulation with Photoshop”
This is a fabulous tutorial; thank a lot for the upload mate!! Definitely subscribing!!