How to Create a Cinematic Snowy Mountain Crash Site Scene in Photoshop

How to Create a Cinematic Snowy Mountain Crash Site Scene in Photoshop

Welcome! Today we're going to be looking at some methods and techniques to composite a si-fi crash site scene. I'll be talking though selecting stock photos, lighting methods, and extraction methods for things like smoke. This kind of imagry is great for backgrounds but mostly these techniques will help you expand your own toolbelt to create more advanced and interesting work!

What you'll be creating

This peice was created as an exercise in landscape imaging. Its something I've always wanted to try my hand at and hopefully can share some experiance about. I used Photoshop CS6 but for the most part any recent version should work with these methods. FIrst I'll give a little info on how I like to extract things and a little bit about my workflow. Then I'll talk about how I handle more complex cutouts like the smoke and fire. Then finally I'll go a bit into my mastering workflow. There are a lot of different ways to go about giving your work that extra "pop" but hopefully mine will give you some ground to stand on. I also try and use stock photos that are free so that everyone can follow along properly. However I do use paid stock in this, so I will suggest some places where you can find similar pic's to use.
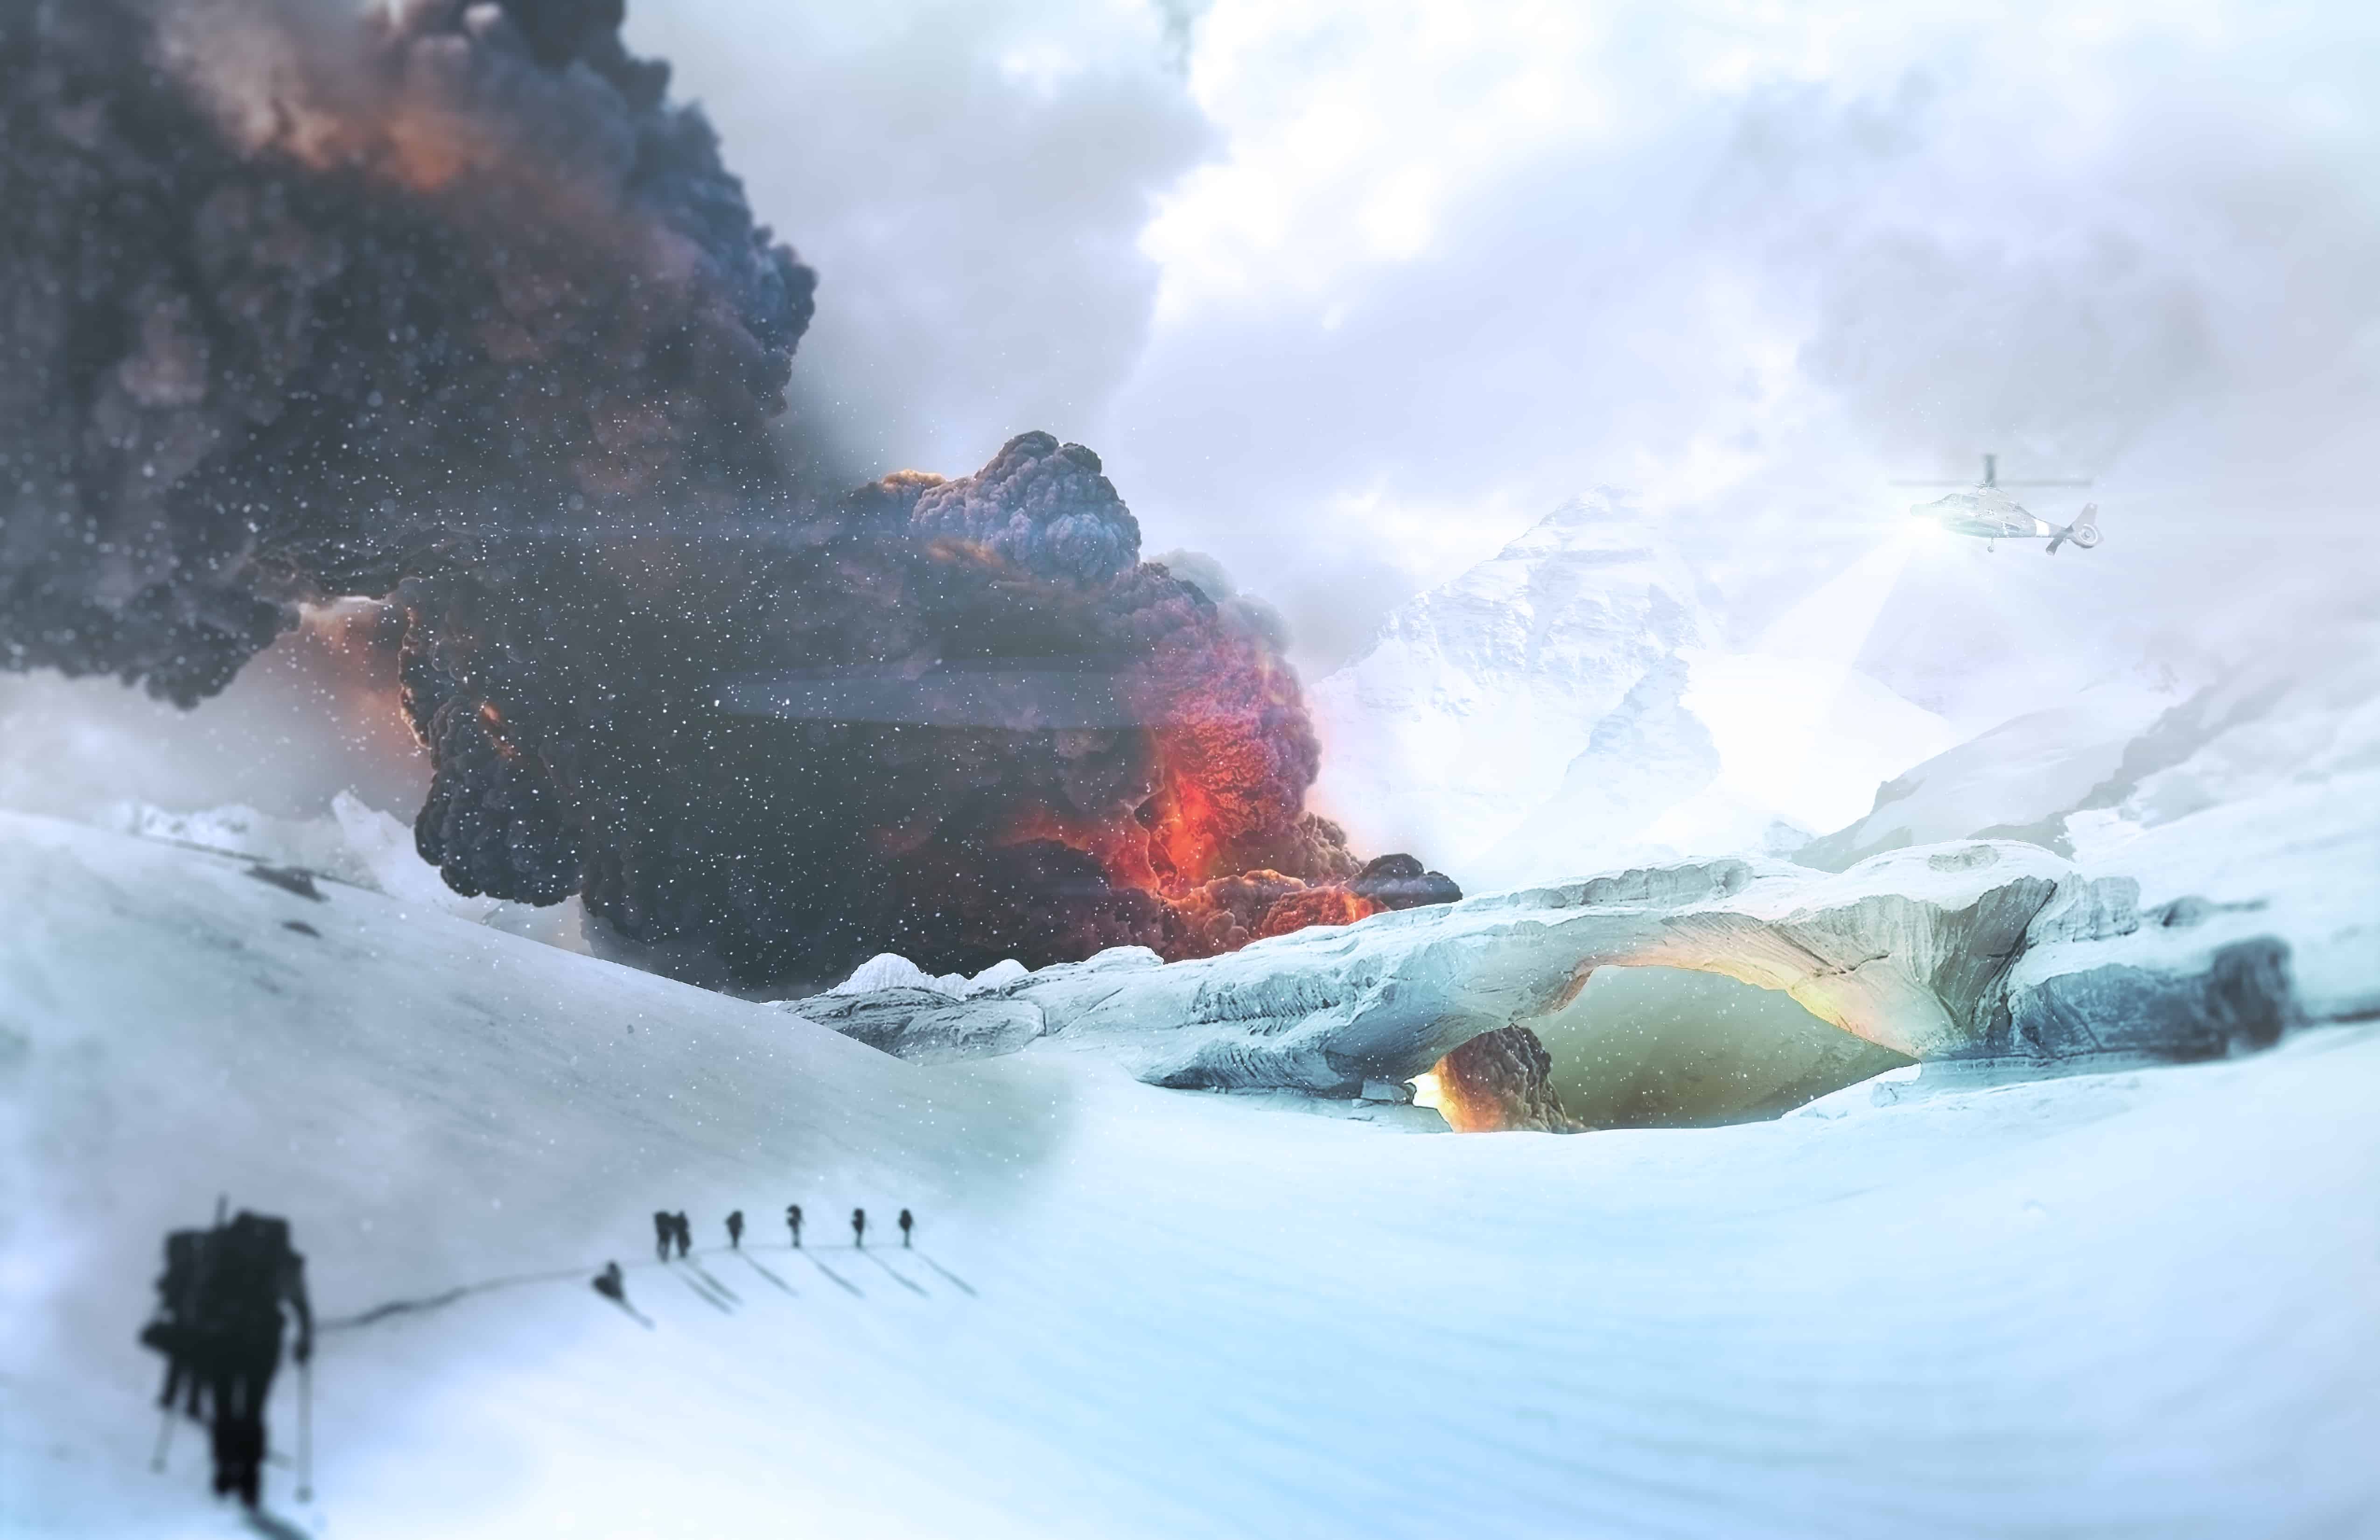
Final

Tutorial Resources

Step 1

Lets start out by making a new document, File > New. When it comes to sizing I like to use pretty standard stuff just for ease of printing later. Also just a tip if you're just starting out, always try and work in 300 Pixels/Inch or above, its easy to scale down later if you need too but will usually look bad trying to scale up at lower resolutions.
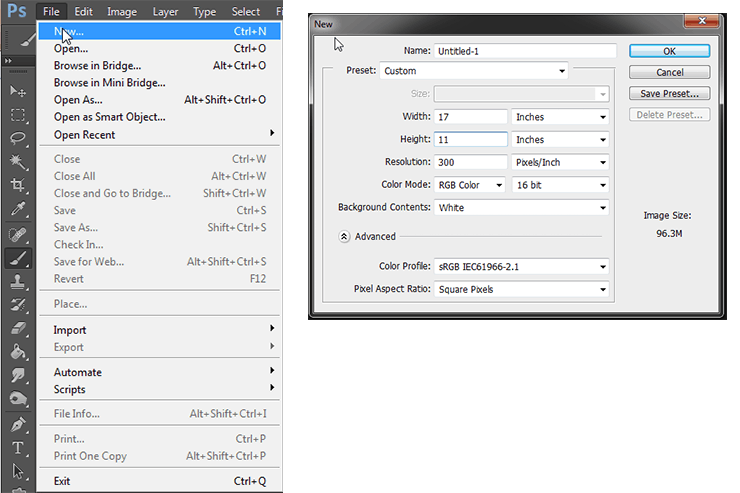
Step1

Step 2

Go ahead and bring in the first stock we'll be using here, the hikers. It's a fairly large image yet still low resolution as if it was scanned from a old photo at one point. But with some techniques we can still work with it. I like it for its great sense of scale and the leading line the hikers provide for us right off the bat.
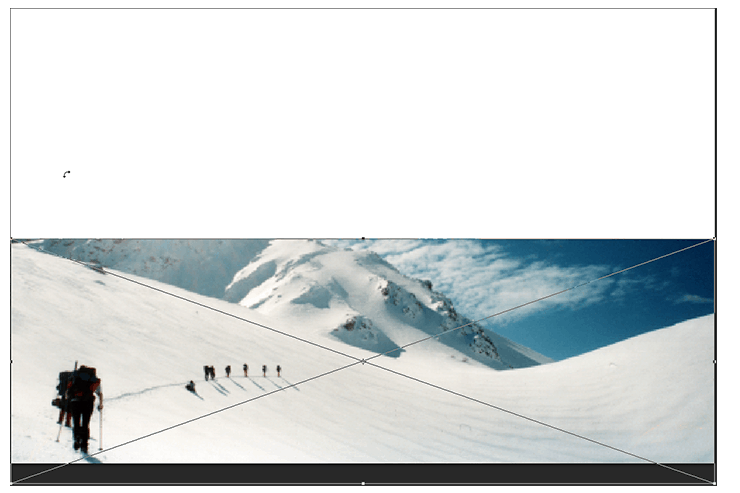
Step2

Step 3

So lets get into cutting out that mountain and sky in the background. For more control we want to put in our own so things all blend nicely. First with the layer selected we want to go too Layer > Layer Mask > Reveal All. This will give us a mask to work with on the layer (the small white box next to the thumbnail in the layers palette) By selecting that rather than the thumb you can draw the opacity using Black and White brushes. However for this tutorial I'm going to assume you're pretty comfortable with how masks work and we will be using them for every image from here on out.

Step3

Step 4

As far as defining our lines to be masked I prefer the pen tool, in a picture like this with lots of white and similar shades the quick select tool isn't going to be as effective or accurate at getting exactly what we want. Go ahead and use the pen tool to plot a line around the mountain and the sky in the background like you see below. When you're happy you can right click and click on "Make Selection", It will ask you if you want to have a feather, in this case I set mine at 0.

Step4

Step 5

With the mask selected in your layers panel and your selection in the main window you can paint (in black) in the mask to get rid of that mountain and sky. Now again with masks you can draw things back in any time you want unlike destructive editing. You'll end up with a similar result as below.

Step5

Step 6

Lets bring in the Rock Bridge photo and do the same to get it extracted from its photo. But here we have another problem, its a desert rock, which doesn't look very good or realistic in our snow scene. With the rock layer selected go to Image > Adjustments > Black and White to get rid of that bright orange color. Next is fixing the tone.

Step6

Step 7

For the tone I like to use the levels adjustment (Image > Adjustments > Levels) and with a good bit of adjusting we can get a good looking result that at least looks somewhat realistic. Something important to note about my work flow is that I us Clipping masks quite often. They are fairly simple, all you have to do is right click on any layer and click Create Clipping Mask. It will then only apply to the layer at the bottom of the chain. So this allows you to have adjustment layers and textures and the like all only effect one layer. In this case its the rock bridge we want to adjust and not the snow or the layers we'll be bringing in behind it (the rock bridge layer is behind the first snow layer). At this point go ahead and bring in the mountain and mask it out. Play with a few adjustment layers clipped to the mountain on your own to get comfortable with them before moving on.

Step7

Step 8

Lets catch up a little here about our layers. Working with so many can get confusing quickly so now would even be a good time to group layers together and color code them (as I'll do later in the tutorial) to do that just Shift select the layers you want to group and press Control + G or Command + G on mac, also available in the right click drop down. As you can see I also have a layer called Clone Stamp on top, this is the layer I used to brush out the small guy in front of the rock bridge. A tool thats pretty simple to use and a quick Google search will let you know everything you need! Lets give our landscape a background sky and some atmosphere, we can accomplish both with one photo in fact! Grab the Clouds stock photo and bring it in both on bottom and on top (as you can see in my layers below. The bottom one we'll just throw a Black and White and Levels adjustment layers on there (both set to auto). As for using it as atmosphere you'll have to rastersize the layer (Right click > Rastersize) and then go and do Filter > Blur > Gaussian Blur and Filter > Blur > Motion Blur with the settings below. Setting the layers blending mode to screen and lowering the opacity will give us a really organic and natural haze. It really should be barely noticeable but it will ad a sense of realism to the piece as a whole.

Step9

Step 9

I also want to add a sense of distance and scale to the mountain in the background but a little more intensely than the little haze we just did. So I actually took a brush with about a 20% opacity and started drawing out the mask so we can see though to the background a little bit. If you keep doing this you can get results like below where it will actually look like the clouds are coming in front of the mountain, adding a real sense of scale to the image. For the sake of the composition I also flipped the mountain horizontally and adjusted it levels so it matched the lighting in that part of the clouds as you can see below. Use this as reference before moving ahead to make any adjustments you'd like.

Step10
Step10-5

Step 10

For this next portion my method actually differs a good bit from what others might do. Given how big this next cutout is and how much blending will be done I actually made a new document and did all the editing in that before grouping all the layers together and bringing them into my composition to be blended in. But you're free to to do it however you'd like! I like doing it this way just for a less cluttered environment Lets talk a little bit about extracting smoke. Because the edges are rarely "hard" edges and have varying transparency throughout, the pen tool isn't going to be your only tool in extraction. I use it to get a general line I like and the select the area, BUT then with the wand tool I right click and use Refine Edge. More on that below. Thankfully the top part of this Smoke from deposit photos is pretty well defined (you can find a lot of thick volcanic smoke on sites like deviant art and Free Images as well) so we can use the standard pen tool to select it and mask it out.

step11

Step 11

However its when we get to the bottom that things get more interesting. As you can see I used the pen tool to just get a general line around where I wanted and then this is where refine edge comes in handy!

Step12

Step 12

Go ahead and right click "Make Selection" then use "W" to bring up the magic wand and right click again where you can find Refine Edge.

Step13

Step 13

With this tool you can adjust a lot of options for how to fix your edging. Edge Detection looks at the pixels around the line and tries to determine which ones belong and which ones don't based on which side of the line they're on and color and the such. The rest of the options adjust the line itself. creating a softer or harder blend or a smoother line that doesn't curve sharply. What I used here though is its ability to paint the edge. If you move your mouse out of them menu box (you can even move that to the side at this point) you'll see you have a round brush. The size of the brush can be adjusted with the little menu where the normal brush size would be. As you paint with this brush you are actually sampling areas where you want the tool to readjust the edge to better match the picture. So if you stroke the brush along the edge of the clouds it will start to develop a more natural edge (like the one below). This tool is especially useful for things like smoke and hair and trees! Give it a try and when you're happy with how the edge looks click OK. This will commit the changes to your selection, note that the marching ants line will still look like a solid line but once you start to mask out the selection you can see your real edge show! Give it a try!

Step14

Step 14

Now you can use the smoke stack you've cut out as is or do as I'm about to do and just add a little too it. I like to make a few copies of the originally masked layer and transform them around a little bit to make the smoke a bit "bigger". Once you're happy lets get into adding the flames in the explosion. Bring in the Flames Texture on top of your various smoke layers.

Step15

Step 15

By stacking the texture in sets of two, one being screen blending mode and the other being either overlay or soft light, then adjusting opacity, you can achieve some pretty great results! To simplify the masking process you'll want to group all your smoke layers together and then have all the fire textures clipping masked to that group, you can see an example of this below. Clean up your edges and your textures and we'll be ready to move forward!

Step16

Step 16

So this section really depends on the way you put this together. If, like me, you made it in a separate file then just follow along! If not then your smoke is already in the scene so just jump on ahead! For this part just grab all your layers and group them together (Control + G on PC and Command + G on Mac with all layers selected). Then we'll grab the tab and drag it out so we can see both windows at the same time (Works similar to how web browsers work) then just grab the group and just drag it in!

Step17

Step 17

Now that its in you can position it behind the rock arch but in front of the mountain. Now I turned mine into a smart object, which i found helped with performance on less powerful machines, also smart objects can be resized down and back up without loss of quality. However because we wont be doing too much of that here its just as well kept as a whole group.

Step19

Step 19

Lets go over blending our newly made smoke plume into the scene. Using clipping masks like before, we can bump up the vibrancy of your smart object or group (remember clipping masks work on groups as if they where one layer). We'll also light the smoke cloud. with the light source on the top right we can shade the underside with a clipping mask layer, using a black brush and overlay blending mode, adjust the opacity for a fit.

Step20

Step 20

You can then do the opposite to the top with a white brush to add not just a little brightness but also some atmosphere adding to depth and a sense of size.

Step21

Step 21

Heres a nice spot just for us to gather ourselves and clean up the document. Look for masking mistakes and the like. Also a good spot to group all our sections together and color code them like shown below. This really helps tweaking sections in a more organized way. Below is a image of what I have so far! As always feel free to experiment and try something different! When you're ready lets move forward!

Step23

Step 23

Moving forward we can start getting into some of the details. One of the main focuses of this piece is the arch in the middle ground, lets get the lighting right on it. Add one layer to its clipping mask line and draw in some orange, yellow, and red in varying opacities with an overlay blending mode. Adjust the opacity of the layer to get a nice result like the first picture below. Another problem I encountered was the little white line on the inside of the arch. I used the same pen tool cutout method I discussed earlier. I also cleaned up the line in the snow below it. I also added in the fire image on top of the clipping mask chain as color dodge and with a 72% opacity. Find a nice placement for it to give some nice lighting effects. I usually like using actual images to make lighting effects as oppose to painting them in, for me this give a more organic and natural look and not too stiff. Also to note as this is personal preference, I used the Burn Tool on Shadow Mode with about 10% Exposure on the arch itself to bring out some of the details.

Step24

Step 24

This next part is completely optional, I personally think the piece looks good with or without the shadow but for the sake of practicing techniques lets dive right in! Start with the wand tool (W) selected and right click on the Smokes layer. At the bottom will be the option to do color range selection. Click on it to bring up the tool menu.

Step25

Step 25

Here we can see a preview of the selection in white as well as adjust the "fuzziness" (works like tolerance). When the mouse is outside the box it works as an eyedropper to change the selection, play around with it a bit to get a nice dynamic selection of the smoke. I personally like this method as it will give us a shadow with a more organic feel with different opacities rather than a large dark mass. Once you have something you like click OK and it will bring you to our next step.

Step26

Step 26

With your selection make a new layer on top of everything else (Layer > New > Layer, or Ctrl+Shft+N on PC and Cmd+Shft+N on Mac). Going into Select > Transform Selection we can move our selection into place on the ground keeping into account perspective and distortion.

Step27

Step 27

Once you have it in a nice spot on the ground plane (keep in mind where the light is coming from, although not entirely accurate in this case its always something to keep in mind) feather it out a bit, with the wand tool (W) active right click and go to feather to soften the edge.

Step28

Step 28

Now on the new layer we created on top we're going to fill our selection with a low opacity black brush like on the bottom left. However this still looks really stiff, so go over it (on a new layer) with a black soft brush giving you results similar to those on the right, a nice dark shadow with some dynamic opacity.

Step29

Step 29

Go ahead and group those layers together for proper organization.

Step30

Step 30

Moving on with our details lets add some snowfall, now a lot of people will use custom brushes to do this but for the sake of saving time I prefer to use pre-made textures. For this piece I used textures by Andrei Oprinca from PSDBox (wonderful resources!). To use these its fairly simple, you just want to bring them in and set the blending mode to screen. This will get rid of the black background on the images we've brought in (non destructive) and leave only the nice little white dots. Placing these around the image (on top of everything else and in their own group as shown before) will give us a really nice snowfall effect. Make sure to mask out any visible hard edges as well as the little logo in the corner!

Step31

Step 31

Next let's add a little atmosphere behind the arch due to the glow of the fire. This is as simple as going over the area with a very soft low opacity (think 10% or so) and using the soft light and overlay blending modes and alternating between the reds/yellows/and oranges. We don't want this to be overwhelming just a nice touch of oranges next to all the blues and grays.

Step32

Step 32

Next little detail is the helicopter, use the stock photo provided and practice using a combination of pen tool, magic wand, and selective color. With the stock photo being on a bright blue background this is pretty straight forward. The rotors might give you some trouble but with the refine edge tool you might have better luck!

Step33

Step 33

Next lets use the pen tool to draw in the selection for a search light shape, feather it by about 10 PX then on a new layer draw in white with a big fluffy brush. Your going for a nice little gradient.

Step34

Step 34

Bring in a nice lens flare that you like, I got mine from a quick Google image search but there are a lot of places to get packs for free (check out PSDBox's pack!) I then used a Black and White clipping mask adjustment layer to get rid of the strong colors and put the lens flare on a screen bending mode to get rid of the black background.

Step35

Step 35

Congrats! The mixing is done! You will have a nice image so far but to get things to really pop its going to need to be mastered. First step is grabbing all the layers into one group, duplicating the group, and then right clicking on the second group and merging all the layers. Sometimes doing this will cause problems with certain blending layers so if things turn out weird the alternative is saving the file out as a Jpeg and opening it on its own. As always there are multiple ways to go about things. Once you have your stuff all condensed to one layer we can begin the mastering. First lets sharpen things up, this will really bring out the detail in the smoke and the snow, go to Filter > Sharpen > Smart Sharpen. That will bring up the menu below, we don't want to overdo it but we want to make things pop. I personally like the settings below!

Step36

Step 36

I also like to use gradient map adjustment layers (Layer > New Adjustment Layer > Gradient Map) to bring out nice colors in the arch. My settings are below but I encourage some experimentation here.

Step37

Step 37

Its important to note however that the gradient map shouldn't cover the whole image, with the gradient layer selected go to Layer > Layer Mask > Reveal All. This will bring in a layer mask so you can mask out the adjustment layer everywhere but around the arch. Make sure its not a hard edge so soften it with a big brush at a low opacity. I also put a Vibrancy Adjustment layer on top to help bring out the colors, Layer > New Adjustment Layer > Vibrance.

Step38

Step 38

Now for the Depth of Field, with the image selected press Q. This will bring you into quick mask mode where you can paint in a mask. This is very effective for lens blurs. Go ahead and paint in around the edges, thinking about whats closest and further away as well as what we'd like to focus on. When you're done pressing Q again will bring you out of Quick Mask mode where you'll get the marching ants. But its going to have to be inversed (Shift + Control + I) or right clicking with the Wand tool active (W).

Step39
Step40

Step 39

With the selection still active go to Filter > Blur > Lens Blur. My settings are below. This will give us a really nice natural looking blur to the piece putting more of the focus where we want it.

Step41

Step 40

Finally go to Layer > Adjustment Layers > Photo Filter and use cooling filter 80 as shown below! And thats it! You've successfully made a wonderful snowy crash scene! Congrats! Hopefully you learned some useful techniques and work flow methods!

Step42

Final Results

final-results

<h3>Download the PSD</h3>

[vc_column width="1/1" el_position="first last"] [vc_cta_button title="Download" href="https://downloads.photoshoptutorials.ws/Mountains.zip" color="btn" size="btn-large" icon="none" target="_self" position="cta_align_right" call_text="Mountains.zip | 194 MB" width="1/1" el_position="first last"] [/vc_column]

Tutorial by Jacob Pryor

Check out my Behance! Hope you enjoyed and found my tutorial very informative!

- Jacob Pryor

Download Free Presets
Sponsored

Download Lightroom presets and LUTs, absolutely free. Use the presets to add creativity and style to your photos.

5 comments on “How to Create a Cinematic Snowy Mountain Crash Site Scene in Photoshop”

Leave a Reply

Your email address will not be published. Required fields are marked *

cross