


Step 10
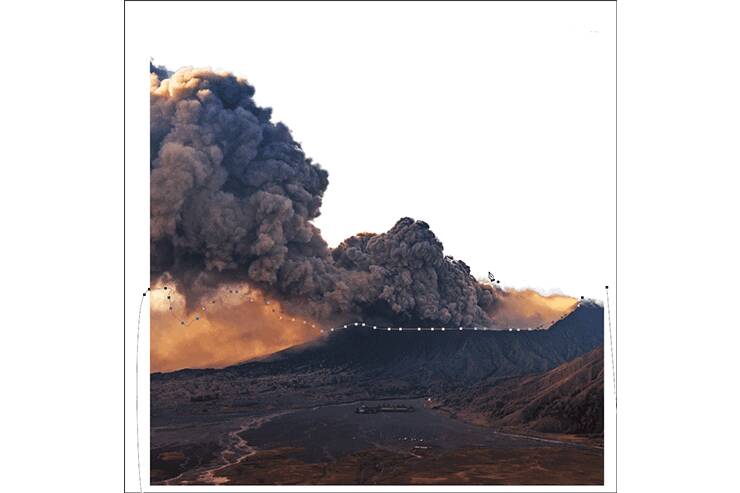
For this next portion my method actually differs a good bit from what others might do. Given how big this next cutout is and how much blending will be done I actually made a new document and did all the editing in that before grouping all the layers together and bringing them into my composition to be blended in. But you’re free to to do it however you’d like! I like doing it this way just for a less cluttered environment Lets talk a little bit about extracting smoke. Because the edges are rarely “hard” edges and have varying transparency throughout, the pen tool isn’t going to be your only tool in extraction. I use it to get a general line I like and the select the area, BUT then with the wand tool I right click and use Refine Edge. More on that below. Thankfully the top part of this Smoke from deposit photos is pretty well defined (you can find a lot of thick volcanic smoke on sites like deviant art and Free Images as well) so we can use the standard pen tool to select it and mask it out.

Step 11
However its when we get to the bottom that things get more interesting. As you can see I used the pen tool to just get a general line around where I wanted and then this is where refine edge comes in handy!
Step 12
Go ahead and right click “Make Selection” then use “W” to bring up the magic wand and right click again where you can find Refine Edge.

Step 13
With this tool you can adjust a lot of options for how to fix your edging. Edge Detection looks at the pixels around the line and tries to determine which ones belong and which ones don’t based on which side of the line they’re on and color and the such. The rest of the options adjust the line itself. creating a softer or harder blend or a smoother line that doesn’t curve sharply. What I used here though is its ability to paint the edge. If you move your mouse out of them menu box (you can even move that to the side at this point) you’ll see you have a round brush. The size of the brush can be adjusted with the little menu where the normal brush size would be. As you paint with this brush you are actually sampling areas where you want the tool to readjust the edge to better match the picture. So if you stroke the brush along the edge of the clouds it will start to develop a more natural edge (like the one below). This tool is especially useful for things like smoke and hair and trees! Give it a try and when you’re happy with how the edge looks click OK. This will commit the changes to your selection, note that the marching ants line will still look like a solid line but once you start to mask out the selection you can see your real edge show! Give it a try!
5 responses to “How to Create a Cinematic Snowy Mountain Crash Site Scene in Photoshop”
-

some pict are missing
-
this is boring
-
Some links of the images are down…
-
It is professionnel
-
is there any tutorial for it ? i will try for sure .
Leave a Reply