

Make skin look perfect in one-click with these AI-powered Photoshop actions.
Step 14
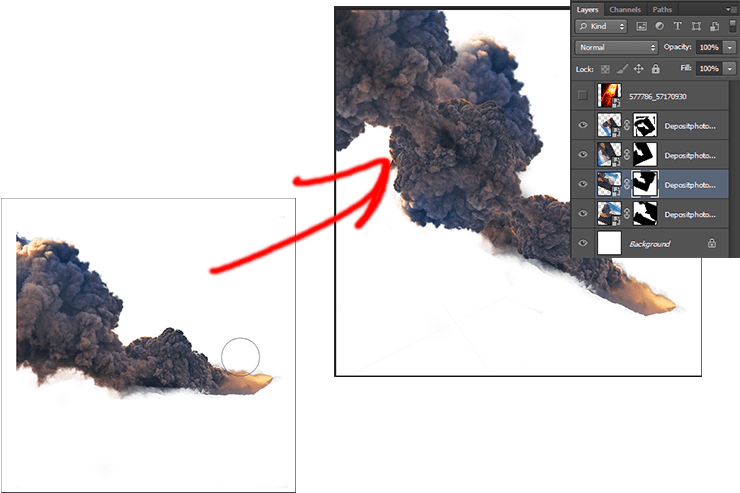
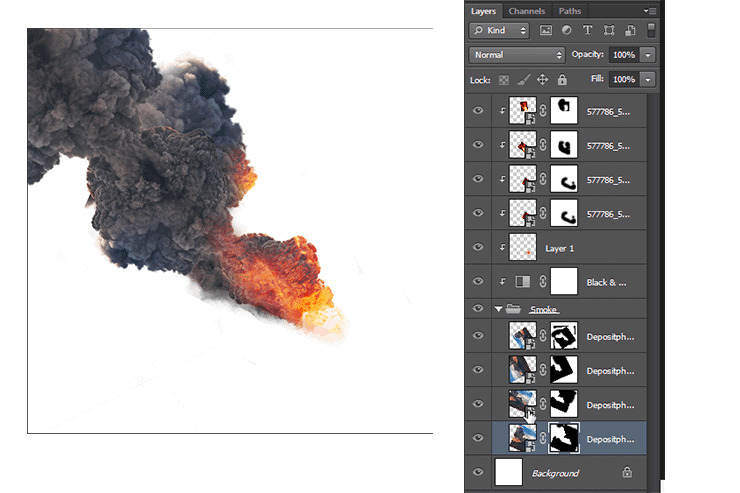
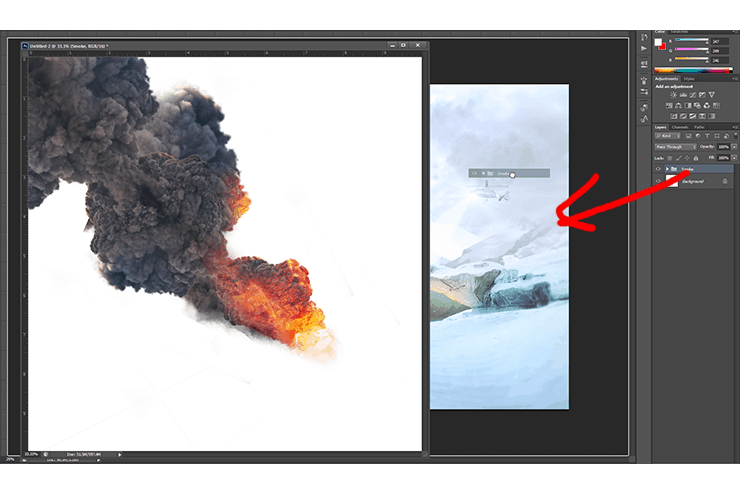
Now you can use the smoke stack you've cut out as is or do as I'm about to do and just add a little too it. I like to make a few copies of the originally masked layer and transform them around a little bit to make the smoke a bit "bigger". Once you're happy lets get into adding the flames in the explosion. Bring in the Flames Texture on top of your various smoke layers.
Step 15
By stacking the texture in sets of two, one being screen blending mode and the other being either overlay or soft light, then adjusting opacity, you can achieve some pretty great results! To simplify the masking process you'll want to group all your smoke layers together and then have all the fire textures clipping masked to that group, you can see an example of this below. Clean up your edges and your textures and we'll be ready to move forward!
Step 16
So this section really depends on the way you put this together. If, like me, you made it in a separate file then just follow along! If not then your smoke is already in the scene so just jump on ahead! For this part just grab all your layers and group them together (Control + G on PC and Command + G on Mac with all layers selected). Then we'll grab the tab and drag it out so we can see both windows at the same time (Works similar to how web browsers work) then just grab the group and just drag it in!
Step 17
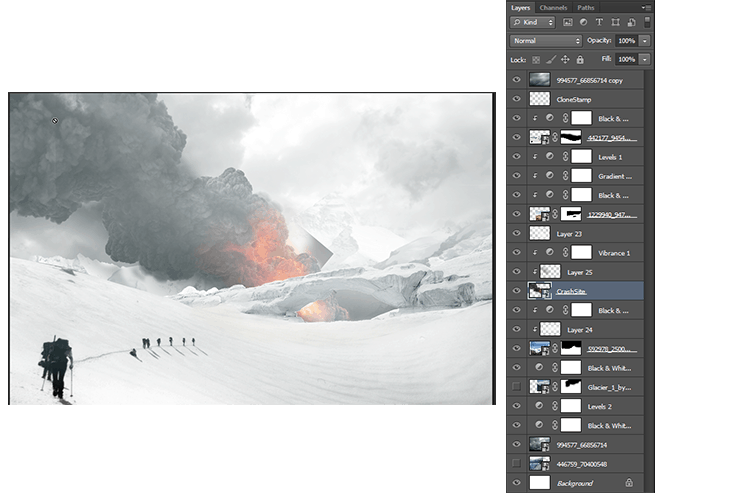
Now that its in you can position it behind the rock arch but in front of the mountain. Now I turned mine into a smart object, which i found helped with performance on less powerful machines, also smart objects can be resized down and back up without loss of quality. However because we wont be doing too much of that here its just as well kept as a whole group.
Step 19
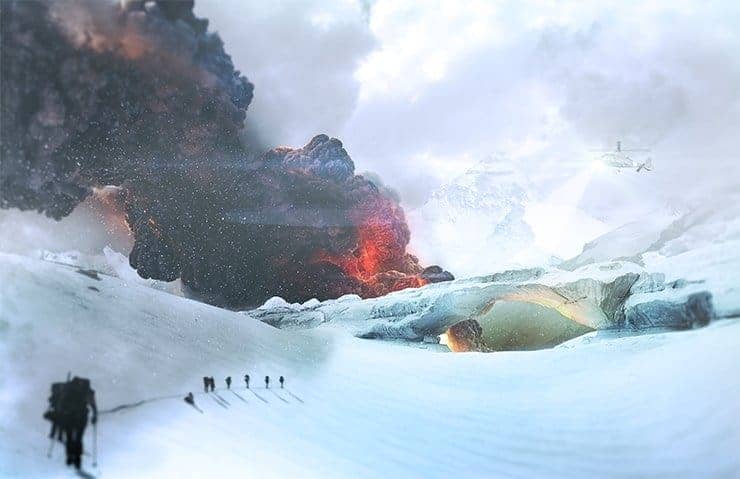
Lets go over blending our newly made smoke plume into the scene. Using clipping masks like before, we can bump up the vibrancy of your smart object or group (remember clipping masks work on groups as if they where one layer). We'll also light the smoke cloud. with the light source on the top right we can shade the underside with a clipping mask layer, using a black brush and overlay blending mode, adjust the opacity for a fit.
5 comments on “How to Create a Cinematic Snowy Mountain Crash Site Scene in Photoshop”
some pict are missing
this is boring
Some links of the images are down...
It is professionnel
is there any tutorial for it ? i will try for sure .