Luminar AI lets you turn your ideas into reality with powerful, intelligent AI. Download the photo editor and see how you can completely transform your photos in a few clicks.

Add more contrast to image to make colors more vivid and deeper shade. Running a little ahead, I will add a full moon, and as you know it gives hard shadows. Add adjustment layer "Brightness/Contrast" with Brightness: +77, Contrast: 12. Layer Opacity some around 81%.

Step 11
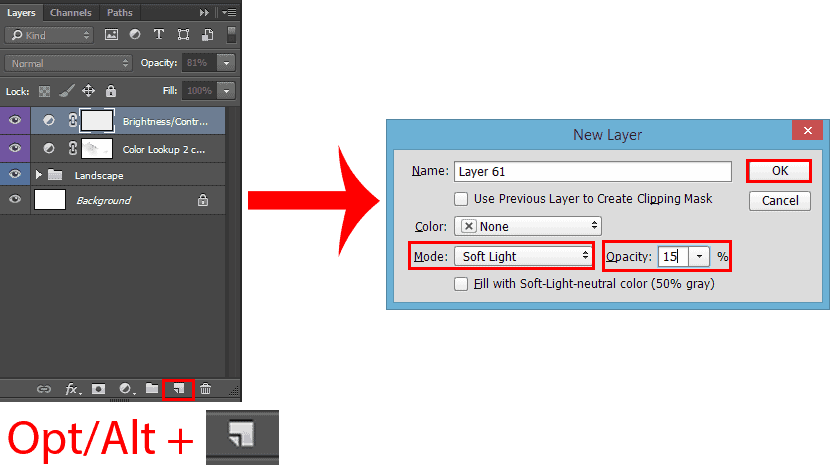
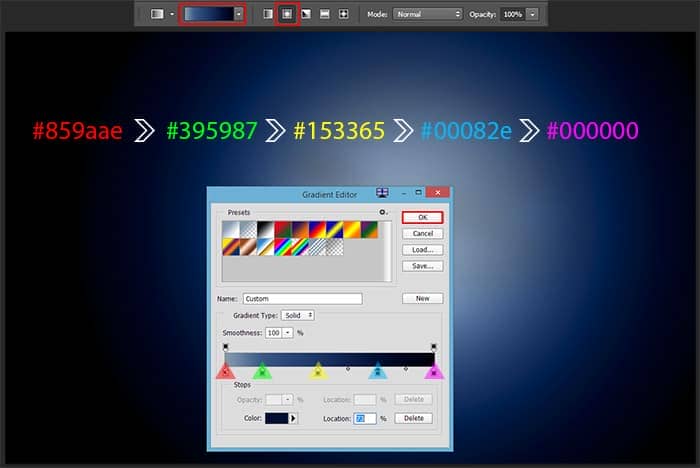
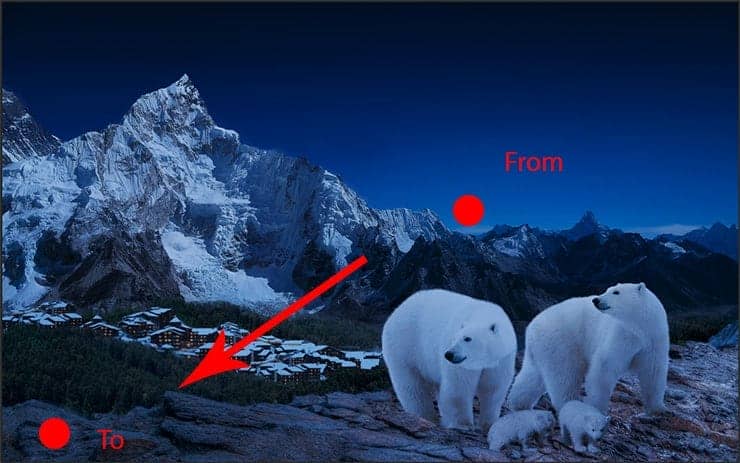
Now lighting. Hold Opt/Alt and click on "New layer" icon to open setting a new layer/ Set Blending Mode "Soft Light" and Opacity around 15% and click OK. Take a Gradient Tool (G), go to Gradient Editor and make gradient under the scheme: #859aae > #395987 > #153365 > #00082e > #000000. Form of gradient - Radial. Draw it, start from dark mountains (on horizon) and end in foreground rocks.
Step 12
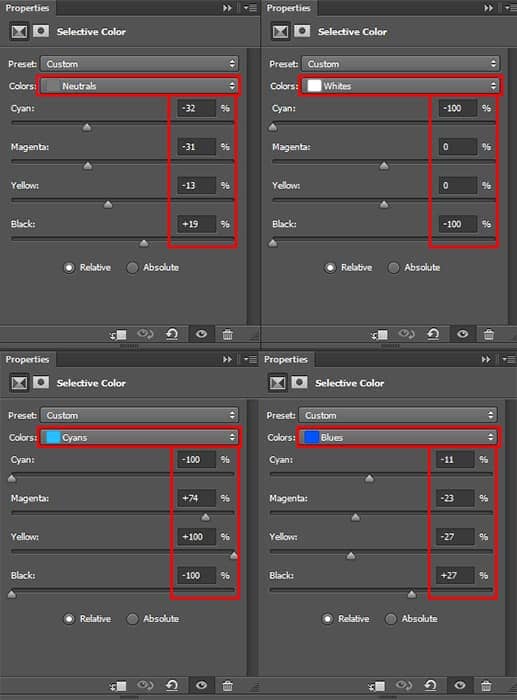
With basic toning images, we figured out and now will correct colors. Add adjustment layer "Selective Color". Make settings as shown in image. Add last adjustment layer "Photo Filter" with settings - Filter: Warming Filter (LBA), Density: 27%, Preserve Luminosity checkbox. Set layer Opacity around 75%.

Step 13
Now back to the forest. You have two options to choose from. You can leave them in the same form as they are now, or change them on the snow-covered. For this I used two adjustment layers. The first is "Hue/Saturation" to desaturate forest. Set Saturation: -100 and clip this layer to forest group. The second layer is "Selective Color" to create snow on the trees. Go to Neutral colors and set all values to -100. Clip this layer (Cmd/Ctrl + Opt/Alt + G) and here's your snow-covered forest.

Step 14
So, now to add some detail to the picture. We begin with the light from windows. On a new layer (Cmd/Ctrl +Shift + N. This layer is highest in the group "Landscape") I used soft round brush with color # f5e855, Size: 35px, Opacity: 100% and point arranged the lights in the brightest windows. Layer Blending Mode "Soft Light". Duplicate this layer (Cmd/Ctrl + J) and set Blending Mode "Lighter Color", Opacity: 50%.

Now I added a bit of fog to create the effect of height and hide the landscape below. If you have a brush in the form of clouds, use it. If the brush you do not, then is fine "Per Stroke Brightness Variance" brush from the standard set in Photoshop. Use color #d1d1d1 and do not forget to create a new layer every several strokes. So you can control the transparency of each layer and area. When you finish, Merge all clouds layers into one (Cmd/Ctrl + E or right click on selected layers > Merge layers).
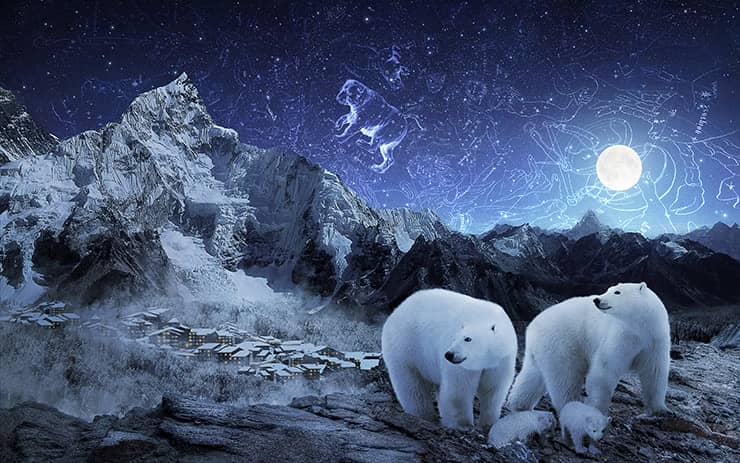

3 comments on “Create a Magical Starry Night of Polar Bears in Photoshop”
Just a pity the PSD is not there it would have been nice to see your flow
The best as usual.
Very beautiful and difficalt lesson. Thanks.