Luminar AI lets you turn your ideas into reality with powerful, intelligent AI. Download the photo editor and see how you can completely transform your photos in a few clicks.

Step 18
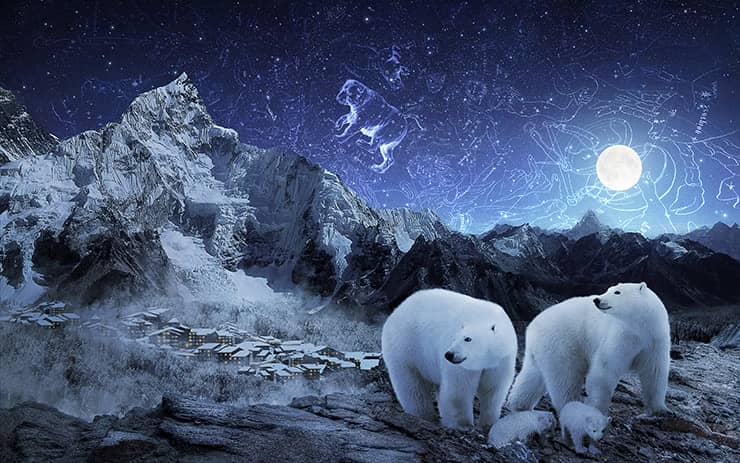
Let's go back to the star group. I did not mean you to move from one place to another :). So you will see the meaning of each layer and its effects. Now we will create a star map in the sky. Add the working document texture star atlas and resize it as it covered the whole sky and flip vertical.
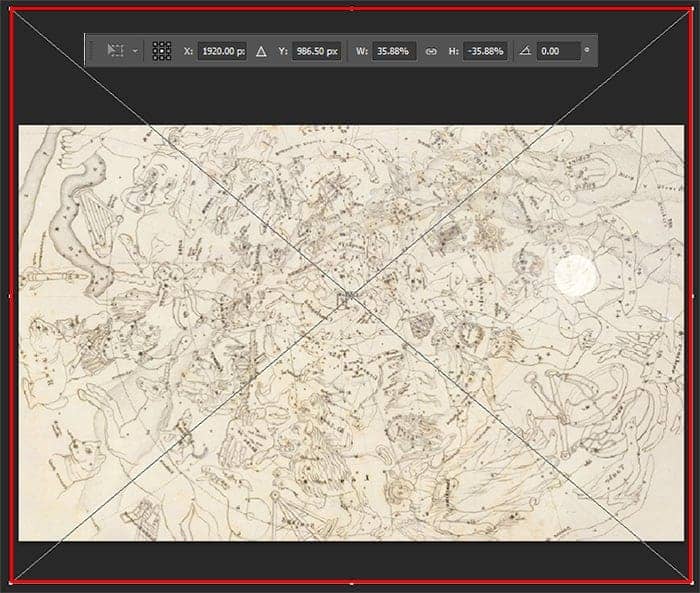
Add a filter "Spherize" (Filter > Distort > Spherize...) with the settings - Amount: -70%, mode: Normal and click OK. It is necessary to create the effect of the dome. After all, the sky is not flat but spherical. Move the texture halfway up to the moon was in bowl of Libra. Remove some of the star map that covers the mountains, using the method from Step 7.

Step 19
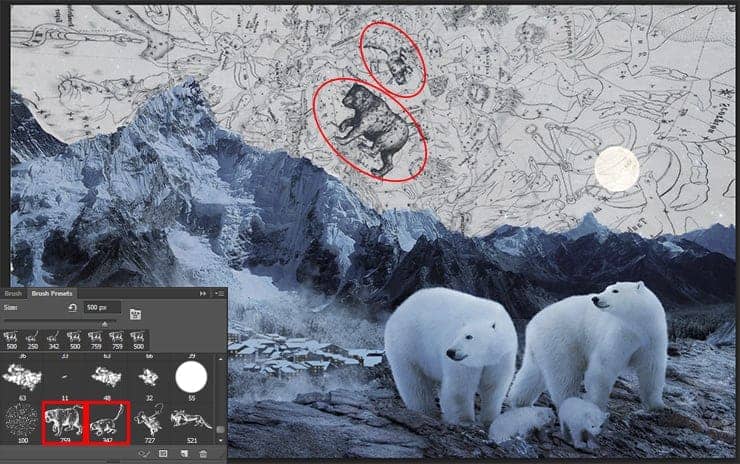
Convert this layer for Smart Object (right click on layer > Convert to Smart Object) and rasterize it (right click on layer > Rasterize Layer). Load constellation brushes in Photoshop and draw Ursa Major (Size: 500px, Angle: -41 degrees, Color: Black) and Ursa Minor (Size: 250px, Angle: 100 degrees, Color: Black), as they are depicted in the map of the sky.
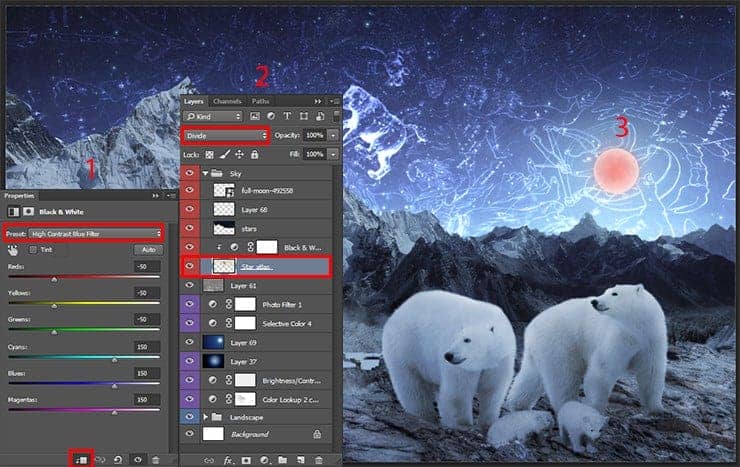
Add an adjustment layer "Black & White" and clip it to star map texture. Set Preset "High Contrast Blue Filter". Change the Blending Mode to "Divide" for star map texture and enjoy the results! Use Eraser Tool (E) to remove part of the Libra from the moon.
Step 20
It seemed to me that the picture is not enough contrast, So I add an adjustment layer "Curves" (Layer > New Adjustment layer > Curves...) to increased the light and dark tones on the RGB channel. Add first point with coordinates - Input: 135, Output: 120 and second point - Input: 210, Output: 217.

Group all layers and groups into one "Manipulation" group (Cmd/Ctrl +G or Layer > Group layers), duplicate it (Cmd/Ctrl + J or Layer > Duplicate layer) and merge only duplicated group (Cmd/Ctrl+ E or Layer > Merge Group). Go to Filter > Other > Hight Pass and set Radius: 2.0px. Set Blending Mode of this layer to "Overlay". This layer will increase the clarity of all details.

Final Results
That's all! The picture is ready. I hope you had a good time and learned a lot of interesting things. Take a look at the final image.

3 comments on “Create a Magical Starry Night of Polar Bears in Photoshop”
Just a pity the PSD is not there it would have been nice to see your flow
The best as usual.
Very beautiful and difficalt lesson. Thanks.