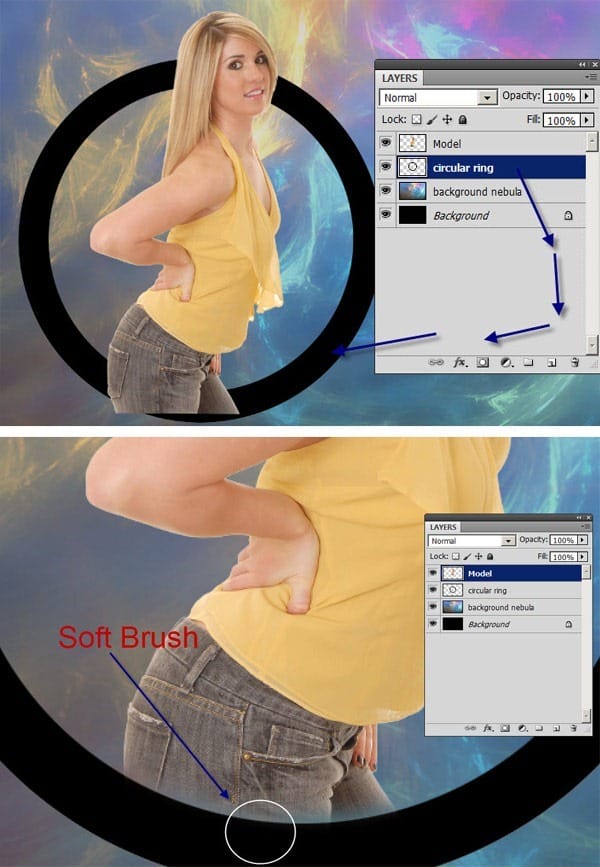
I used a reasonably sized large soft brush to erase the portion of her legs.
Step 4 – Styling the Circle
To give the ring a neat retro effect I’m going to use layer styles and the default Photoshop patterns. I’m using Photoshop cs5 to write this tutorial so lets hope our features look and behave the same way…………Anyways!!!
Double click on the circular ring layer to open up the layer styles dialog box or right click and select blending options.
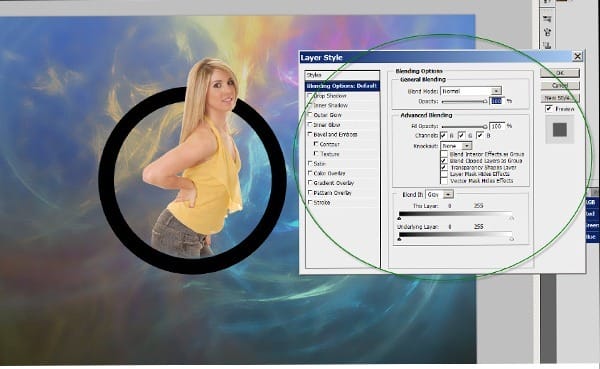
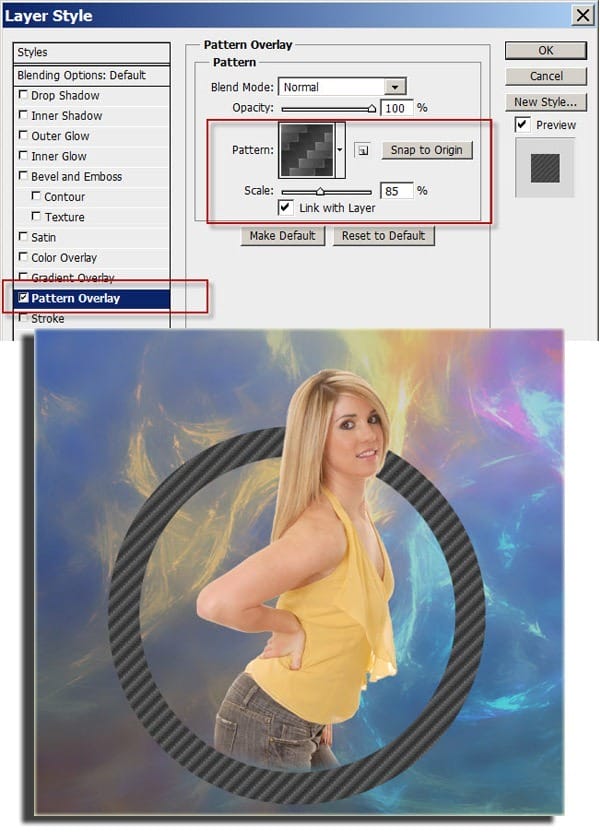
Click on pattern overlay and follow the settings as shown below. Scale is set to 85% and I clicked the small arrow in the dialog box to choose the desired pattern.
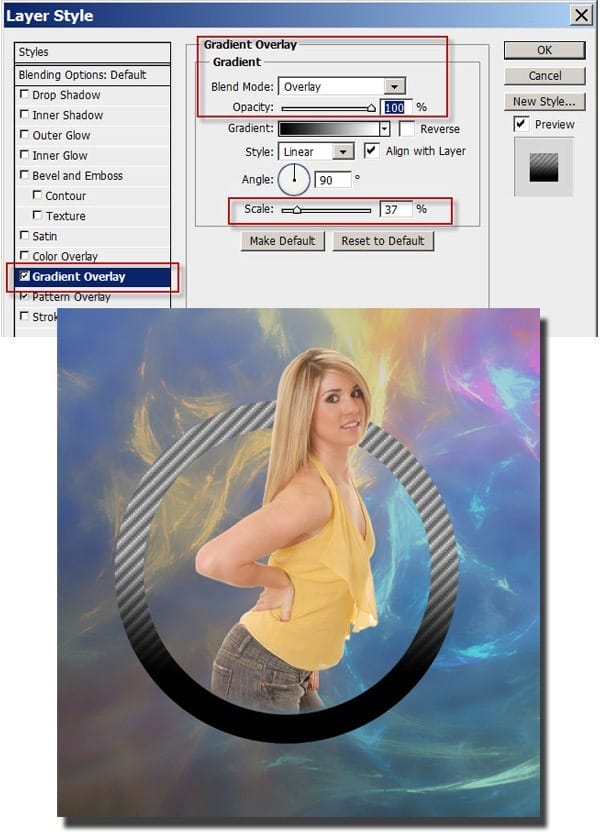
The second layer style we are going to add to the circle is gradient overlay. Leave it at its default black to white gradient but change the blend mode to overlay and the scale to 37%. This gives us a nice gradient effect utilizing the pattern.
Step 5 – Custom Brush Effects
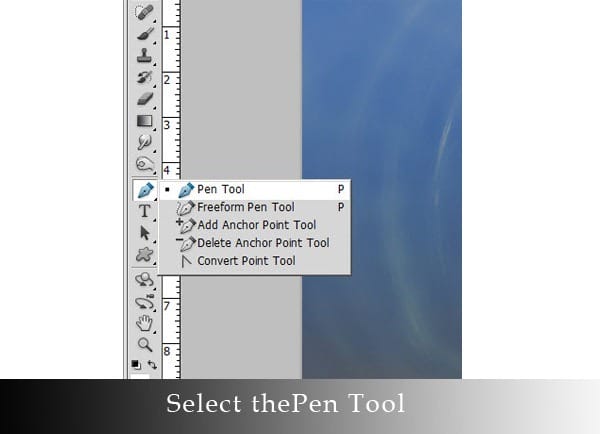
In this step. I’m going to use the pen tool and we are going to create a custom brush effect to make a nice circular bokeh element. Select the pen tool as in the diagram below and follow the steps below:
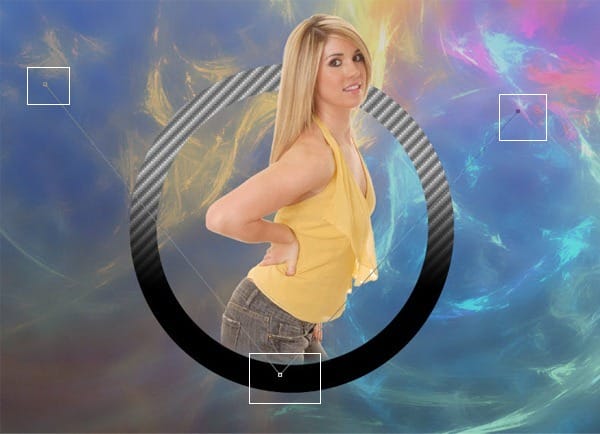
Create 3 points using the pen tool as demonstrated in the image below. The circular effect is going to follow the pattern of the pen tool. Read on…………
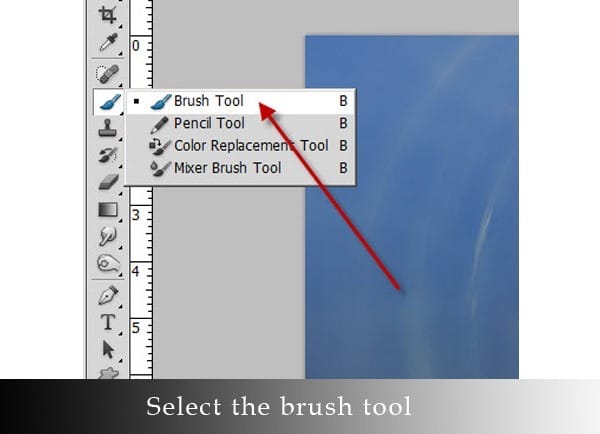
Now Select the brush tool by clicking and holding on the icon shown and then selecting “brush tool”………………….^_^. The fun starts here!
After selecting the brush tool select an average size brush using the brush panel. The brush size I’m using in this example is 38 px. Typically, the brush panel is not always shown by default, Therefore, go to Window>>brush or follow the pictoral example below. The panel should now pop up automatically once activated.
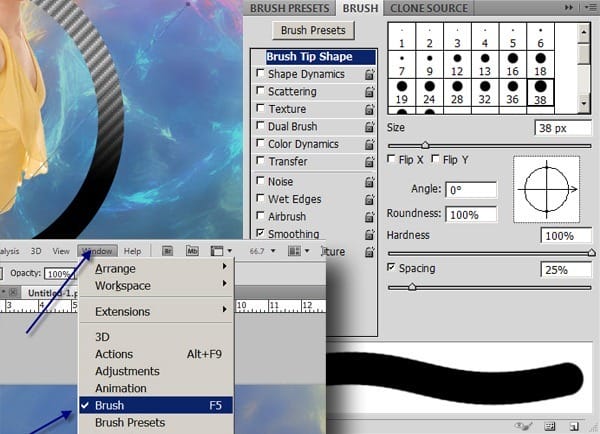
Follow the settings below to create the custom brush.
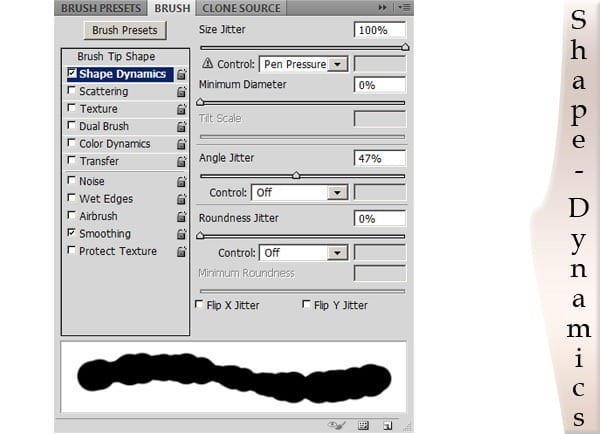
The most used options in the shape dynamics tool is normally size jitter and the minimum diameter. Size jitter and Minimum diameter work hand in hand. Based on our use of the tool, the minimum diameter affects how small the circle would be and size jitter would control the varying sizes from small to big. To properly understand this tool, you would have to tweak the settings on your own or my explanation would be useless!


Leave a Reply