Lower the opacity of this layer to 20%. On this layer mask use a soft black brush to erase the effect on the right of the mountain where we don’t want to be affected by this layer:

Step 11
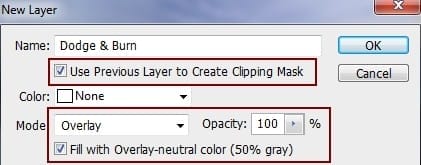
Make a new layer, change the mode to Overlay 100% and fill with 50% gray:

Take the Dodge and Burn Tool (O) with Midtones Range, Exposure about 15-20 % to refine the contrast and details on the mountain. You can see how I did it with Normal mode and the result with Overlay mode:


Step 12
Extract the rock from the background and place it at the right edge of the scene:

Step 13
I used Curves to darken the rock:

On this Curves layer mask use a soft black brush to remove the dark on the left edge of the rock:

Step 14
I used Color Balance to match the color of the rock with the background:


Step 15
Take the balcony part from the original photo and place it at the left edge of our main image:


Step 16
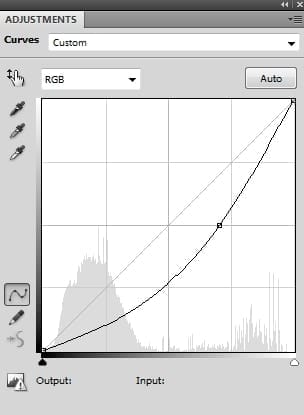
I used Curves to darken the balcony:

On this layer mask use a soft black brush to reduce the darkness on the following parts:

Step 17
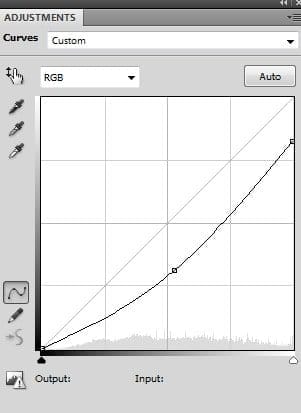
I use another Curves adjustment layer to brighten the front part of the balcony and apply brushing on this layer mask:

Step 18
I used Hue/Saturation to reduce the saturation of the balcony:

On this layer mask I used a soft black with the opacity from 20% to 100% to restore the saturated light on the balcony front:

Step 19
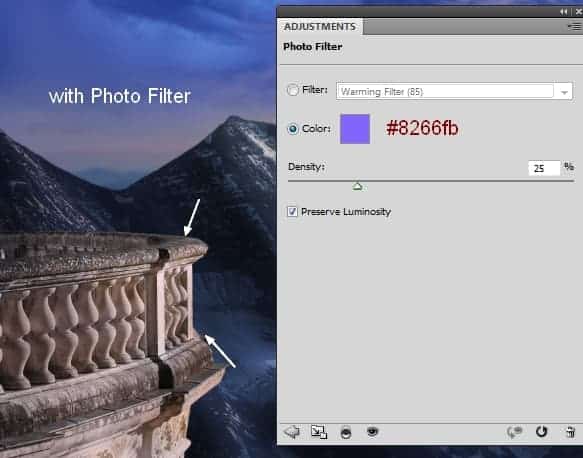
I used Photo Filter to add some purple tone to the balcony:

Step 20
To refine the light and shade of the balcony I used the Dodge and Burn Tool on a new layer:

Step 21
Isolate the model from the background and place her onto the balcony area:

Add a mask to the model layer and use a hard black brush to remove the lower part of her dress and make her look like standing inside the balcony:

Step 22
I used a Hue/Saturation adjustment layer for the model. On this layer mask use a soft black brush to erase the effect on the model front:

Step 23
I used Color Balance to add some purple tone to the model. Also apply brushing on the front of the head, dress and hair to keep some sun highlight there:

Step 24
I used Curves to brighten the model. On this layer mask use a soft black brush to clear the light effect behind and on the left to make a nice contrast:
9 responses to “Create a Sunset Landscape Photo Manipulation in Photoshop”
-
Thank you
-
Thank you for the lesson . he’s just adorable. The game of colors and delicate taste It’s my pichttp://j-p-g.net/if/2015/12/05/0996727001449341248.jpg
-
Hi, It ‘s very beautiful , You are a professional designer
-
would u mind sending me the pictures u used in the manipulation ?
sorry i can’t download some of them :( -
I really enjoyed reading this tutorial. I always thought images like this were hard work, but when you break it down into steps like this, it seems so simple! (Although I’m sure this is not for the beginner in Photoshop.)
-
Nice Tutorial
-
plz post psd plz
-
Sorry I missed this step. I used Color Balance:
Midtones: -57,0,100
Highlights : -2,0,78 -
How did the sky layer turn blue ?? What Setting you used ???


Leave a Reply