

Step 36
Apply Photo Filter to change color of the hill a little:


Step 37
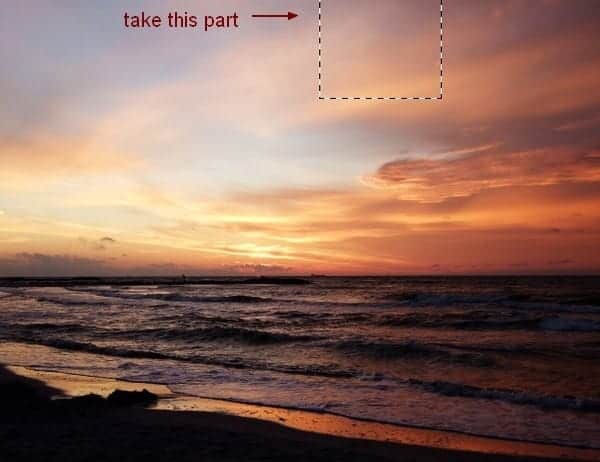
Open sky 1 stock. Choose sky part and place it on the top (the black part), set this layer above the background and under underground group. I rotated it and tweaked it a little:


Use layer mask to remove unnecessary edges:

Step 38
To make sky look smoother, go to Filter-Noise-Dust & Scratches:

I named this layer “main part”.
Step 39
Copy a part from sky stock and put it at the left side of the main part, resize to be smaller:


Remove hard edges of this part with layer mask:

I called this layer “part 2”.
Step 40
Add another part from sky stock to our picture. I placed it at the top right, used layer mask, applied Dust & Scratches filter with same settings in step 38:


Step 41
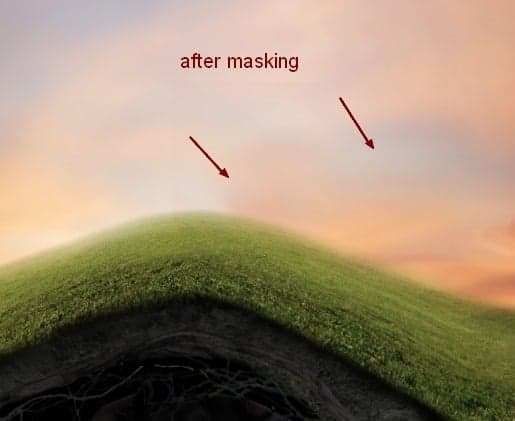
Continue adding another sky part. Move it to the right corner of the sky, apply Dust & Scratches filter and layer mask:


Step 42
Make group for these sky parts, name it “sky 1” or whatever you want. Use Curves to change color of sky 1:

Apply erasing job on Curves layer mask:

Step 43
Make a Color Balance layer within this group:

Erase on Color Balance layer mask again with brush with opacity about 45%:


Step 44
To add more details to the sky, I used sky 2 stock. Place it over sky 1 and change the mode to Soft Light 100%:

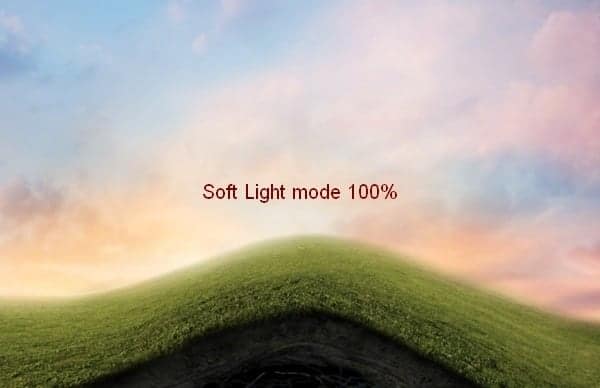
Name this layer “sky 2”.
Use layer mask to reduce some details of the sky 2:


Step 45
Apply Dust & Scratches filter with radius 2 px:

Step 46
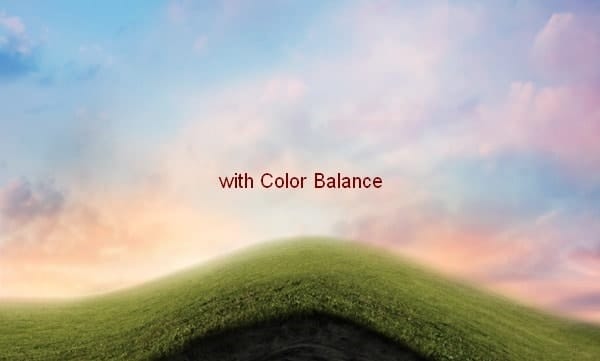
I used a Color Balance layer for sky 2:

Step 47
Continue with a Selective Color layer:


Step 48
Darken the sky a little with Curves:


Step 49
I used a Levels layer to darken the sky 2 again. Then I erased the top center of the sky to keep it brighter than the sides:


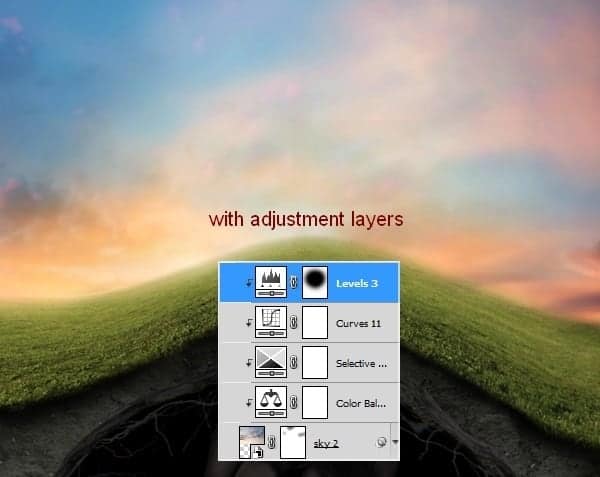
Step 50
Make a new layer on the top of layers. Use soft white brush with 50% opacity to paint on the top center of the sky. Change the mode of this layer to Soft Light 100%:


Step 51
New layer and use soft brush with color #f7d17f to paint on the top center of sky again. Lower opacity of this layer to 30%:


Step 52
Open tree stock. Take its trunk and put it on the top of the hill after scaling:


Use layer mask to blend the tree with the grass:

Step 53
To make shadow for the tree on the hill, I created a layer under the tree one. Hold Cmd/Ctrl while clicking tree thumbnail layer to load its selection:
28 responses to “Create a Surreal, Emotional Underground Scene Photo Manipulation”
-
Thanks for that…
-
Unfortunately, the resources are no longer available. There’s a double edge to free stock photos; they’re free, but they tend to disappear. It is still possible to follow the tutorial using alternative photos. You can download the PSD and find the stock photos there as well.
-
Most of the resources won’t download, any tips or can anyone send me a zip file with then in.
TIA
-
Most of the resources won’t download, any tips
-
gooooooooooooooooooooooooooooooooooooooooooooooooooooooooooooooooooooooooooooooooooooooooooooodddddddddddddddddd
-
Great tutorial, All are path instruction for a model very teachable. Thanks for sharing great experience.
-
Great! all Photoshop tutorials are unique. Thanks for sharing your good effective knowledge.
-
Hi, I think the link for the “Branches 1” is not working. Could you give me the alternative link instead? Thank You
-
Sorry about that – the author has removed his/her image. Try using another branch stock here: https://www.deviantart.com/resources/popular-all-time/?q=branches
-
-
awesome tutorial.. make easy to learn, thanks
-
Thanks for the tutorial.. easy to learn
-
The download link of this tutorial is death! :(
-
Please re uploaded PSD file because when i click on download showing 404 error, this is best work for me i want check how did you do this
-
i can’t download the .PSD file
renew link please,, -
amazing!! great to see the amazing work of great experienced art directors!!
-
Thanks Amazing designs, best of luck in your design career!
-
Amazing tutorial! I’ve learned a lot!!! And I like it better to read tut’s so video is not necessary.
-
This is a pro job.
I’m a fan of photoshop and I see that you give real professional lessons.
I admire your work -
You are a genius Jenny
-
verrynic sof
-
You are a genius Jenny
-
I a beginner in photoshop, I know only make the cut: (
Seeing such advanced tutorials I wonder how people are to learn all that -
tutorial very detailed and well explained.
I congratulate you for your work, good job -
nice tutorial thanks
-
Beautiful!! ^_^
-
Is there any easy way to learn photoshop by videos.. its good but little bit confusing../
-
Great tutorial,thank you ^^
-
I will follow this tutorial to see the results.
I am looking for a long time this kind of lesson


Leave a Reply