Make skin look perfect in one-click with these AI-powered Photoshop actions.
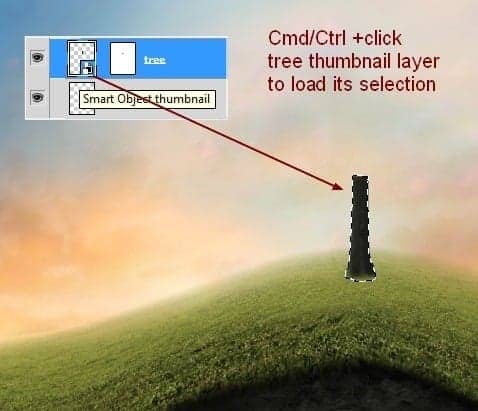
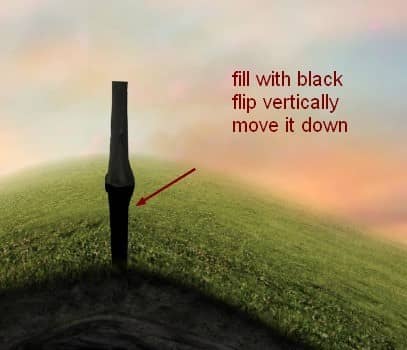
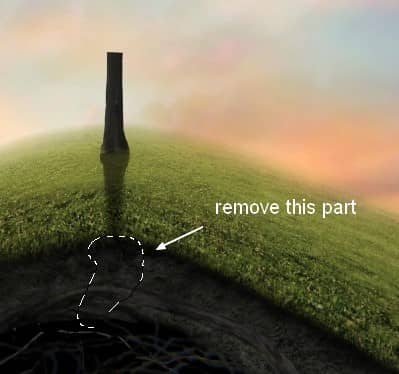
Fill this selection with black (Shift+F5). Then choose Edit-Transform-Flip Vertical and move this shadow under the tree bottom.
Step 54
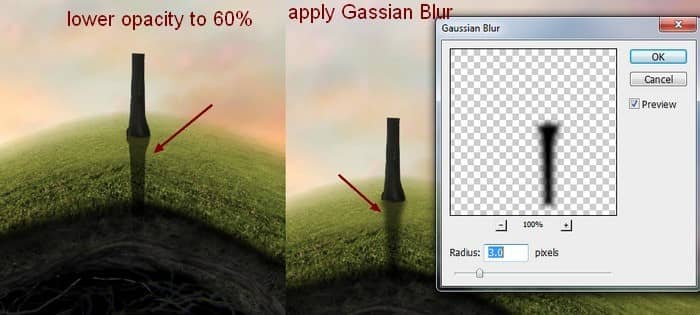
Lower opacity to 60% then apply Gaussian Blur with 3 px (Filter-Blur-Gaussian Blur):
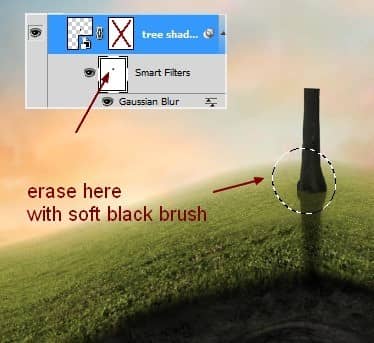
On Filter layer mask use soft black brush to remove blur effect at the part near the tree bottom to keep the hard look for it:
Step 55
Add layer mask to shadow layer and remove the top of it:
Step 56
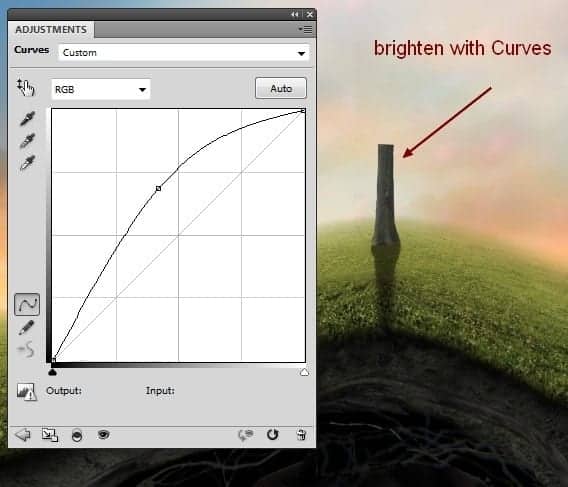
I used Curves to brighten the tree:
Step 57
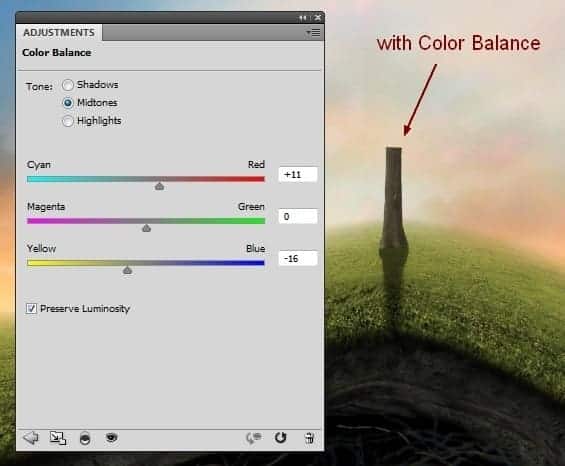
Add a Color Balance layer to give the tree some yellow:
Step 58
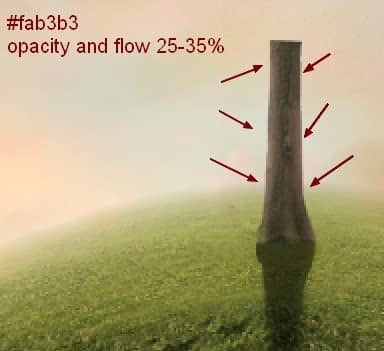
To add more light to the tree, I used a new layer and take brush with color #fab3b3, opacity and flow 25-35%. Paint along the tree sides as I did below:
Step 59
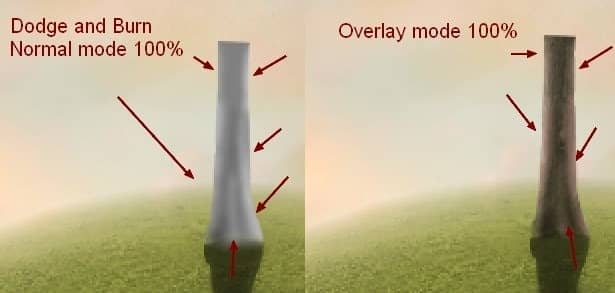
Make a new layer with same settings in step 10. Use Dodge and Burn Tool to create more contrast on the tree:
Step 60
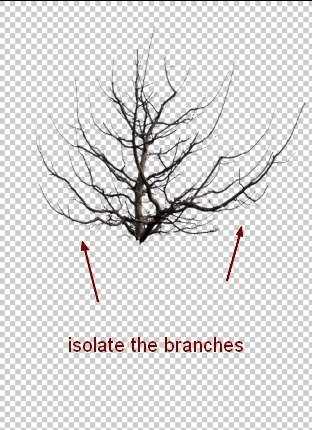
It's time for most interesting parts of the tutorial - making a heart from branches. Open branches 3 stock. First use your own method to cut out the branches from background:
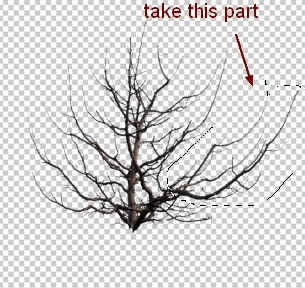
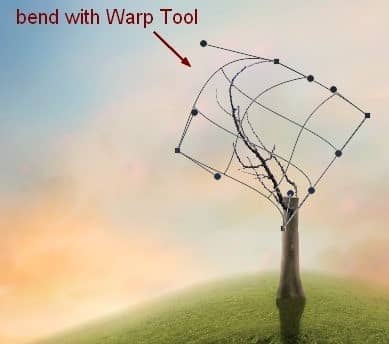
Use Lasso Tool to take a part from isolated branches and put it above the tree. I used Warp Tool to bend it:
Step 61
Use different parts from branches stock to put on the tree following a heart shape, use Warp Tool or Puppet Warp Tool if needed . I used layer mask to remove any unwanted parts. You don't need to create exactly like mine but can take it as a reference:
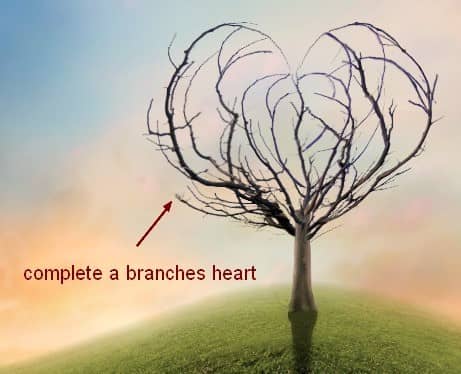
I used 15 layers for this branches heart.
Step 62
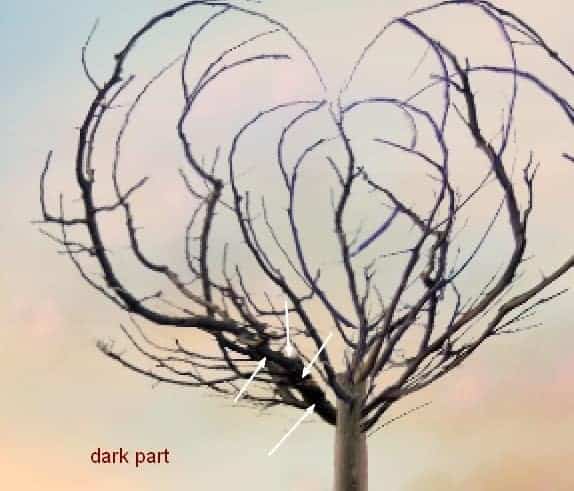
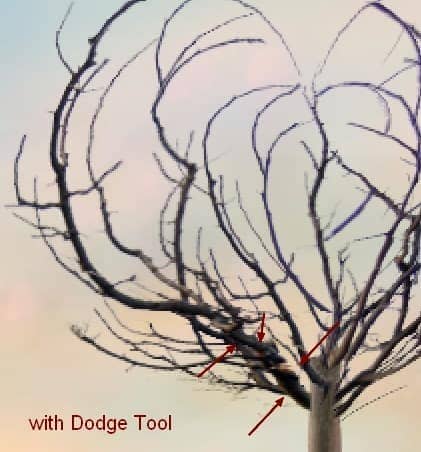
Group all heart branches layers and name them (I called them from 1 to 15). I used Dodge Tool with same way in previous steps to brighten some parts that are too dark:
Step 63
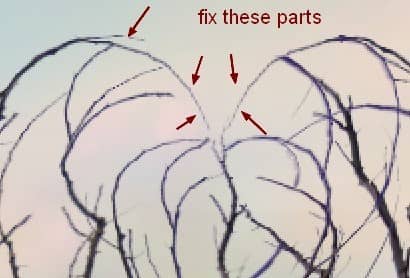
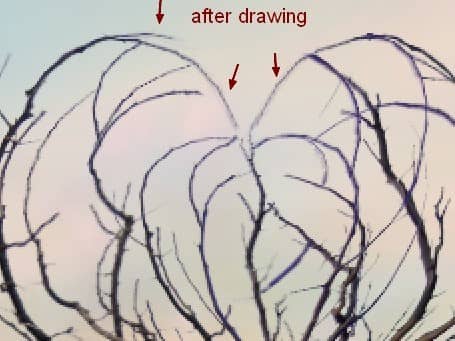
Make a new layer on the top of these branches layers (within this group). Use hard black brush, 1 px and color #1a142d to make some branches parts more visible:
Step 64
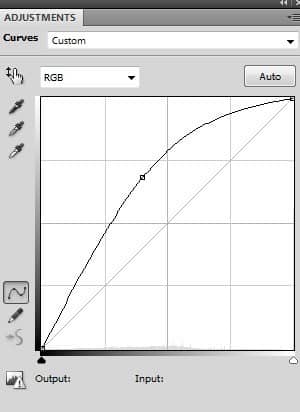
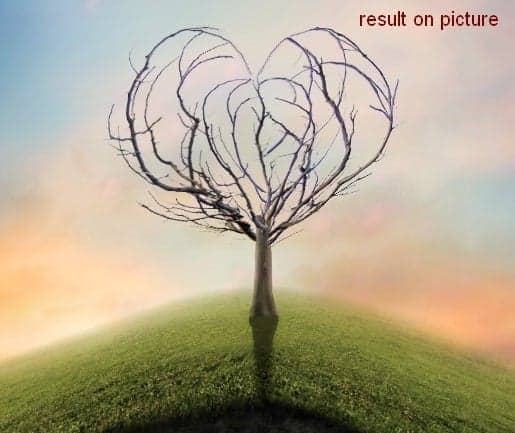
Add a Curves layer within this group to brighten this heart:
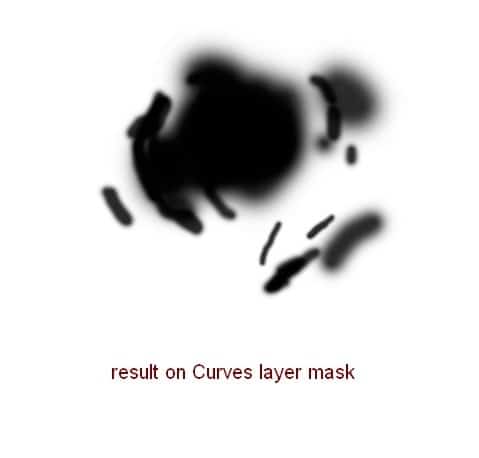
I used brush on Curves layer mask to clear some parts below:
Step 65
Use Color Balance to give some yellow to the branches:
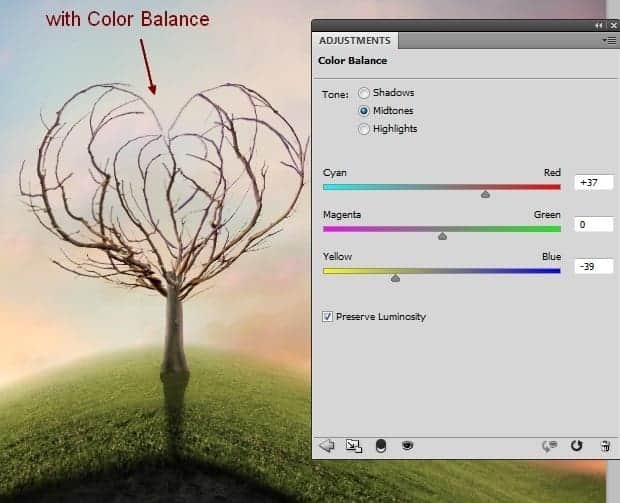
Step 66
Right click branches heart group, choose Duplicate Group. Right click it again, choose Merge Group. Now we have a selection of these branches that will be useful in next steps. Turn off this layer.


28 comments on “Create a Surreal, Emotional Underground Scene Photo Manipulation”
Thanks for that...
Unfortunately, the resources are no longer available. There's a double edge to free stock photos; they're free, but they tend to disappear. It is still possible to follow the tutorial using alternative photos. You can download the PSD and find the stock photos there as well.
Most of the resources won't download, any tips or can anyone send me a zip file with then in.
[email protected]
TIA
Most of the resources won't download, any tips
gooooooooooooooooooooooooooooooooooooooooooooooooooooooooooooooooooooooooooooooooooooooooooooodddddddddddddddddd
Great tutorial, All are path instruction for a model very teachable. Thanks for sharing great experience.
Great! all Photoshop tutorials are unique. Thanks for sharing your good effective knowledge.
Hi, I think the link for the "Branches 1" is not working. Could you give me the alternative link instead? Thank You
Sorry about that - the author has removed his/her image. Try using another branch stock here: https://www.deviantart.com/resources/popular-all-time/?q=branches
awesome tutorial.. make easy to learn, thanks
Thanks for the tutorial.. easy to learn
The download link of this tutorial is death! :(
Please re uploaded PSD file because when i click on download showing 404 error, this is best work for me i want check how did you do this
i can't download the .PSD file
renew link please,,
amazing!! great to see the amazing work of great experienced art directors!!
Thanks Amazing designs, best of luck in your design career!
Amazing tutorial! I've learned a lot!!! And I like it better to read tut's so video is not necessary.
This is a pro job.
I'm a fan of photoshop and I see that you give real professional lessons.
I admire your work
You are a genius Jenny
verrynic sof
You are a genius Jenny
I a beginner in photoshop, I know only make the cut: (
Seeing such advanced tutorials I wonder how people are to learn all that
tutorial very detailed and well explained.
I congratulate you for your work, good job
nice tutorial thanks
Beautiful!! ^_^
Is there any easy way to learn photoshop by videos.. its good but little bit confusing../
Great tutorial,thank you ^^
I will follow this tutorial to see the results.
I am looking for a long time this kind of lesson