Learn how to create this eerie photo manipulation of the Grim Reaper’s side job – mowing! This simple tutorial is great for beginner photo manipulators and will show you how to quickly combine photos, warp them into your scene, and add a cold blue color effect that eliminates all need for color matching.
Preview of Final Results

Tutorial Resources
- Straws -Bergadder, pixabay
- Cloud – lancealot21us, pixabay
- Grim – mjranum, Deviantart
- Scythe – mynoahsart, Deviantart
Step 1
Let’s start by opening the straw image in the Photoshop.

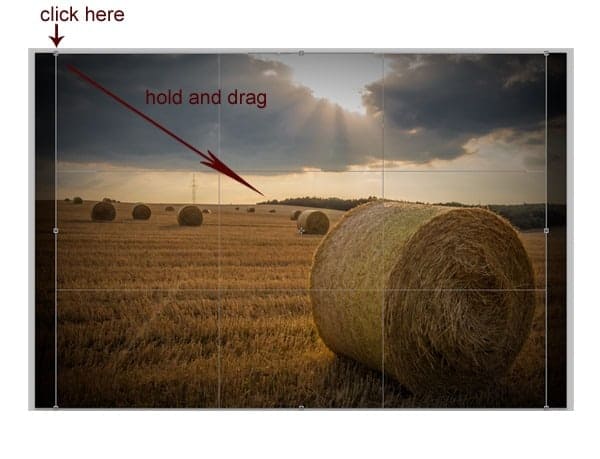
Activate the crop tool in the tool panel by hitting the short key C on the keyboard. We will crop the image a little bit with this tool.

Start cropping by clicking the tool and drag around the image we want to crop. I started from upper left part of the image and dragged to lower right part. Hit enter to crop the image.

Here is the result of the cropped image now.

Step 2
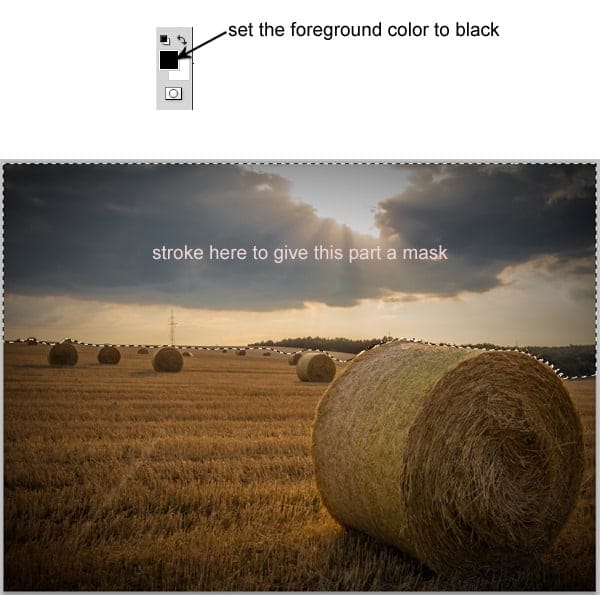
We will hide the cloud part of the image. To do this purpose, we will give the image a layer mask by clicking the layer mask icon located in the bottom of the layer panel. There will be a white mask thumbnail next to the layer thumbnail.

Next, start accessing the brush tool by hitting the short key B. Choose a soft round brush at 0% hardness with size of around 900 pixels.

Make sure to set the foreground color to black and the background to white and the layer mask thumbnail is activated. Start masking the cloud part of the image by stroking the brush with black to mask the cloud.

Here is the result

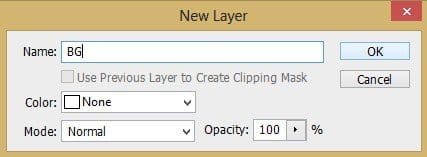
Now point out the cursor on the background layer and double click on it to show up the new layer option box. This will lead us to change background layer into a new layer named layer 0 in option box. I named this layer BG..

Step 3
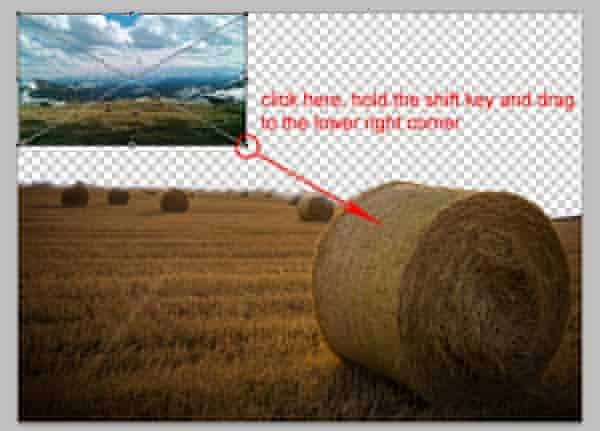
Now open the cloud image on the document. This image will be a new layer above the BG layer in the layer panel. I named this layer cloud. Position the cloud layer under the BG layer by clicking, holding and dragging it downward.

Activate free transform tool (Ctrl+T) and scale up the cloud image by clicking one of the transforming points, holding and dragging downward until the cloud cover the blank space in the document.

Here is what I have done:

Step 4
With the cloud layer still activated, go to filter > blur > surface blur. Set the value of the blur as given below:
20 responses to “The Grim Reapers Side Job”
-
this is a terrible tutorial a lot of stuff you need past experience to know where it is and if you dont it takes 4 other tutorials to do. die
-
Step 8 what is clipping mask for?
-
Good tutorial I learned a lot thanks!
-
Why i can’t look full tutorial?
-
Click on page 2
-
-
Great. Thank you very very much!
-
Wow … it’s so elaborate with each steps perfectly depicted with screen shots… it’s a great job… really like the image transformation with perfect use of layer mask, adjustment layer, blur, transform, wrap, curves, hue saturation and a lot. Excellent
-
Awesome! :)
-
Its been a while.
-
So nice!
-
-
you help me to create with a good idea
-
Great, thanks for all the helpful info!
-
super
-
Excellent Tut
-
Thank you very much for sharing the tutorial.
-
Good it is very good tutorial THX
-
I LIKE UR TUTORIAL
-
I like the tutorial but it is very dark for Christmas.
-
Does anyone have extra photoshop subscriptions I can have?
-
freeloader…
-


Leave a Reply