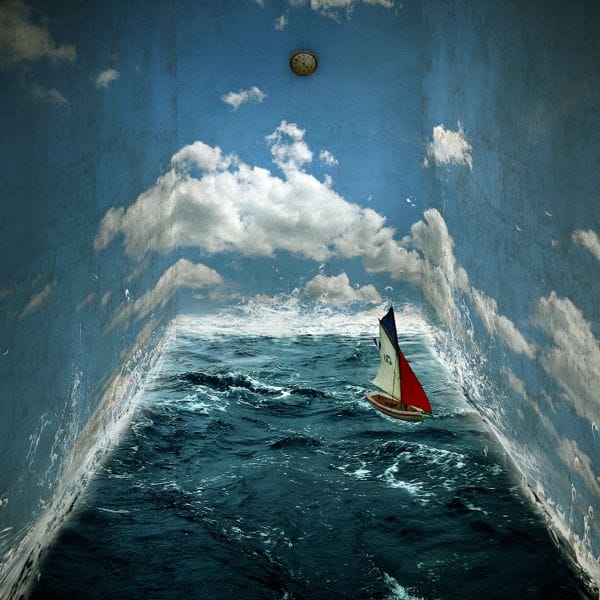
In this tutorial, we will be creating a surrealistic room with realistic water as its floor, real clouds as its wallpaper with a clock on the wall and a boat on the water floor. We will learn a lot of technical aspects like visualizing and creating a perspective using the ruler and the transform tools especially the distort tool, creating realistic waves using the brush tool and two wave brush sets, using brush textures and apply it to the walls to make them realistic. Then we would be creating shadows using the brush tool and the burn tool. Finally we would make the boat look like it really is running and producing waves in its wake.
Preview of Final Results

Surrealistic Room Photo Manipulation Photoshop Tutorial
Tutorial Details
- Program: Adobe Photoshop CS2
- Difficulty: Medium
- Estimated Completion Time: 1 to 2 hours
Resources
- 18 Vintage Photoshop Brushes by Photoshop Free Brushes (Unrestricted Stock)
- Water Effects Photoshop brush set by fiftyfivepixels (Royalty Free License)
- Waves Brush by anaRasha (Creative Commons License)
- Clock by Mind IllusionZ Stock (Royalty Free License)
- Stormy Sea by darkrose42-stock (Royalty Free License)
- Toy Boat by Simona Dumitru (Royalty Free License)
- Big Blue Sky Stock by fahrmboy-stock (Royalty Free License)
Step 1 – Create a new file
Create a new file with these settings:
- Width: 3000px
- Height: 3000px
- Resolution: 300 dpi
- Color Mode: RGB Color; 8bit
- Background Contents: Transparent

Step 2 – Create the Walls
To start off, let’s open Big Blue Sky Stock. We will be using this to create the walls of our room. So let’s transfer it to our 3000×3000 layer. Click our stock image, press (M)to activate our Marquee tool and select the sky and leave the trees outside the marquee box, once you’ve done that press (V) and drag the selected part of the image by holding down the left mouse button to our canvas. See example below:

Note that that image has large dimensions (8591 x 3912 pixels) so, obviously we would need to decrease that size to be optimal for our canvas. We would need a lot of precision on this and on the succeeding steps, so let us activate our ruler by pressing Ctrl+R. You’d be seeing a ruler which is in inches on the top and on the left size of our image. Now that the ruler is active let us create a guide. Click the top ruler and drag it all the way down to the axis or level: 5.3in See image below:

Press Ctrl+T to transform our image. Resize it to come up with something similar to the image below:
 Now that that’s done, let us create the room’s perspective. Let us set the navigator to 15% so the ruler would be counting in 1’s. See image below:

Activate your marquee tool and use it to select the area from axis 5.3in of the ruler on the left to axis 3in on the top ruler. An example is shown below:

Now use the transform tool and right click anywhere on the canvas and left click on the Distort tool. Follow instructions seen on the image below:
8 responses to “Surrealistic Room Photo Manipulation”
-
Psd pleasd not link
-
We have fixed the broken link. Thank you for letting us know.
-
-
Thanks a lot! Great tutorial and love your precise approach =) I modified final part, but love your original idea. Here is my version http://milanaserk.deviantart.com/art/Setting-Off-484852574
-
I searched a lot, but the Anarasha wave brush seems to be offline. But after some searching I found equally good wave brushes at this site:
http://midnightstouch.deviantart.com/art/Stormy-Seas-38507114
A lot more ‘water brushes’ can be found here:
http://www.photoshopfreebrushes.com/25-sets-of-high-quality-water-brushes-for-creating-splashing-backgrounds/Hope this will help!
Kind regards,
Mike -
very very nice, your picture works.thanks sir………..
sorif, -
the waves brush by anaRasha is not a working link. I’ve tried looking for it and it would be really cool for a different download or something like that.
-
Not sure if your aware theres a guy selling prints of your Tuts, I’m guessing without any permission?
-
Not sure if your aware theres a guy following your Tuts as finished artwork out there…I’m guessing without any permission?


Leave a Reply