Luminar AI lets you turn your ideas into reality with powerful, intelligent AI. Download the photo editor and see how you can completely transform your photos in a few clicks.
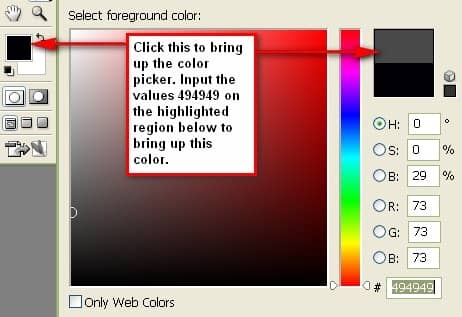
After that, apply the brush anywhere on the image. Next, transform the image by pressing Ctrl+T and click on Rotate 90’ CW. Once it has been rotated let us transform it again to make it fit the wall. Be sure to activate the ruler since we would need it drastically throughout. Transform the image and align its width from the axis 3in to 7in on the top ruler and be sure its height is in the axis 5.3in on the left ruler. Reference is below:
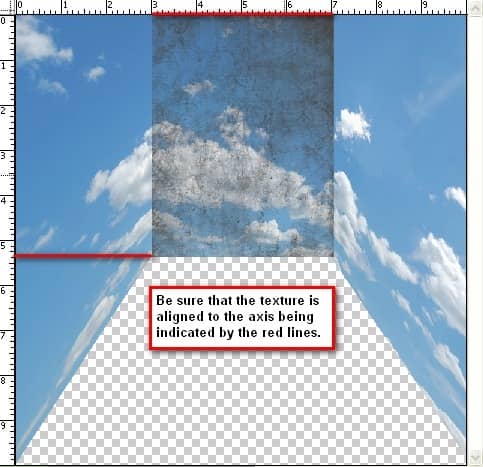
After doing that, transform the image and click Flip Horizontal.
The wall isn’t convincing yet isn’t it? Let’s lower the layer’s opacity. Go to the Layer Window and change the Opacity to 25%.
To create the texture for the wall on the left just duplicate “Wall texture: middle” press Ctrl+T and click Flip Horizontal and then rename it to: “Wall Texture: Left” We would need to distort that to fit the wall, so let’s transform the image and use the Distort Tool. Distort the texture like we did with our sky image earlier to fit the wall and make sure to align it to axis 10in on the ruler on the left. Set its opacity to 50%. See reference below:
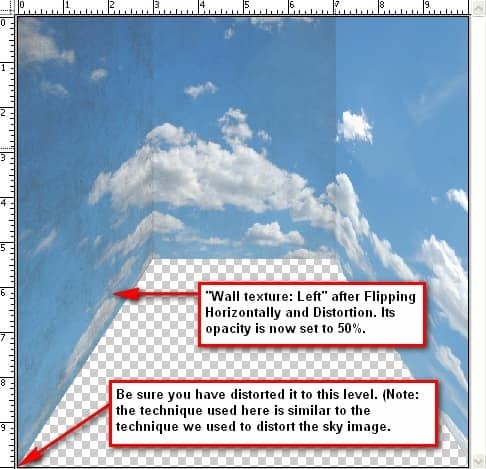
For the wall on the right just duplicate “Wall Texture: Left” rename it to “Wall Texture: Right” and drag it using our Move Tool (V) to the right. It should now look like this:
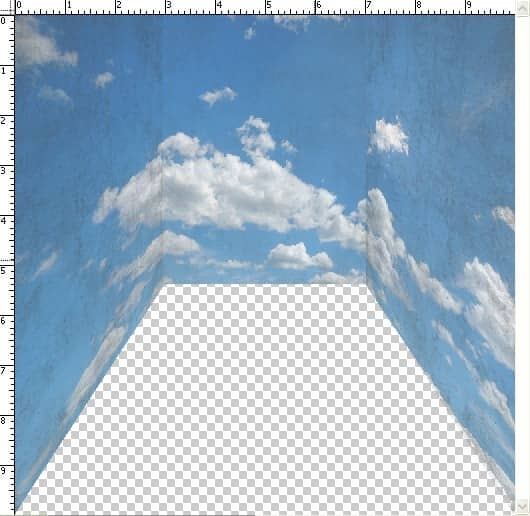
You may want to group all the Wall textures to lessen the confusion on later steps. To create a group, “go to Layer > New > Group” and name it “wall textures.”
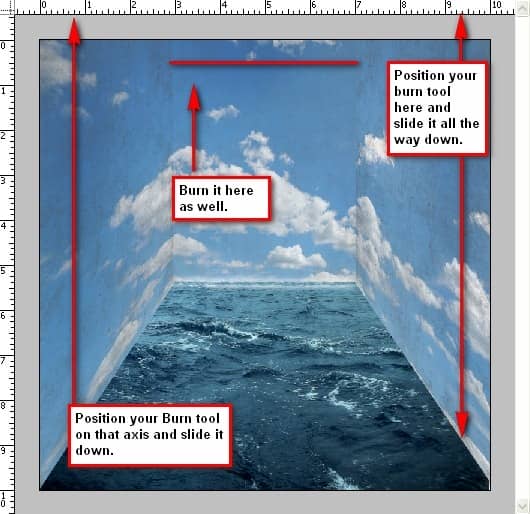
Let’s darken some parts of the wall to enhance its contrast and appearance. Activate your Burn tool by pressing (O) and clicking on that tool to bring out the menu shown on the image below for instructions:

Set the Burn tool values to the following:
- Brush size: 900px
- Range: Midtones
- Exposure: 35%
The reference below shows the region to be burned or darkened.
Step 4 - Creating the floor
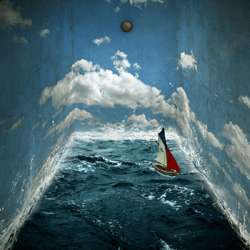
For our floor, we will be using the image Stormy Sea. Open the file, use the marquee tool and select the sea and drag it to our 3000x3000px layer and put it under all the layers that we have created. Let us transform it so it would fit the canvas and make it look like the room’s floor. See reference below:

8 comments on “Surrealistic Room Photo Manipulation”
Psd pleasd not link
We have fixed the broken link. Thank you for letting us know.
Thanks a lot! Great tutorial and love your precise approach =) I modified final part, but love your original idea. Here is my version http://milanaserk.deviantart.com/art/Setting-Off-484852574
I searched a lot, but the Anarasha wave brush seems to be offline. But after some searching I found equally good wave brushes at this site:
http://midnightstouch.deviantart.com/art/Stormy-Seas-38507114
A lot more 'water brushes' can be found here:
http://www.photoshopfreebrushes.com/25-sets-of-high-quality-water-brushes-for-creating-splashing-backgrounds/
Hope this will help!
Kind regards,
Mike
very very nice, your picture works.thanks sir...........
sorif,
the waves brush by anaRasha is not a working link. I've tried looking for it and it would be really cool for a different download or something like that.
Not sure if your aware theres a guy selling prints of your Tuts, I'm guessing without any permission?
Not sure if your aware theres a guy following your Tuts as finished artwork out there...I'm guessing without any permission?