
Learn how to create this photo manipulation by Oliver Cereto. Some of the techniques you will learn in this Photoshop tutorial are how to give a person a cute doll-like face, how to extend backgrounds, and how to apply a moody photo effect.
The Maiden and Hummingbird Photo Manipulation Photoshop Tutorial
Preview of Final Results

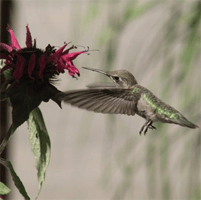
Stock Photos
These are the images used to create this artwork. You can click on the images below to go to the web page where you can download the images.


Step 1
Begin by opening the photo of the of the model into Photoshop. Because we are giving this image a dark feeling, we’ll use the levels tool to reduce the brightness and increase contrast. Choose Image > Adjustments > Levels and adjust the settings like shown in the image below.

Step 2
While increasing the contrast, we also increased the saturation. Choose Image > Adjustments > Hue/Saturation to reduce the saturation.

Step 3
Choose Image > Adjustments > Color Balance. With the color balance tool, we’ll reduce the reds and yellows in the image and add a bit of green. Adjust the settings like shown in the image below. This will give it a strange color effect that is slightly similar to the color effect of retro films. This is just a simple first edit on our image and later we’ll add different color and lighting effects.

Step 4
Now let’s play now with the powerful liquify filter. Choose Filter > Liquify. In the Liquify window, you’ll find the tools on the left and the settings on the right side.
In the center of the window is the workspace and preview. Working with the liquify tool is like working with clay. Imagine that you are creating a clay figure that you can smudge and distort it in the way that you want. This is how it works, more or less.
I recommend you that you play with this filter some minutes before to start to work. It’s easy to use but you need practice to get realistic results.
Press B to select the bloat tool. The bloat tool will expand the area that you paint. It’s important that use it carefully by clicking little by little in slightly different areas rather than holding the mouse button on one area.
Leave a Reply