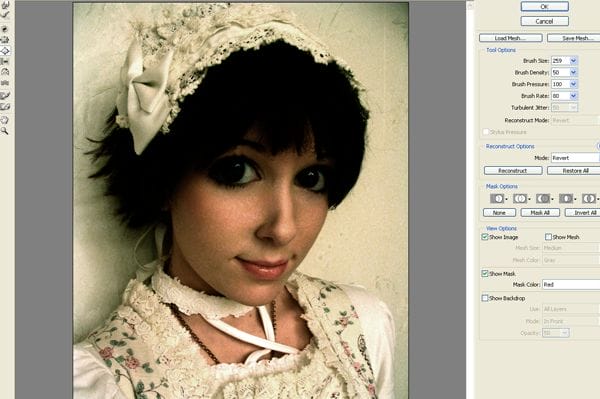
Now select a brush size about 260 and brush over one of the eyes. Use it carefully in the center of it and make it bigger. Do the same for the other eye.
Press W to select the forward warp tool. It’s like a finger that push pixels. This tool is really useful and can help get better results after using the bloat tool. Use it to fix some types of distortions. For example, if the pupil is not a perfect circle after using the bloat tool, you can use the forward warp tool to correct the imperfections to make it a perfect circle.
Keep the liquify window opened.

Step 5
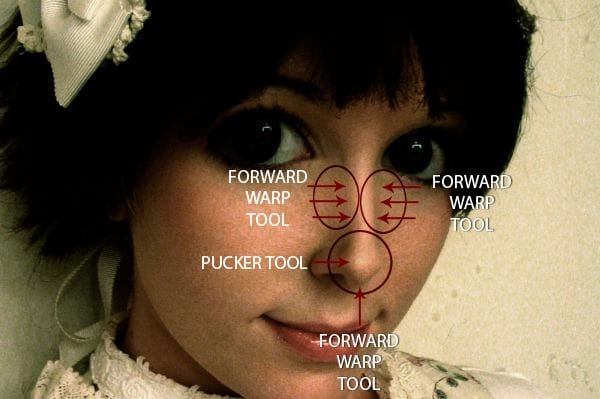
Now let’s work on the nose. Press S to select the pucker tool. The pucker tool is the opposite to the bloat tool. The technique we’ll be using with the pucker tool is the same that the previous one but using a smaller brush size (about 190). Use it on the tip of the nose to make it smaller. Switch to the forward warp tool (w) and, using a smaller brush (about 120), push the sides of the nose towards the centre to get a smaller and thinner nose.

Step 6
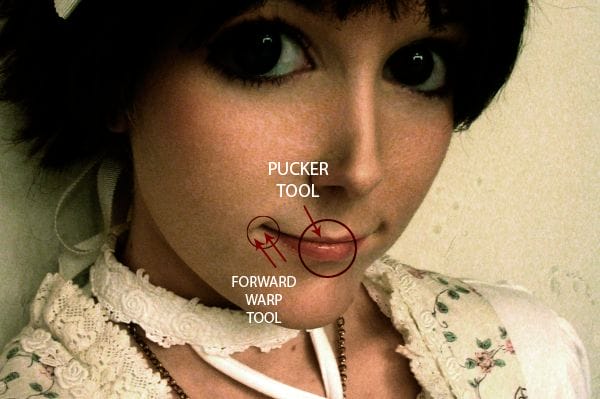
Next step is to use the liquify filter over the mouth of the girl. Select the Pucker Tool (S) with a brush size about 280 and press in the center of her lips. Be subtle, we don’t want to erase her mouth. Then use the Forward Warp Tool to correct and line up correctly her smile, you can make her smile bigger if you press over the corner of her mouth and drag it carefully.

Step 7
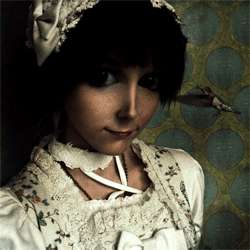
Because we have done so many modifications to the eyes and nose, her face still looks a little too big. We are going to correct this with the forward warp tool. Select the forward warp tool and push the edge of the face and chin to make her face look slimmer. Use a brush size about 190 for the large areas and a smaller one for the smaller details.
I modify other places like the hair, pushing down it a little and then I retouch the nose, mouth and eyes. Feel free to modify everything to get the best surreal portrait as possible.
Ensure that you don’t distort the areas that you don’t want. This usually happens when you’re using a big brush. In these cases it’s useful to use a mask. Select the freeze mask tool (F) then paint the zones that you don’t want to modify (for example the neck of the model). Once you have painted the mask, you can feel free to edit without worrying about modifying the areas that you don’t want to.


Leave a Reply