
In this tutorial you will learn how to make 3d objects, easy and fast and integrate them in a photo manipulation. We will make grids and meshes using them in a very unique way to obtain a very colorful and visually impressive artwork.
The Making of “The Birth of Venus” Digital Art Photoshop Tutorial
Preview of Final Results

Getting the stock-images
As I was saying before the most important thing in a landscape photo manipulation is the right stock , so pick it carefuly . I’ve chosed the folowing stock:
- Ocean1: aussiegal7
- Ocean2: thiselectricheart
- Rocks and Ocean: timewizardstock
- Model: mjranum-stock
- Splash: two-ladies-stocks
- Cosmos Packs: resurgere
- Cosmos Packs: resurgere
- Cosmos Packs: resurgere
- Island1: persephonestock
- Island2: persephonestock
- Island3: mpersephonestock
Step 1
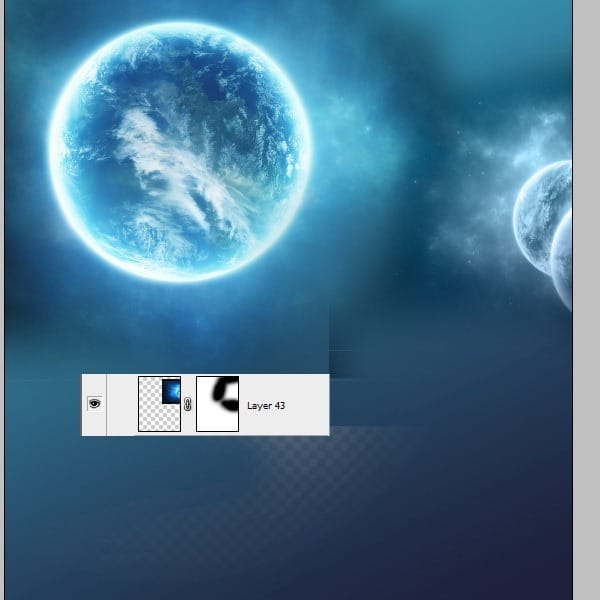
Open the first picture from the cosmos pack and place it in the left upper corner.

Step 2
Create a new layer. Select the brush tool smooth edges and paint some of the areas like in the image below. You can find the colors code next to the image.
Step 3
Open the next cosmos picture and place it in the right . Create a layer mask and eraseall th edges with a black brush with smooth edges.
Step 4
Open the third cosmos picture and place it at the bottom of the file. We just need the little planet from this one since we are going to put the earth there.

Step 5
Now press CTRL+J and duplicate this layer so the little planet should be in the left.

Step 6
This is it with the cosmos background for now, so let’s create the earth. Open a new file. We are going to use a lot of stock pictures for this one so open the first two ones and place them like in the picture below.

Step 7
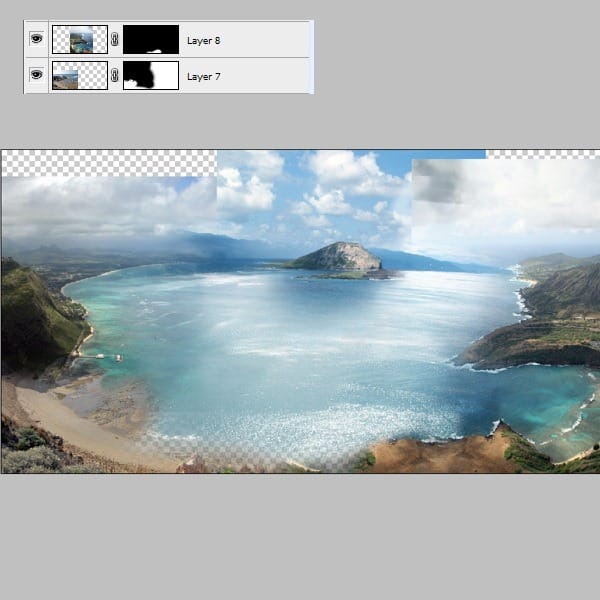
Open the next two pictures and place them like I did in the image below.

Step 8
Now create a mask for the sea picture and erase with a black brush all the edges.

Step 9
Open the cliff image and place it in the left corner, then got o the thitd image that we have opened and CTRL+J it and flip it horizontaly. We just need the bottom part from this picture.

Step 10
Create masks for this 2 new layers and erase all the edges.
Step 11
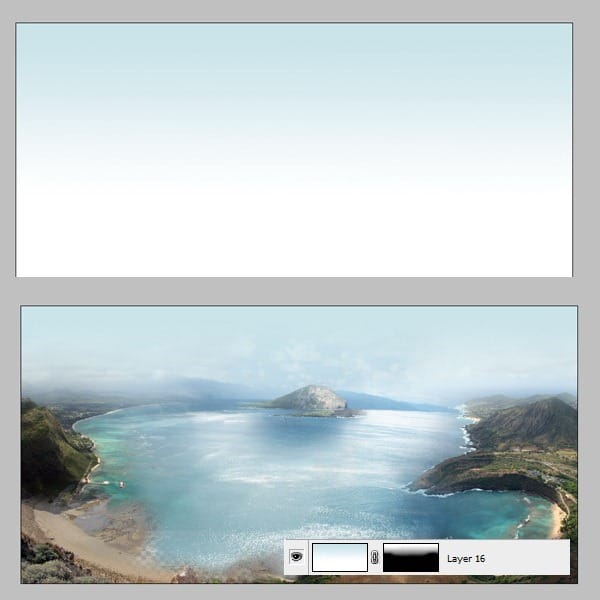
Create a new layer and fill it with light blue. Create a maks and erase some of the parts like in the image.
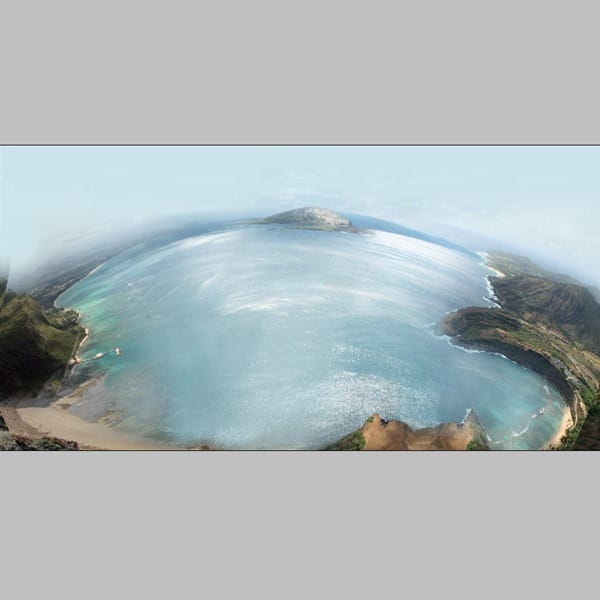
Step 12
Merge all the layers by pressing CTRL+ALT+SHIFT+E. Then go to File-Transform-Warp. Watch the picture below to see how to use the warp correctly.

Step 13
Drag the earth into the cosmos file. Place it like in the image. Create a mask and erase the top edges.

Step 14
Create a new layer . Load some cosmos brushes . You can fiind lots of greath brushes here or you can create your own brushes. Now place some stars in the lighter areas. This is a matter of taste so place as many as you wish.
Leave a Reply