

Step 24
Create different meshes with edges like in the image below, using the technique at step 18. This will be used to create her fiery hair.
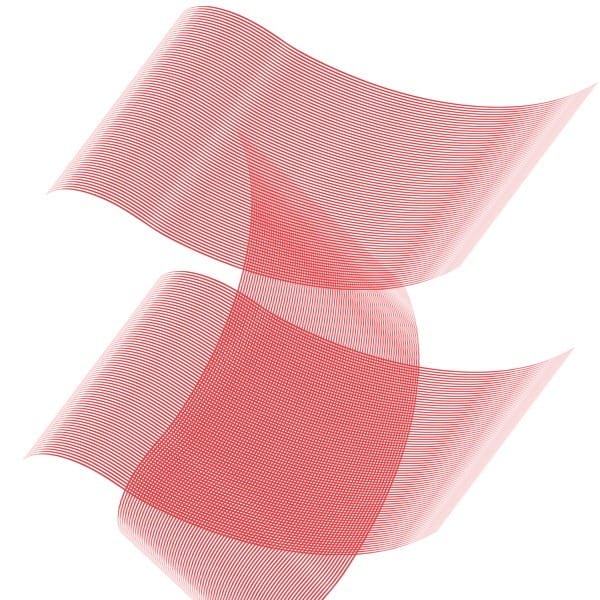
Step 25
This is really the part where your imagination is important. Position the red mesh over her hair and pain out on the mask the parts you dont want to keep. Duplicate the mesh layer and transform it until you have something similar to the result in the image below, or untill it starts to appeal to you.

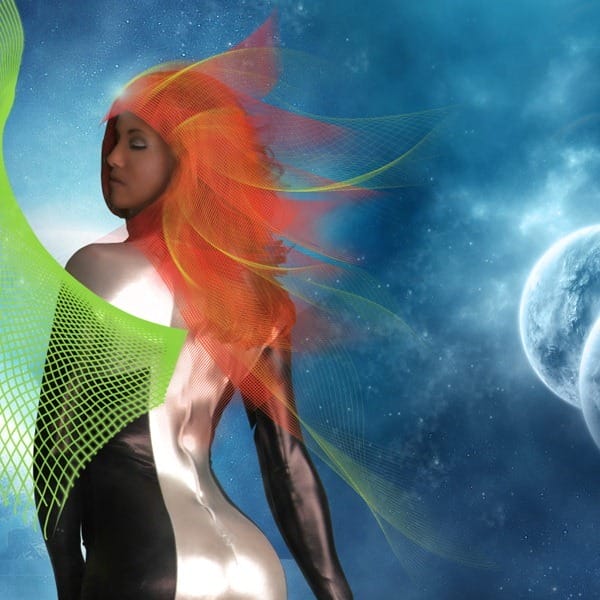
Step 26
Change the color of the mesh to yellow (change the fill of the clipping mask to yellow) and position the parts you like on top of the red mesh to create a fiery look. You can use this cyber fire in a lot of other different projects.
Step 27
There are many different ways of creating a checkerboard in Photoshop. This is the way I did it since I had a different thing in mind when I started this piece. But in the end I only used the black squares for a more surreal look. First draw a square with the marquee tool and fill it with black.(1) Then duplicate the layer, select the transparancy mask and fill it with white, moving it to the righ – using the right key. (2,3) Merge the two squares in one layer, duplicate it and move it down and then transform/flip horizontal (4) Merge everything (5) Then start duplicating until you have a big checkerboard (6) Then merge everything into one layer and if you set the blending mode to multiply it will show only the black squares (7)

Step 28a
Open Adobe Illustrator, then using the brush or pencil draw a line similar to the one in the image below (1). Change the stroke width to 10 (2). At (3) in the image below we must use the 3d effect in illustrator – which I explain in detail in the step below – 28b. After you did step 28b then you can copy/paste the object in Photoshop where using the transform/warp tool you can adjust it the way you want it (4).

Step 28b
To make the line look 3D we must go to Effect/3D/Extrude & Bevel. Then use the information I used in the Extrude & Bevel panel, shown in the image below.

Step 29
Use dodge and burn for extra lights and shadow. Then selecting the transparency mask of that shape fill it with black and lower the opacity and move it like in the image below to make the shadow that object is casting on the model. Erase on the mask the parts where there should be no shadow (the shadow must be only on the model’s back).
Leave a Reply