
Step 12
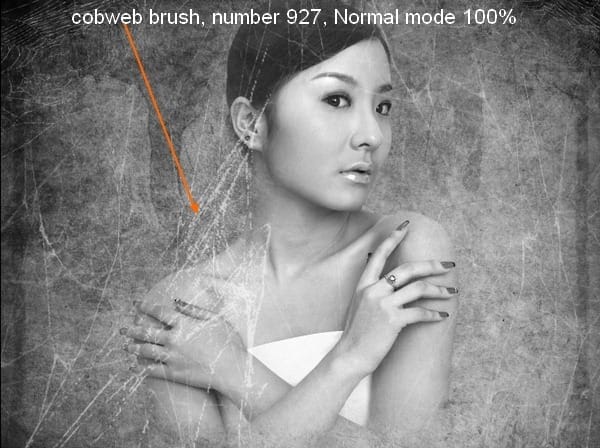
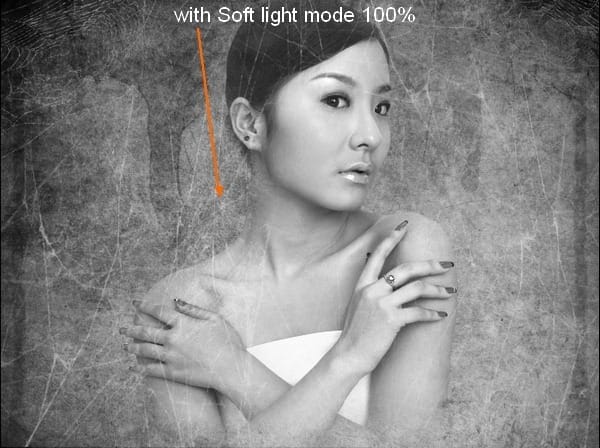
To make model look like being covered by cobweb, make a new layer and choose color for brush as white. Use cobweb brush, number 927 painting on the left side of model then put the mode as Soft light 100% :
Step 13
Use cobweb brushes again with number 968. Paint on the right side of model:

Hit Cmd/Ctrl+T to transform it then hit Warp modes:

Warp it to make it look like covering model shoulder and arm:

Set the mode as Soft light 100% and add layer mask and erase selected part:

Step 14
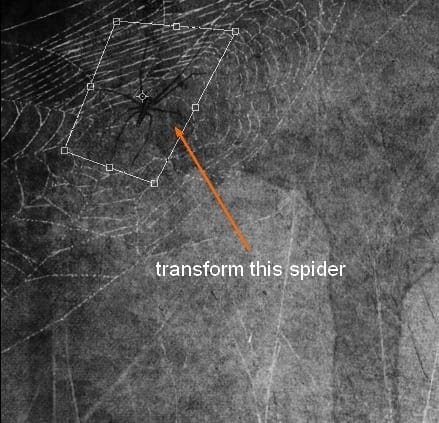
Create a new layer and set foreground color to black. Use a spider from this brush set ( I choose number 1068, you can do your own or you can use spider image) and paint on cobweb area on the top left. Transform it as the screenshot below shows:

Step 15
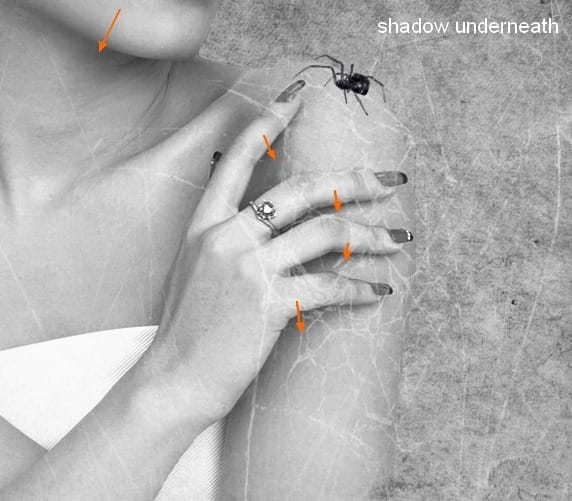
Create a new layer and choose another spider ( number 200). Transform it and place it on model shoulder:

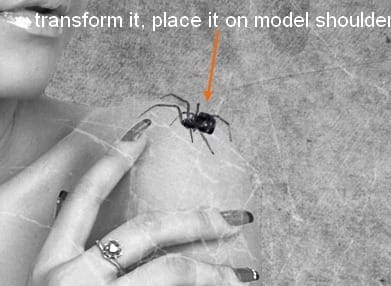
Look at the model you can see show the shadow done. So we should add an underneath shadow for this spider. Right click this spider layer, choose Blending options:


Step 16
Open wire stock. Extract the one you like and move it into our canvas, remember to resize it to fit the size of background:


Add layer mask to erase the part on model:

Step 17
Lower opacity of this wire to 40%:

Add a Hue/Saturation layer with Clipping Mask for this wire, down saturation and lightness:
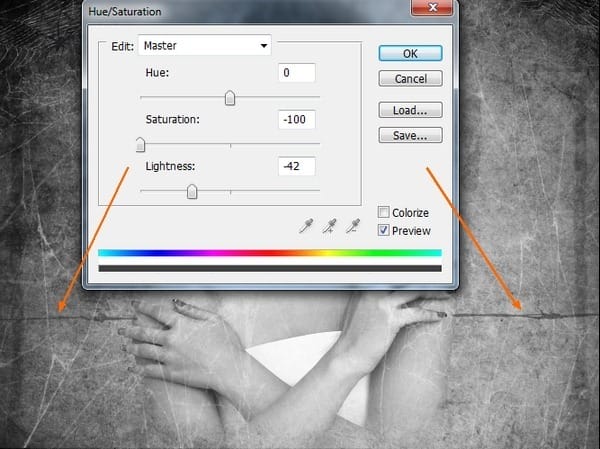
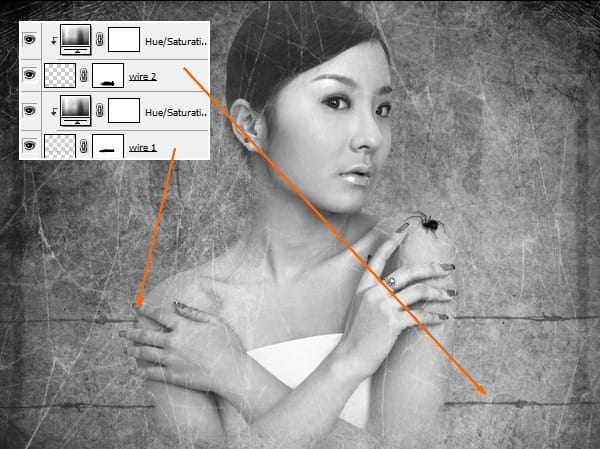
Duplicate this wire and apply Hue/Saturation layer ( Clipping Mask) with the same settings. Move it down, apply Flip Horizontal and Vertical. Name them as “wire 1”, “wire 2”:
Step 18
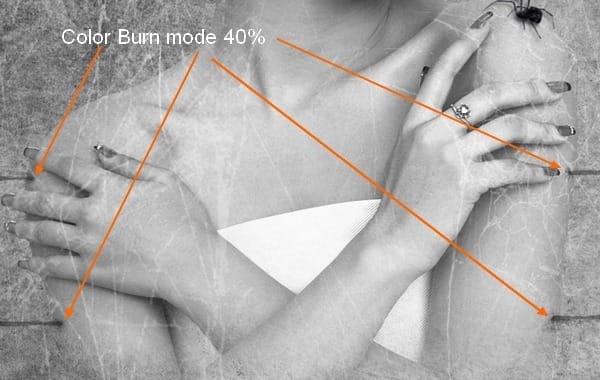
To get a look that the wires stabbing through model arms, make a new layer and I use brush with color #898887. Paint with small brush on intersections between wires and model arms:

Change the mode to Color Burn 40%:
Step 19
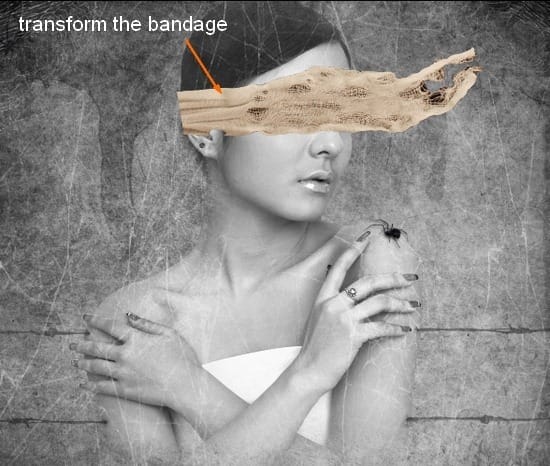
Open bandage stock. Extract one of them and place it into our picture, transform it as shown below:

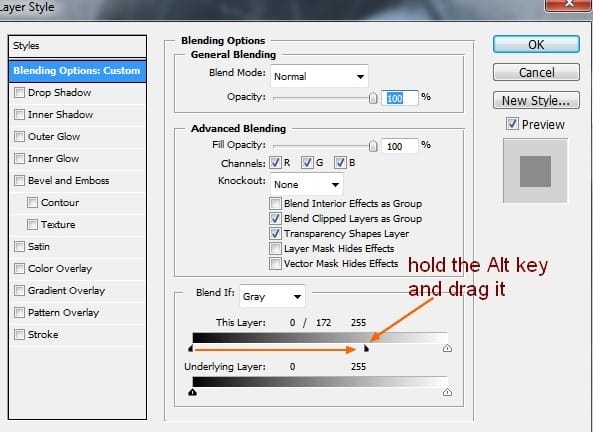
To remove the dark parts of this bandage ( from dark background in original) we’ll use Blend If tool. Right click this layer, choose Blending options. Hold down the Alt key while dragging black button of This Layer to get the value below:
This is what we have so far:
15 responses to ““The Pain” – Create this Eerie Abstract Photo Manipulation”
-
I think the instruction is pretty good however when I enter some of the values for the blood colors they don’t look like yours ….not sure if that is because I have an older version or what.
-
Which step are you not getting the right color for?
-
-
You can turn this artwork into a symbolism of the Hong Kong police force by putting the blood in one eye only.
-
Where is the pain? She looks pretty comfortable! lol
-
cool
-
Wonderful tutorial..Thanks for sharing.
-
your work is amazing …..well done xx
-
it was great.can you please send this instruction to my email.
-
cool!
-
yes girl.
-
wow what a great tut, thank you very much <3
-
Great tutorial, thank you very much :) Easy to follow and an awesome result! Cheers
-
Can’t download the model stock, please reupload it! Thanks for the tut!
-
i love it^^
-
excellent! better remove the earring and ring,redo the nails pure black


Leave a Reply