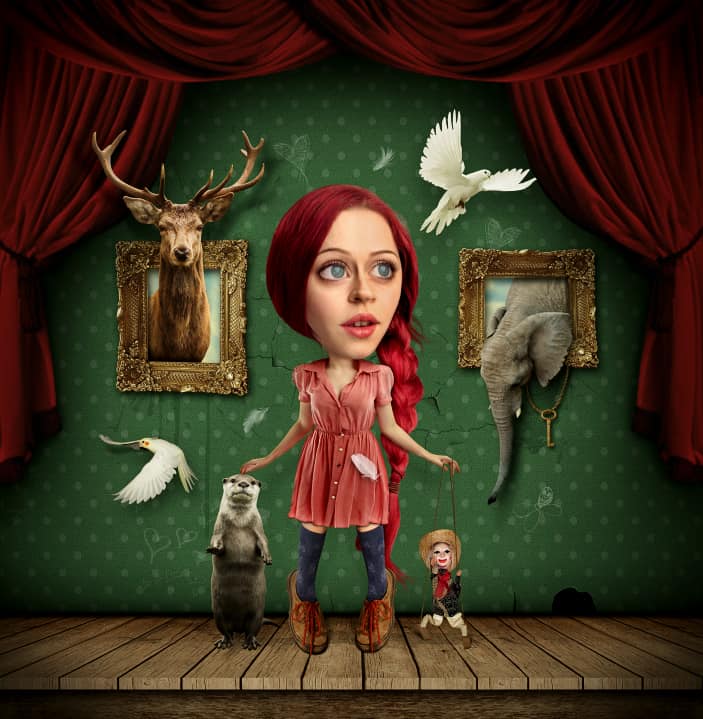
OK, this is the fun part, go to Filter > Liquify. This will call up the Liquify options window. Pick a Bloat Tool, set the Brush Size to about 200 px, and click a few times on her eye to make it bigger. Then move to the other eye and repeat the process.
Now grab a forward Warp Tool, and start pushing parts of the image around to make the initial shape of the head. Vary your brush size and don’t hesitate to zoom way in for best results. Use smaller dimension for the tighter areas and inside details.
Tips: Use Ctrl+Alt+Z to undo steps or hold down Alt key and brush over your image to gradually undo each change you’ve made.


Step 19
To fix the transition between her neck and her head, use a Stamp Tool with 40-50% Opacity on a new layer. Make sure the Sample is set to “Current & Below”. Start painting it carefully click by click, don’t hold your mouse button while doing this, as it tends to become very ugly that way.
We also need to fix the left side of her collar by making a duplicate from the right one. In order to do that, grab a Lasso Tool and start making a selection around the collar. Press Ctrl+J to duplicate that selected area to a new layer, then flip the layer horizontally.
Add a Levels Adjustment Layer and set the settings as indicated in the 2nd image below. Now grab an Eraser Tool, and with the soft-edge brush, carefully erase the part we don’t need.


Step 20
Open the Hair image. Using a Lasso Tool, select the part we’re interested in and paste it in our main canvas. Now we’re going to change the color and the lightness of the hair to match up with the original red color. Press Ctrl+U to call up the Hue/Saturation options window, set the Hue to -30, Saturation to +13, and Lightness to -9.
Try to find a good placement for it, like you see in the 2nd image below, and reshape it a bit using a Warp Transform. Now grab a Brush Tool and start painting using 0% Hardness. See the image below. Green arrows indicate where to put the shadows. When you’re done with it, turn down the layer’s Opacity to 45%.
13 responses to “Transform a Portrait Into a Caricature Artwork”
-
A disgraceful explanation. nothing is understood.
-
Hello, your tutorial sucks. It gives no context to what I am actually doing, and it just expects me to know things not explained. I don’t care about what you are going to say to this because my opinion is already formed that this tutorial is no good.
-
This is super cool. Inspired me to a new piece I’ve been wanting to do for a while. Thanks for sharing :)
-
Really your method is very easy and helpful. I get complete idea to the work. Thanks for your kind post.
-
It’s really great tutorial.but how to do the first step? I mean the Gradient step.
-
1. Create a new layer (Layer > New > Layer).
2. Select the Elliptical Marquee Tool (Press Shift+M until the icon in the toolbar turns into a circular marquee).
3. Go to Select > Modify > Feature. Set the Radius to 150px.
4. Go to Select > Modify > Inverse.
5. Press Shift+Backspace. Set the contents to black.
6. Lower the current layer’s opacity to 21%.
7. Duplicate the layer by pressing Ctrl+J (Cmd+J on Macs).
8. Go to Edit > Transform > Scale. Scale it up by around 137% or larger.
9. Lower the current layer’s opacity to 41%. -
exactly i have no clue
-
-
there is no tutorial on the dall looking girl?
-
how do i find out more about this please…very interested..thankyou
-
where is the add button??
-
GOOD!!
-
How to download this ??
-
wow am so inspire men good tin


Leave a Reply