
Step 4
Select the Brush tool (B) then set the brush size to 100 pixels and hardness to 50%. Paint over the object shown in the image below.Let’s now give a color to our texture. Go to the Layers panel, add a Hue/Saturation Adjustment Layer and set the Hue to +105, Saturation to -22, and Lightness to -29. Then add a Levels Adjustment Layer to darken it a bit by move the Shadows slider to 36 and Midtones to 0.89. You can see all the settings below.


Step 5
To add a pattern to our texture is a bit tricky here. Firstly, we need to create a new canvas with the size of 140 x 140 px with black as a background. Then, using a hard-edge brush with the size of 45 px, draw a white circle in the middle of the canvas and also on one of each corner just like in the image shown below.
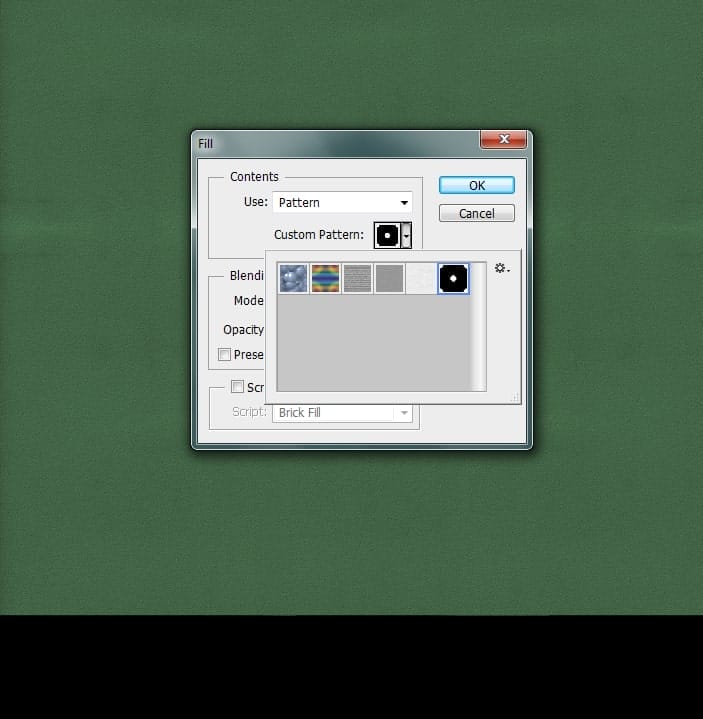
Go to > Edit > Define Pattern, rename the pattern “Polka Dot” and click OK. Now go back to our main canvas, create a new layer and press Ctrl+A to select all, then go to Edit > Fill, choose Pattern from the Content dropdown menu, and select our pattern we’ve just created. Set the layer’s Blending Mode to Screen and the Opacity to 9%.


Step 6
Next, we’re going to create a vignette effect, to add a bit of depth and to make the center of the image stand out. First, create a new layer, then grab an Elliptical Marquee Tool and draw a big circle in the middle of our canvas. Go to Select > Modify > Feather and set the Radius to 150 px. Press Ctrl+Shift+I to inverse the selection and fill it with black. We need also lower the layer’s Opacity down to 21%.
Now duplicate the layer, press Ctrl+T, scale it up about 137% larger and set the Opacity to 41%.


Step 7
Add a new layer and grab a Gradient Tool. Use a linear black to transparent gradient to draw a small gradient in the bottom of our texture, then set the layer’s Blending Mode to Multiply and the Opacity to 25%. Repeat the process, but this time, make the gradient shorter than previously and set the Opacity to 35%.
Now add another new layer, and using a Brush Tool with the size of 25 px and 0% Hardness, create a line along the width of our canvas. Hold down the Shift key while dragging to get a perfect straight line. Then go to Filter > Blur > Motion Blur, set the Angle to 90, Distance to 23 and turn down the layer’s Opacity to 64%.
13 responses to “Transform a Portrait Into a Caricature Artwork”
-
A disgraceful explanation. nothing is understood.
-
Hello, your tutorial sucks. It gives no context to what I am actually doing, and it just expects me to know things not explained. I don’t care about what you are going to say to this because my opinion is already formed that this tutorial is no good.
-
This is super cool. Inspired me to a new piece I’ve been wanting to do for a while. Thanks for sharing :)
-
Really your method is very easy and helpful. I get complete idea to the work. Thanks for your kind post.
-
It’s really great tutorial.but how to do the first step? I mean the Gradient step.
-
1. Create a new layer (Layer > New > Layer).
2. Select the Elliptical Marquee Tool (Press Shift+M until the icon in the toolbar turns into a circular marquee).
3. Go to Select > Modify > Feature. Set the Radius to 150px.
4. Go to Select > Modify > Inverse.
5. Press Shift+Backspace. Set the contents to black.
6. Lower the current layer’s opacity to 21%.
7. Duplicate the layer by pressing Ctrl+J (Cmd+J on Macs).
8. Go to Edit > Transform > Scale. Scale it up by around 137% or larger.
9. Lower the current layer’s opacity to 41%. -
exactly i have no clue
-
-
there is no tutorial on the dall looking girl?
-
how do i find out more about this please…very interested..thankyou
-
where is the add button??
-
GOOD!!
-
How to download this ??
-
wow am so inspire men good tin


Leave a Reply