Professional retouchers use a lot of techniques to retouch skin. In this tutorial, you’ll learn one of the most basic retouching techniques called frequency separation. It’s used as a quick way to airbrush skin without removing too many fine details.
What is Frequency Separation?
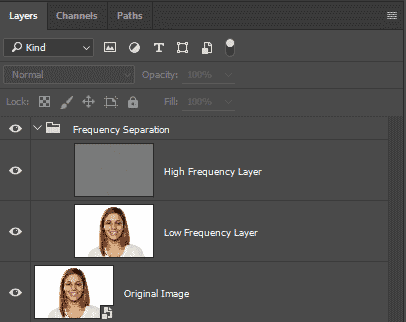
Frequency Separation is a jargon used in the retouching world to describe a skin airbrushing technique. The technique involves splitting an image into two “frequencies”:
- Low Frequency Layer: smoothed layer where only the colors and tones can be seen
- High Frequency Layer: sharpened layer holding the finer skin details
Once the skin is separated into these two layers, you can adjust the layers to create airbrushed skin.
How to Airbrush Skin With Frequency Separation
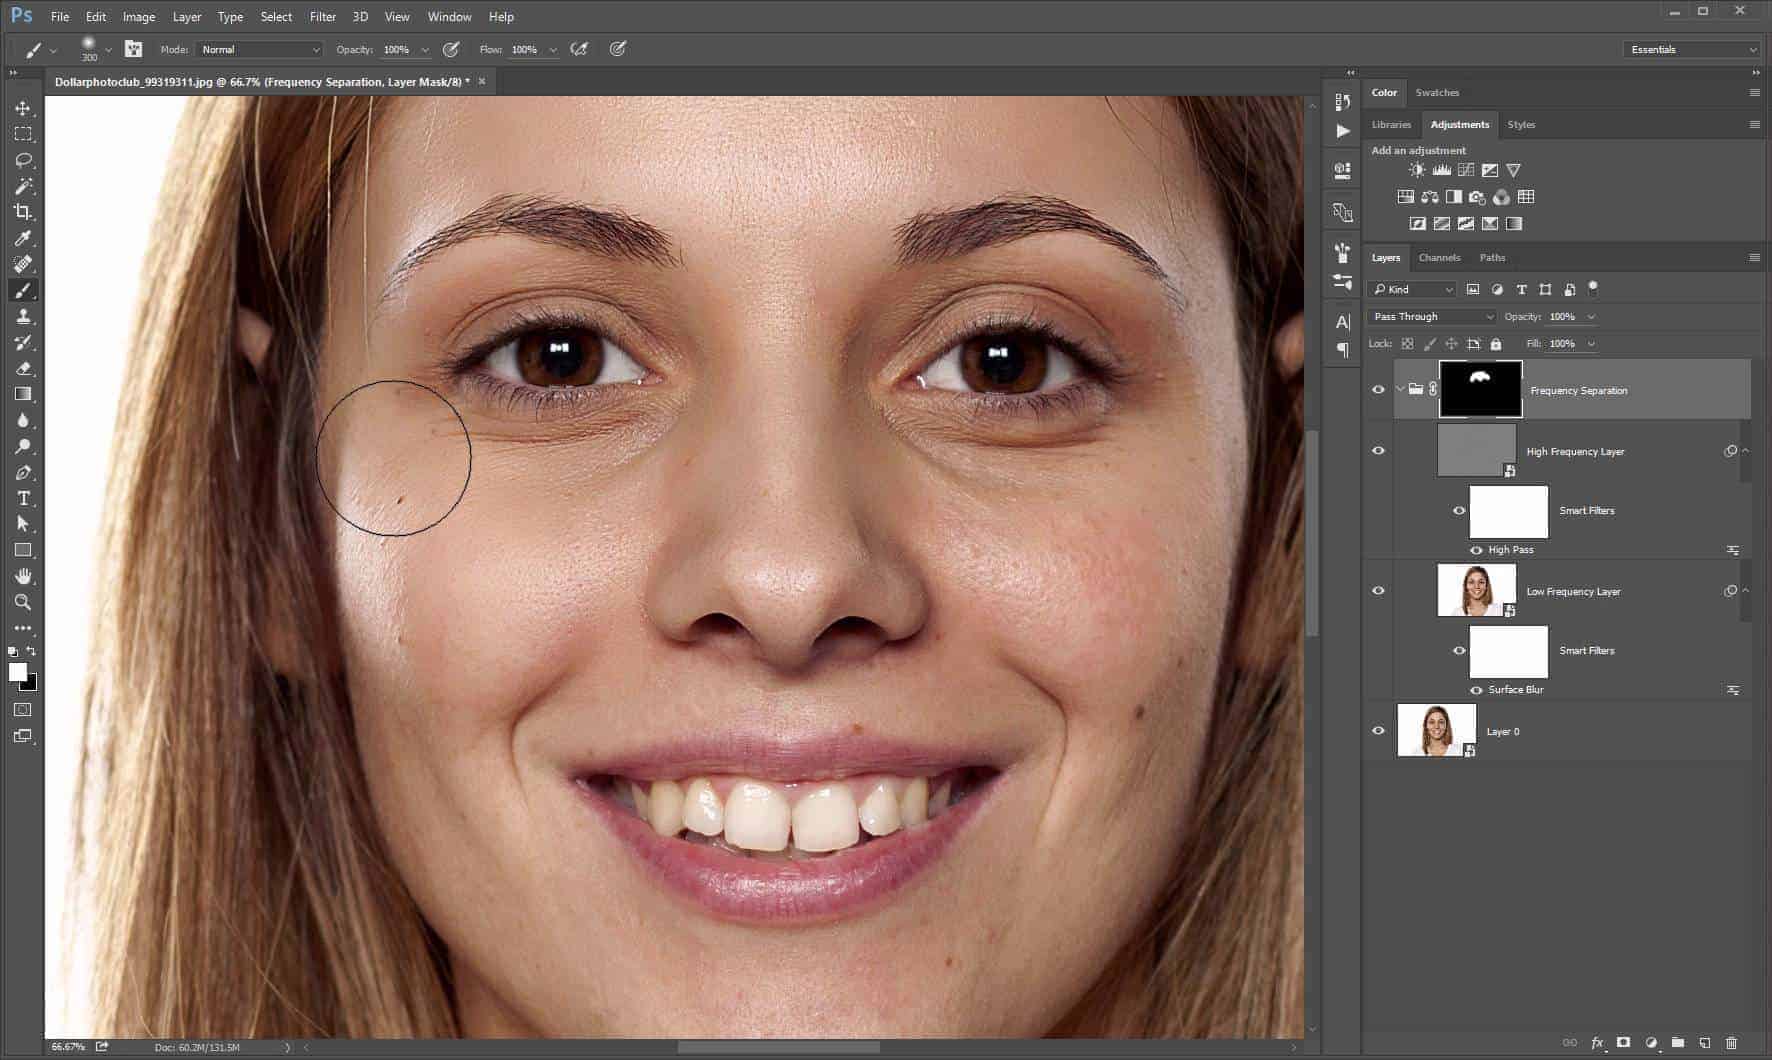
Prepare Your Layers for Nondestructive Editing
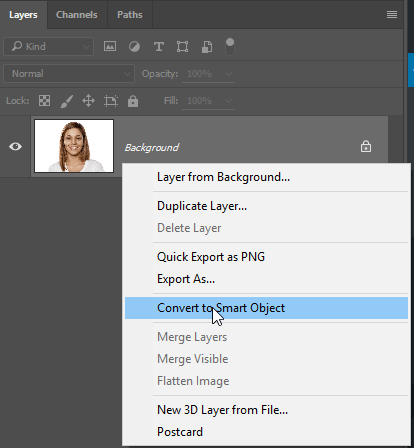
Start by converting your layer into a Smart Object. This will let you change the filter settings later on without undoing a bunch of steps. Open an image then right-click on the layer and select “Convert to Smart Object”.
Next, duplicate the layer twice. Name the top layer “High Frequency Layer” and the second layer “Low Frequency Layer”.

Create the High Frequency Layer
Select the High Frequency layer then go to Filter > Other > High Pass. This filter is used to create a gray layer with an embossed effect of the fine details. Set the Radius to 3 then click OK.

Change the blending mode to Linear Light. Once it’s changed, your image will look incredibly sharp. This layer helps restore the fine/high-frequency details in your photo.

Traditional vs Modern Frequency Separation
Traditionally, the frequency separation technique applies a low-pass filter to the Low Frequency layer. In Photoshop, the low pass filter is called the Gaussian Blur filter and it is the opposite of the High Pass filter. Instead of revealing the fine details, it’s used to blur the image so that only the tone and color are visible.
However, the traditional frequency separation technique doesn’t produce the best results. It creates a diffused-glow effect on the skin which looks artificial. Instead, we’ll be using a newer variant of the frequency separation technique which uses Photoshop’s Surface Blur filter instead of the Gaussian Blur filter. This produces much better results and it helps preserve the edges in your image. Below is a comparison between the two techniques.
25 responses to “How to Airbrush Skin With Frequency Separation”
-

Great Job
-
nice
-
-
I have never used frequency separation like this before. My eyes are opened wider every single day!
-
I have been trying to get this right for so many years. Up close like this, the task looks daunting to me, but you tutorial is really a good one.
-
so amazing!
-
Huh, I have never heard of this technique before and I am wondering why. I would be using this all of the time on the photoshoots that I deal with on a regular basis.
-
Very nice training videos. Very informative! Thanks for the share.
-
Great post here. It’s amazing what can be done with Photoshop. And it’s fun to learn all the tricks of the trade. :)
-
wow its amaizing
-
Very informative!
-
where the download link source image?
May I ask the picture? -
Following so I can watch later
-
…
-
Nice :p
-
Thank a lot for teaching.
-
Very informative! Thanks for the share.
-
IMO anything about story telling is great , who agrees?
-
absolutely correct
-
hi! i downloaded file a couple of times and couldn’t open it with winzip. any suggestions on my next step? thanks
-
link is broken
-
try again…it works for me
-
-
super
-
Interesting :p :)
-
-
Helpful, but I’m not sure how many newbies will be able to reach to the smart layers and frequency layers in the first place. A thorough tut with VO would’ve been great.
Leave a Reply to AnthonyCancel reply