Download Lightroom presets and LUTs, absolutely free. Use the presets to add creativity and style to your photos.
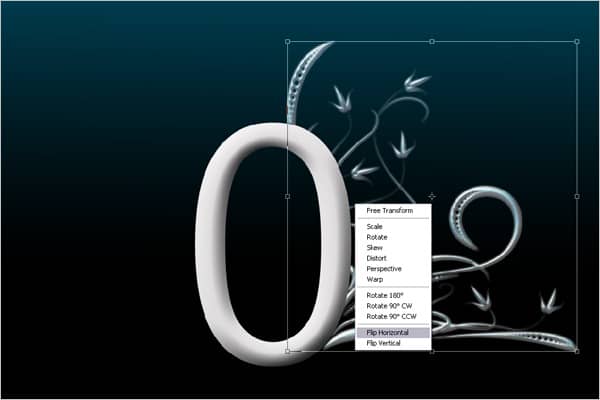

Step 13 - Adding Glow Effect
Add a light effect to the design to make the flowers glow.
Select brush tool (B) > Right click on the screen and choose soft round 45px brush > Make the brush diameter 70px
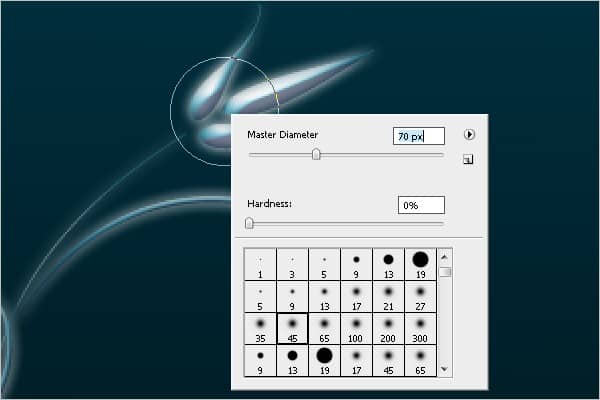
Step 14 - Adding Glow Effect
Once you select the brush, make sure that your foreground color is white. Create a new layer and click on the design.
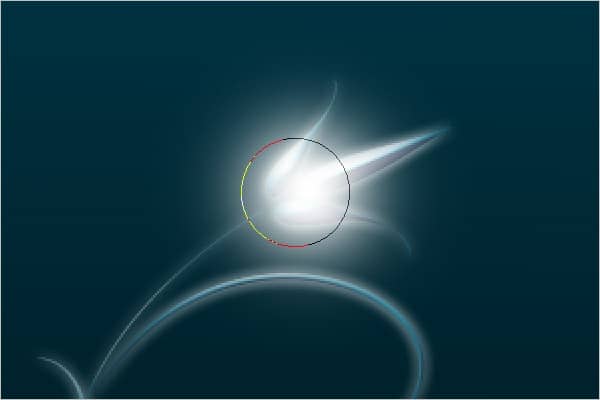
Step 15 - Blending Glow Effect
Blend the glow effect with the design to create a glowing feel. Select the brush layer and choose the blending mode as "Overlay".

Step 16 - Duplicating the Glow Effect
Add the glow effect to the entire flower design.

Final

Step 17 - Creating a Light Glossy Shade
Create a glossy shade above the design to give a glowing effect to the entire image.
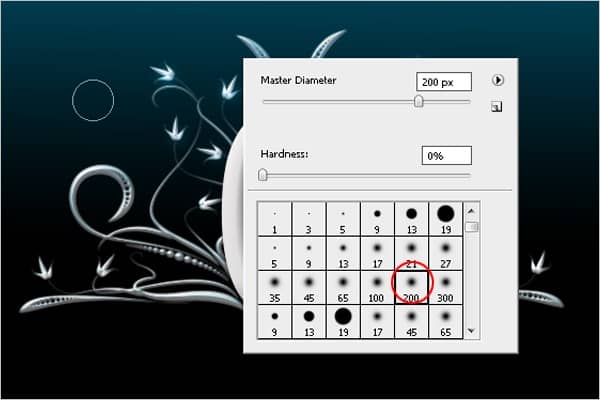
Create a new layer and move it to the top of all the other layers > Choose the brush shown below.
Step 18 - Creating a Path
Create a path using the pen tool (P).

Step 19 - Selecting a Stroke Path
Right click on the screen and select a stroke path.
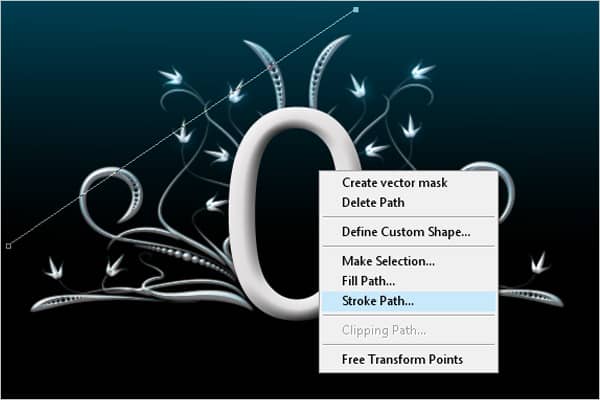
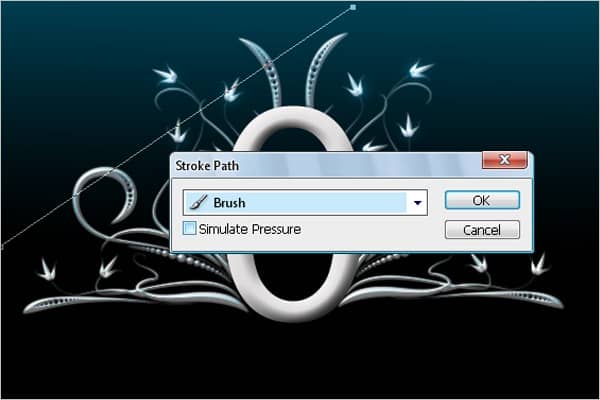
Step 20 - Filling the Stroke Path
Once you select the stroke path, you will get a stroke path option. Select Brush from the option and click OK.
Final

Step 21 - Duplicating the Stroke Path
Once you are done with the stroke path, duplicate the path into multiple copies. Select the stroke layer > Press Alt + Click and drag in the same direction multiple times.

Step 22 - Blending the Stroke Fill
Transform the stroke fill to the entire screen. Select the blending mode from the layer palette as "soft light".

Step 23 - Adding Gaussian Blur
Make the stroke fill a little bit smoother. Select Menu > Filter > Blur > Gaussian Blur > Follow the settings below.
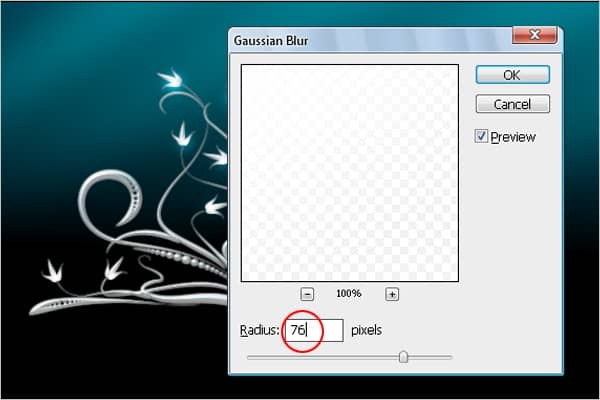
Step 24 - Adding Landscape
Add a landscape to the typo design. You can download the image here:
Once you download the image, insert it on the screen and press Ctrl + T to make it transform. Make sure that this image layer is at the bottom of all the other layers.

Step 25 - Transforming the Image
Select the transform tool, then click and drag it to the entire screen as shown below.

Step 26 - Adding Levels
Do some color setting to the image to add levels. Press Ctrl + L and follow the settings below.
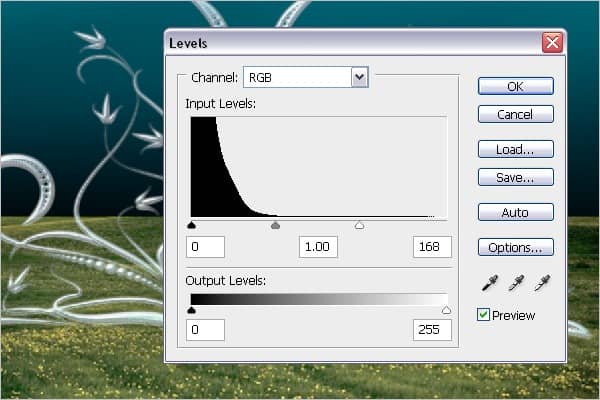
Step 27 - Creating Curves
Make the image dark enough so that when we add light, it gives off more of a glowing effect.
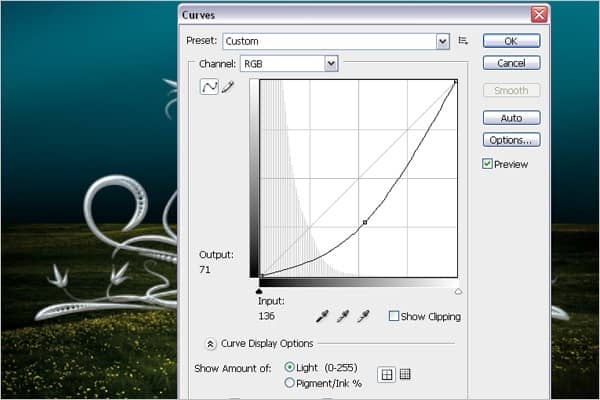
Step 28 - Adding Levels
Add levels to the image to make it a little bit lighter.
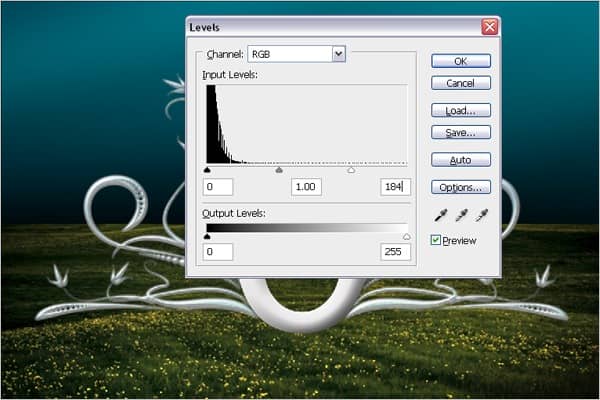
Step 29 - Creating a Path
Create a glowing reflection effect by creating a path. Select the pen tool (P) as shown below.

Step 30 - Filling the Path
Fill the path. Press Ctrl + Enter > Choose the foreground color as white > Press Ctrl + Backspace.


3 comments on “Elegant Typography on Vista Background”
LINK is Broken.
Download Floral Design
http://myphotoshopbrushes.com/brushes/id/244
I have to purchase the grass image?
Gorgeous but it will not appear good on non symmetrical letters.