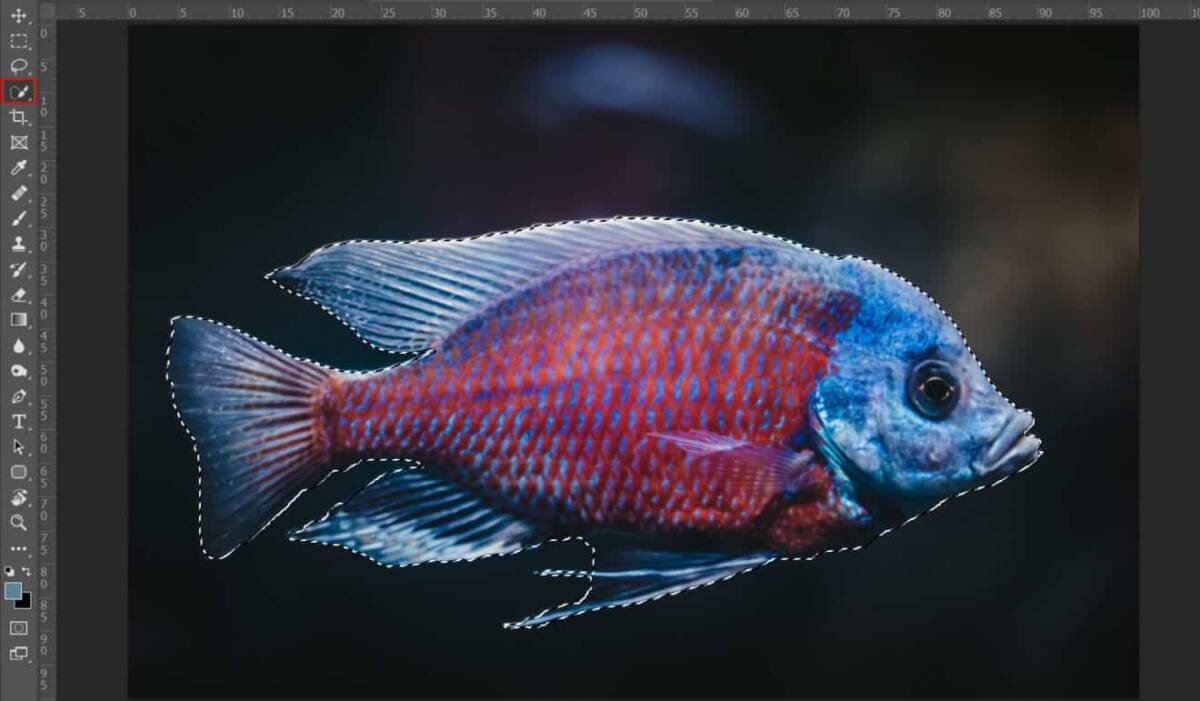
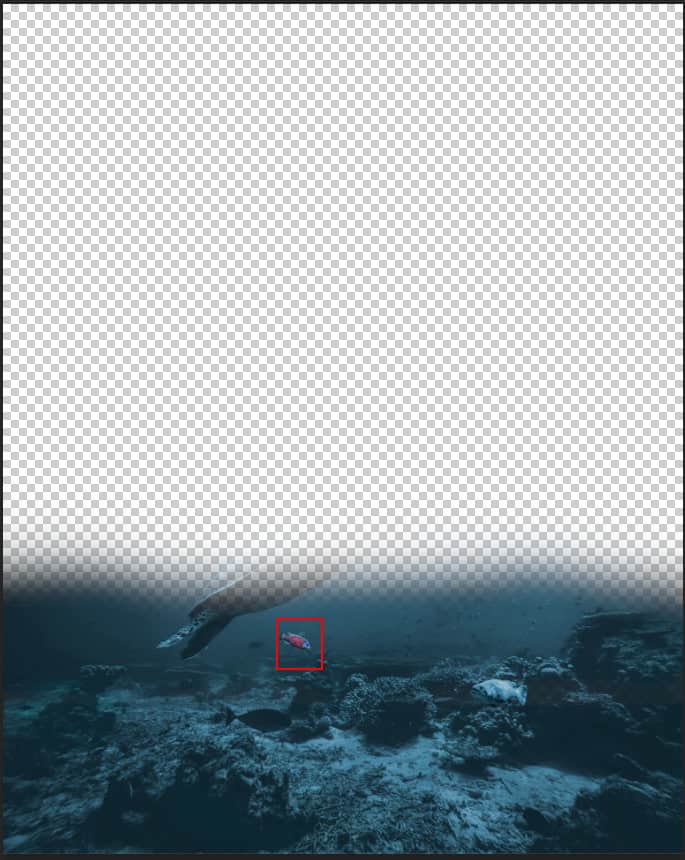
Step 12
Add Adjustment Layer “Hue/Ssaturation” and set Opacity to 50%.

Step 13
Add Adjustment Layer “Curves” and press Ctrl/Cmd + I to invert. Then use Brush Tool(B) Soft Round with foreground color white and paint on upper body of fish.

Add Adjustment Layer “Curves” and press Ctrl/Cmd + I to invert. Then use Brush Tool(B) Soft Round with foreground color white and paint on lower body of fish.
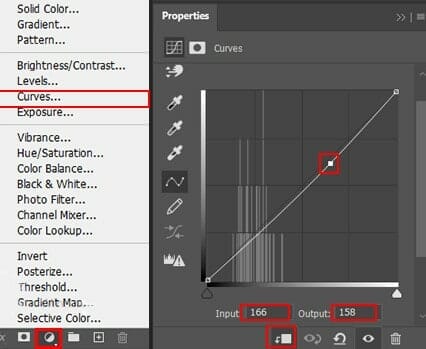
Step 14
Now create a new layer and make it Clipping mask . Then use Soft Round brush tool with foreground color white and paint to upper body of fish. Look at picture below, Opacity reduce to 20%.

Step 15
Now lets add some darks ond lights. First create another layer and use Brush Tool(B) Soft Round with foreground color Black and paint on Left side of photo. Blend mode change to Soft Light with Opacity 10%.

Then create another layer and use the same settings. Use Brush Tool(B) Soft Round with foreground color White and paint on right side of photo. Blend mode change to Soft Light with Opacity 20%.

Step 16
Next, place City Go to File > Place and select City. Then place it to our work canvas. Then position the image with the transform tool (Ctrl / Cmd + T). Hold Alt + Shift and rasterize like the image below. In Photoshop CC only hold Alt to rasterize all sides together.


Create a layer mask and use Soft Round brush tool with foreground color black and paint on water under city to delete it.

Step 17
Add Adjustment Layer “Curves”

Step 18
Add Adjustment Layer “Color Balance”
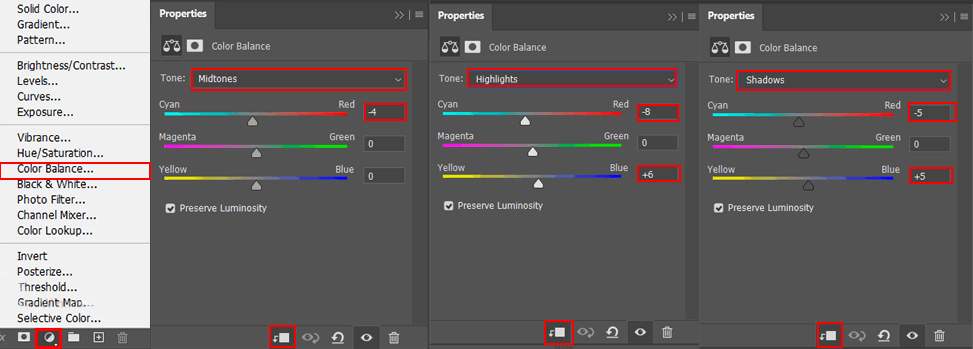
Step 19
Add Adjustment Layer “Curves”

Step 20
Now go to open Sky. File > Open and select Sky. Use Rectangular Marquee Tool(M). With the Rectangular Marquee tool, drag over the area you want to select. Hold down Shift as you drag to constrain the marquee to(release the mouse button before you release Shift to keep the selection shape constrained).
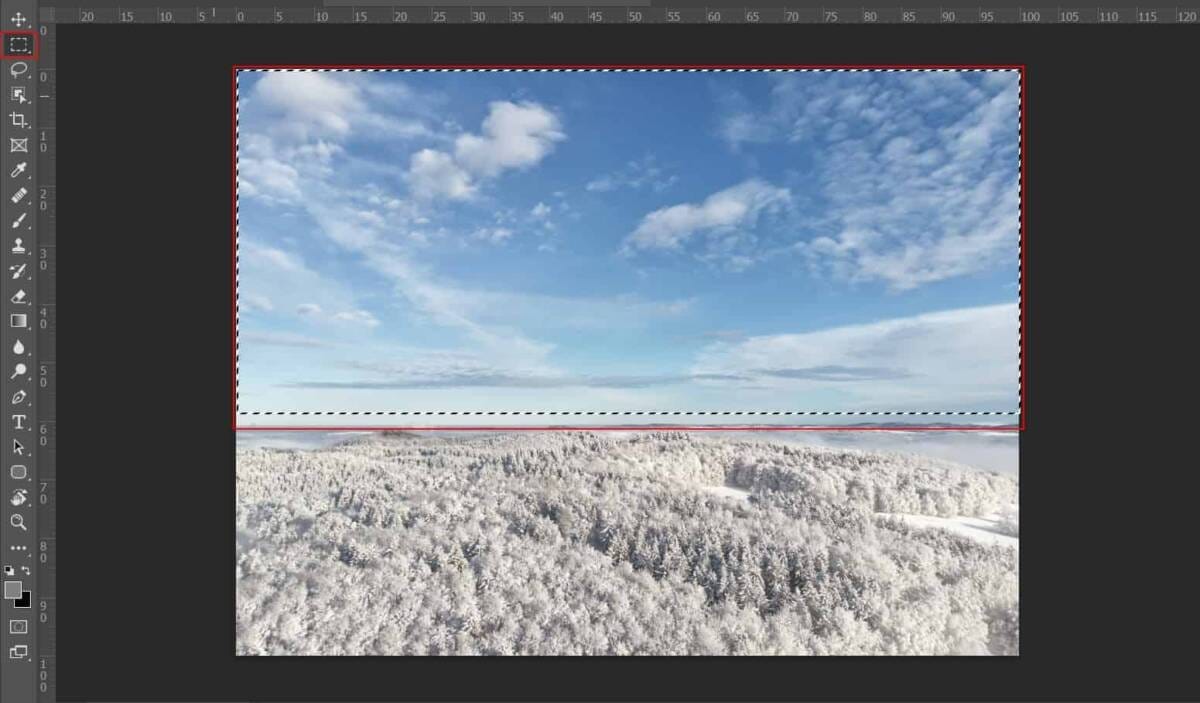
After the selection area has been created, simply copy (Ctrl / Cmd + C) and Paste (Ctrl / Cmd + V) it to our work canvas. Then position the image with the transform tool (Ctrl / Cmd + T).

Now use Quick Selection Tool(W) and start selecting Buildings , then click create layer mask. Opacity set to 52%.
One response to “Create Underwater Atlantic City Photomanipulation”
-
nice


Leave a Reply