One of Photoshop’s new features is ‘artboards’. If you’re familiar with Adobe Illustrator, you may already have an idea of how artboards can benefit you. Artboards are a great tool for more efficient project organization, and are also helpful when you need to export multiple files that are part of one project. Whether you are familiar with artboards or not, this tutorial will show you how to use them in photoshop.
What you’ll be creating
Artboards are very versatile. My hope for this tutorial is not so much to help you create a specific project, but how to utilize the features effectively. In order to demonstrate how artboards work, I will be creating a project that includes artboards for some business card designs. We will create an artboard for the front design, the back design, as well as the mockup. You can follow along, or apply the principles to your own project. Below I list some templates you can work with if you wish to follow along. Please note that artboards are currently only available in Photoshop CC 2015.

Tutorial Resources
- Business Card Template – Hongkiat
- Business Card Mockup РJos̩ Polanco
Step 1
You can create a new artboard project from scratch, or convert an existing photoshop file to an artboard project. Because the mockup we downloaded is already a photoshop file, we’ll start by converting it to an artboard project.
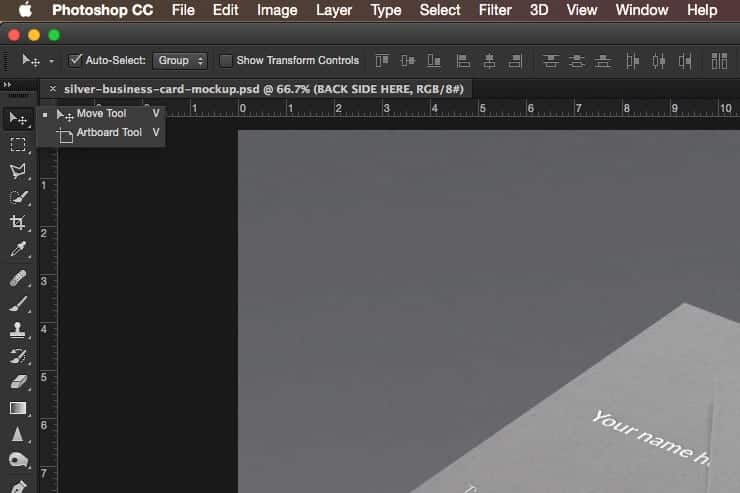
First, open the mockup you downloaded. To turn this project into an artboard project, all you need to do is create an artboard. We do this with the artboard tool, which is nested under the move tool in the tools panel. You can either press (V) to select the move tool, then Shift + (V) to switch to the artboard tool, or click and hold on the move tool, and click ‘Artboard Tool’ in the dropdown.

Step 2
With the artboard tool selected, drag a box around the part of the mockup you want to be visible in the artboard. You can select the entire mockup, or a cropped section of it. For this example, it would be best not to select an area larger than the mockup.

Step 3
Congratulations! You’ve just created your first artboard. You should now notice a couple of changes in the appearance of your project. You’ll see a label over the mockup on your canvas, as well as a section in the Layers panel that reads ‘Artboard 1’, as seen in the image below. This represents your artboard.
5 responses to “Working with Photoshop’s New Artboard Feature”
-
Good one
-
Great. Artborad giving you an infinite canvas
-
Can this be done in CS5?
-
Hey Terry,
Artboards are a brand new feature in CC 2015, so, this cannot be replicated in CS5 :/ Sorry!
-
-
nice

Leave a Reply to Santanu SitCancel reply