In this tutorial, we will learn how to create an eerie depiction of a dream through photo-manipulation. We are going to learn how to create a seamless surreal image of a mysterious window-headed man in a haunting, desolate road. We are going to learn the process of creating depth of field using a few Blur tools. We will learn how to create light and darkness to make the background look seamless. We are going to learn how to use textures and give life to our image, and we are going to learn how to create a moody, black and white tone using a few adjustment layers.
Preview of Final Results
![image002[1] image002[1]](https://cdn.photoshoptutorials.ws/images/stories/7bb421a55fea_14F/image0021.jpg?strip=all&lossy=1&webp=82&avif=82&w=1920&ssl=1)
Resources
Road 5 – Nighfate stock(Alternative)- Canim Lake 4 – Little stock
- Window – Mehrunnisa stock
- Cliff type 2_2 – The Strawberry Tree
- Suit Stock 2 – rhyfelwr stock
Swing Stock 2 – Shoofly-Stock(Alternative)- Metal Texture 15 – Wojtar stock
- Paper Texture 1 – Wojtar stock
Step 1: Create a New Image File
Let’s start, first create a new image file, go to the Menu bar and click File > New, and then input the following values on their respective fields:
- Width: 3000px
- Height: 3000px
- Resolution: 300pixels/inch
- Color Mode: RGB Color; 8 bit
- Background Contents: Transparent
Step 2: Create the Road
In this step, we will be creating the foreground of our picture which is the road. To begin, open the image “road 5” by night fate stock. Once you have the image is open, remove the watermark by cropping the image. To do that, activate the Crop tool by pressing Ctrl/Cmd + C on your keyboard. See the images below:
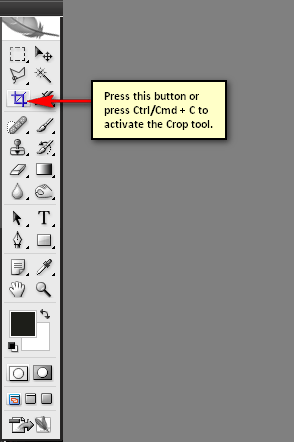
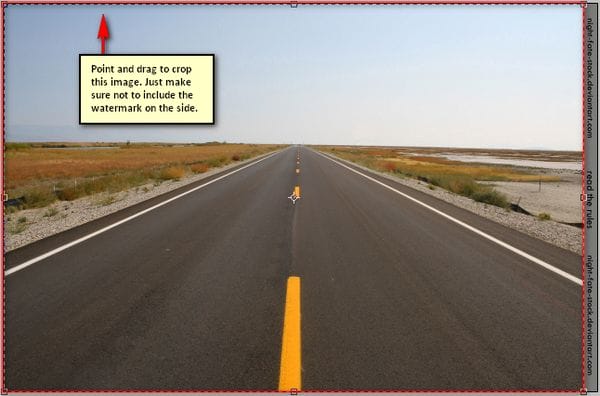
Once you’ve cropped it, activate the Move tool by pressing V on your keyboard. After activating it, left-click on the image and drag it to the 3000x3000pixel canvas. Move and position the road on the canvas as shown on the image below:
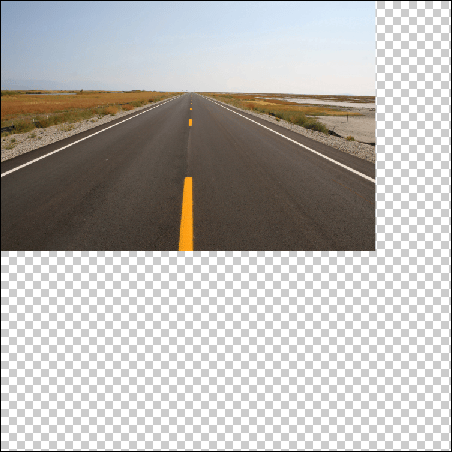
We positioned it there so it would be easier for us to resize that image into a square. Now, before resizing let’s rename this layer to “road”. To rename a layer, simply double-click on the words: “layer 1” (that is our road image) to prompt a text box to appear. Once that appears, you may now rename the layer.
After that, we will now proceed to resizing. First, activate the Transform tool (Ctrl/Cmd + T). Activating this will prompt little squares to appear on each side of the image. Once done, right click on the canvas to bring up the contextual menu and choose “Rotate”. The next step is provided on the image below:
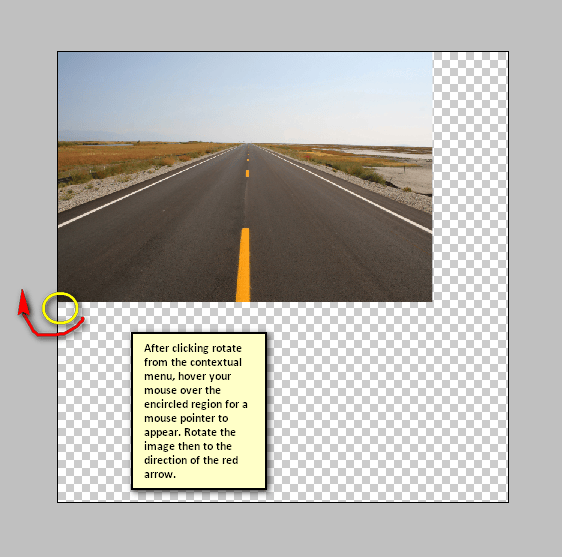
The result should appear like this:
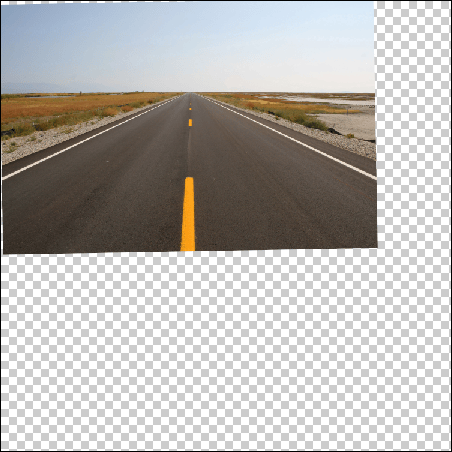
Don’t worry about its uneven sides, we’re going to fix that later.
Now, activate the Transform tool again (Ctrl/Cmd + T) because we’re going to resize the image. Drag the little square on the lower right-hand portion of the image to the bottom to fill the canvas and do the same thing on the top to fill the uneven portion. See image below:
5 responses to “Create a Mysterious and Eerie Surreal Image in Photoshop”
-
These instructions are huge and I appreciate how detailed they are. Thank you for sharing. :)
-
This is an oldie! LOL I think I’ll give it a go! Thank you!!
-
It is. We have a lot of tutorials that are still good but just need a bit of update/fixes with the resource links :)
-
-
i love photoshop
-
nice work


Leave a Reply to bephotCancel reply