Make your artwork look like they're from an alternate universe. These Cyberpunk presets work with Photoshop (via the Camera Raw filter) and Lightroom. Download all 788 presets for 90% off.
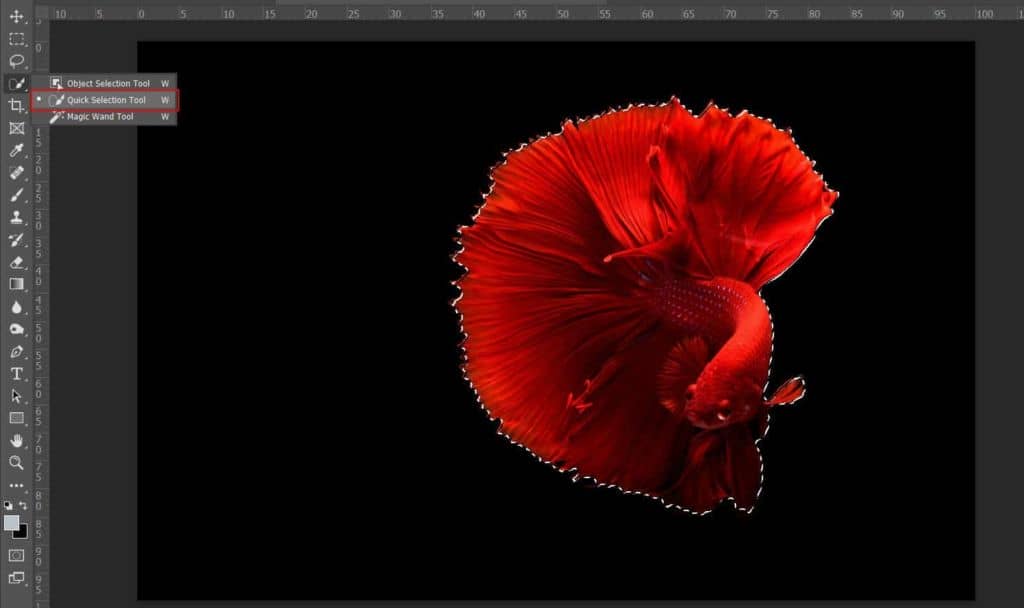
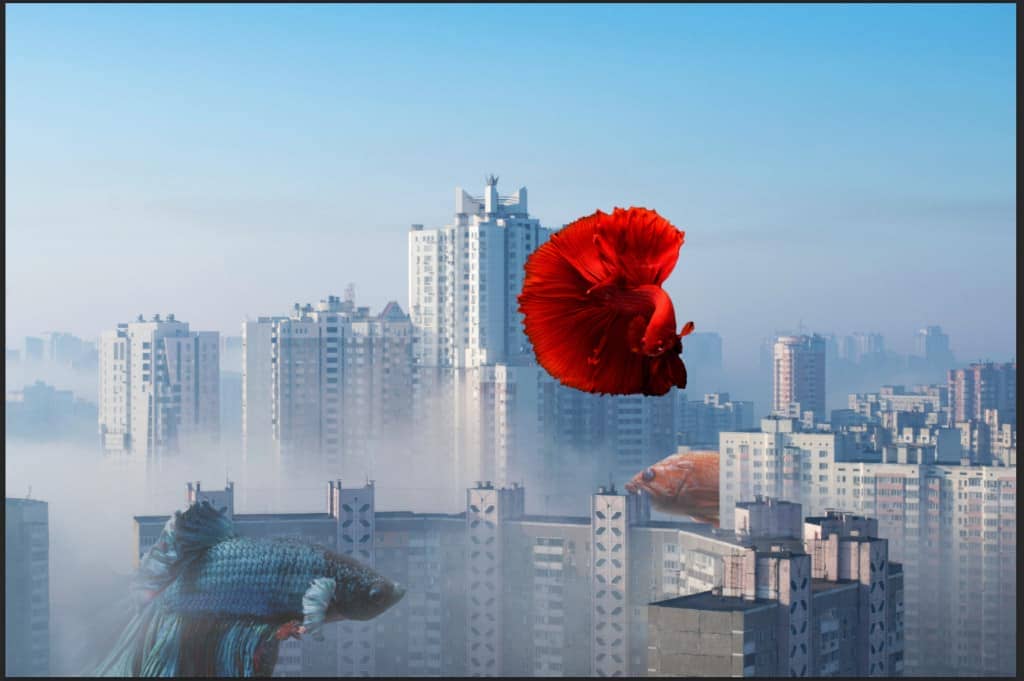
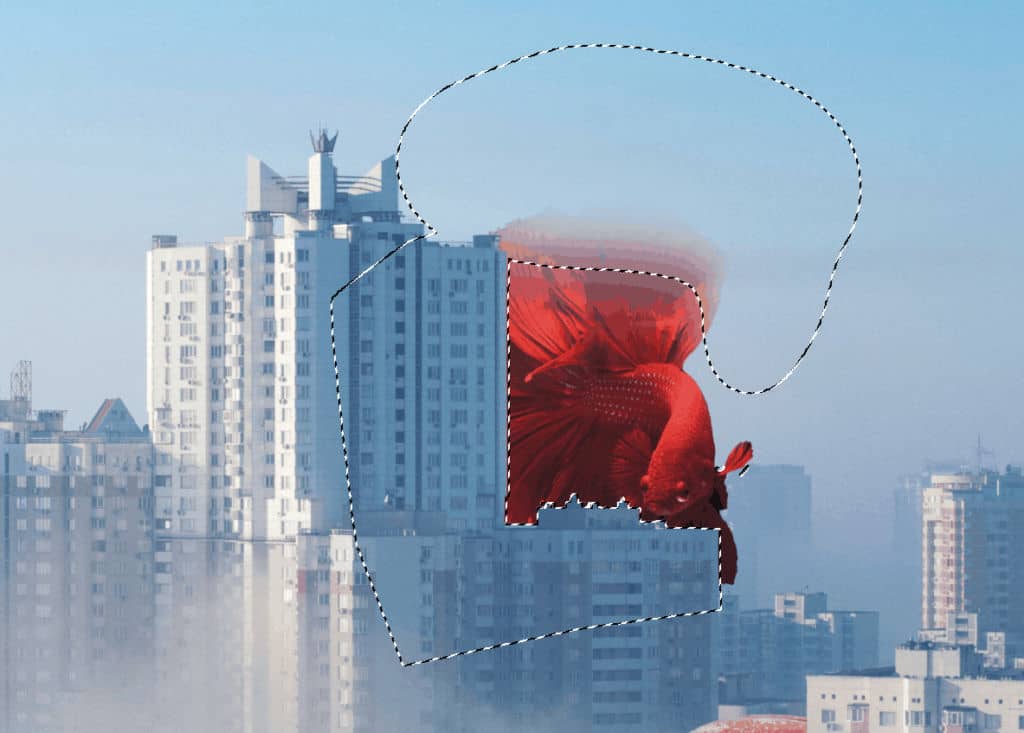
Then create a layer mask and use Brush Tool(B) Soft Round with foreground color black and paint to delete some parts.
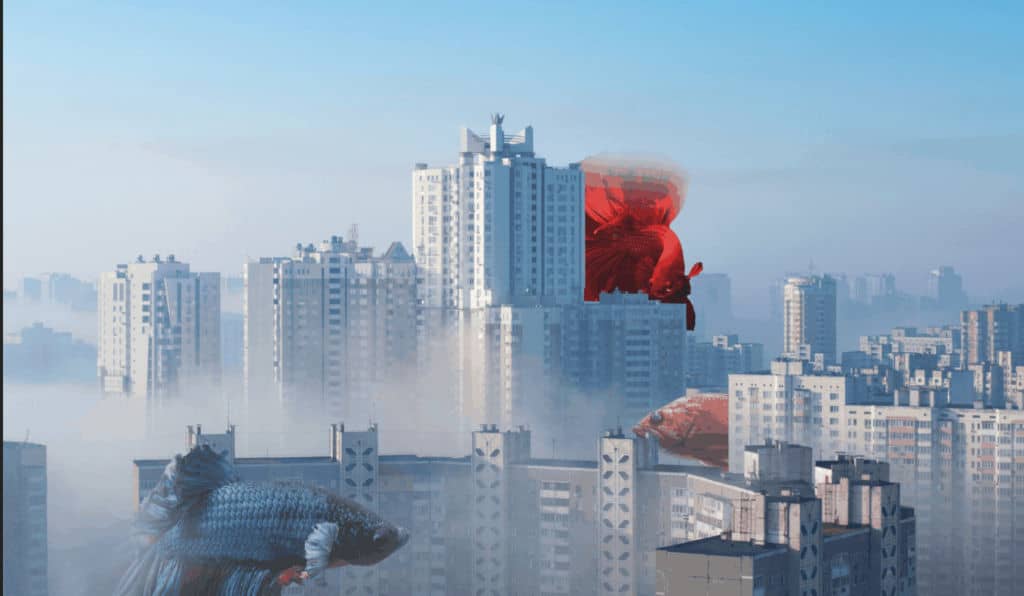
Step 12
Add Adjustment Layer "Levels"
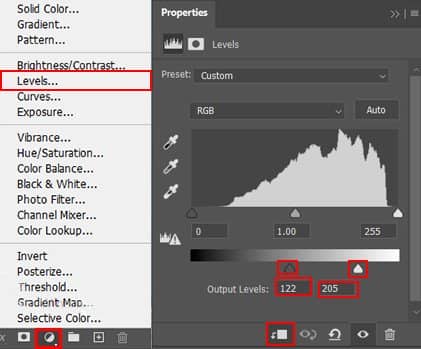
Step 13
Add Adjustment Layer "Black and White" Opacity set to 45%.
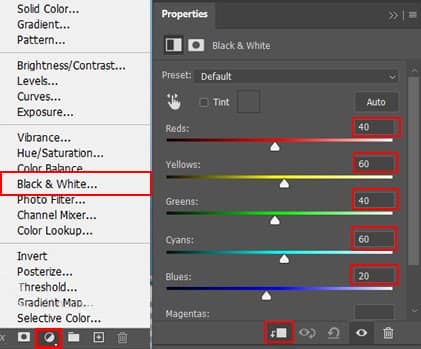
Step 14
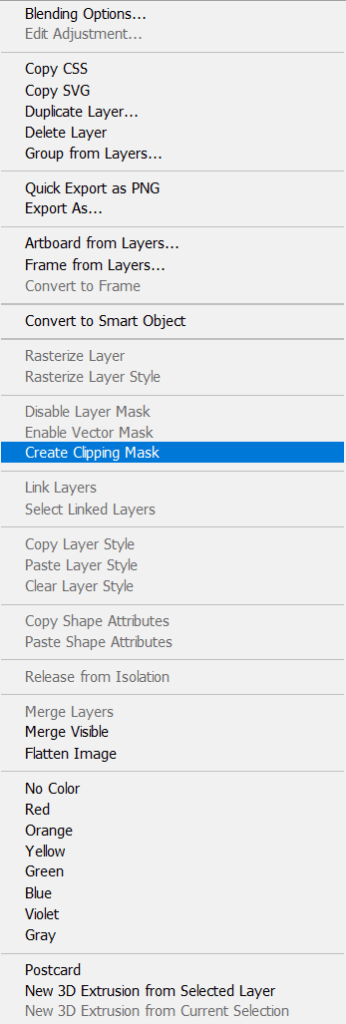
Next create a new layer and use Brush Tool(B) Soft Round with foreground color#a5c4d8 and start painting on Fish. Brush Flow set to 10%. Right click on layer and set Clipping mask.
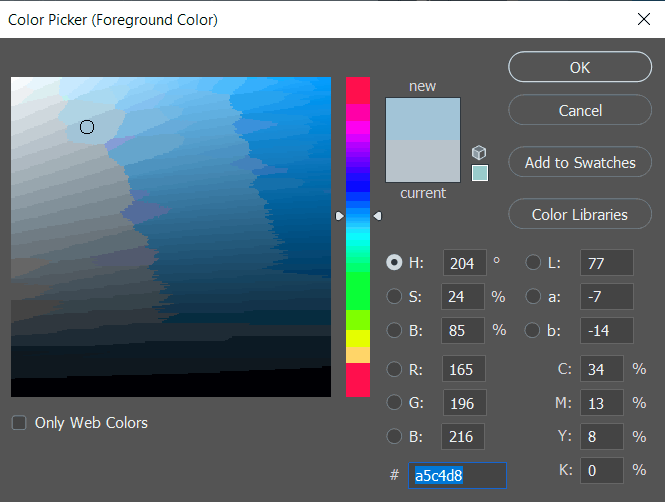

Step 15
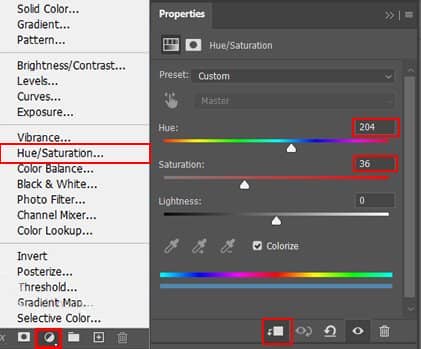
Add Adjustment Layer "Hue/Saturation" Opacity set to 36%.
Step 16
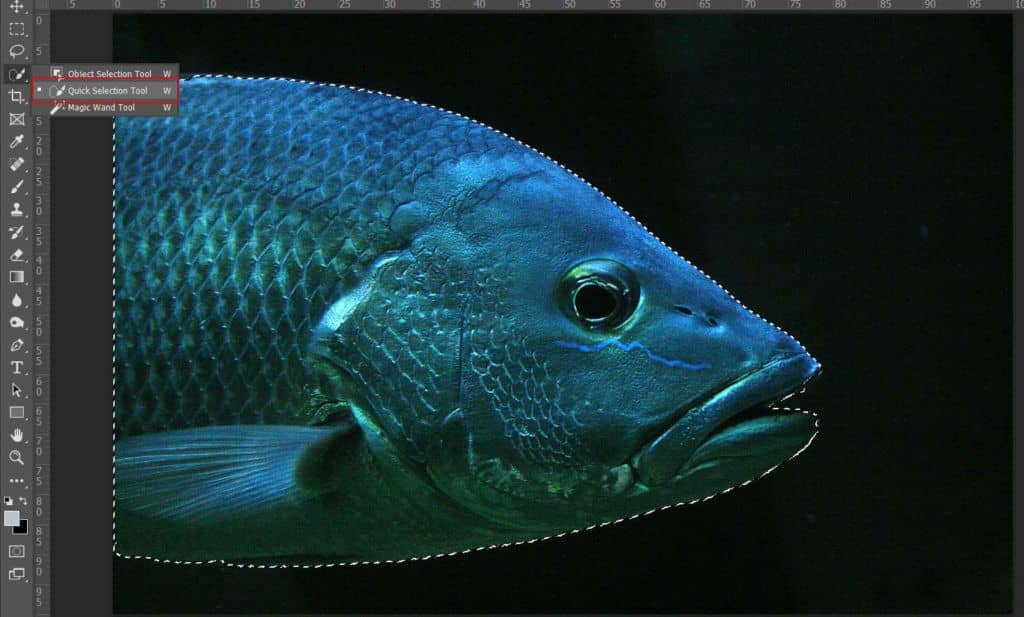
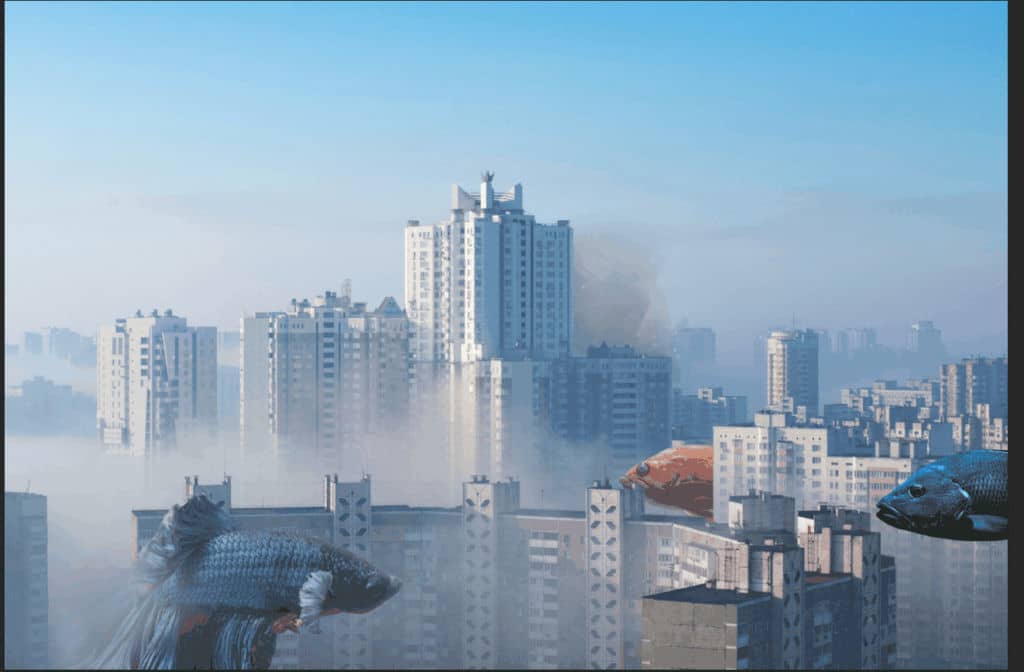
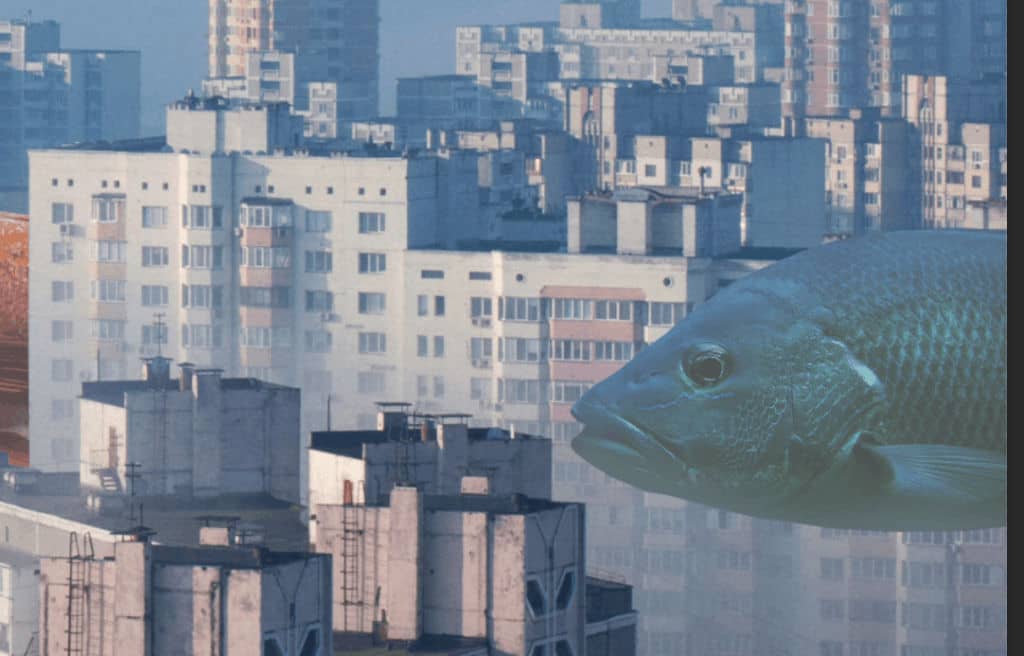
Next we will open the last Fish. After you open the image, use Quick Selection Tool(W) and start selecting the Fish. After the selection area has been created, simply copy (Ctrl / Cmd + C) and Paste (Ctrl / Cmd + V) it to our work canvas. Then position the image with the transform tool (Ctrl / Cmd + T). Hold Alt + Shift and resterize like image below. In Photoshop CC only hold Alt to resterize al sides together.
Step 17
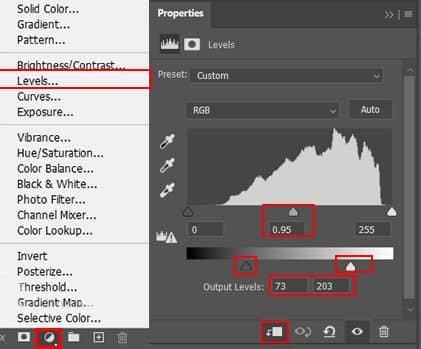
Add Adjustment Layer "Levels"
Step 18
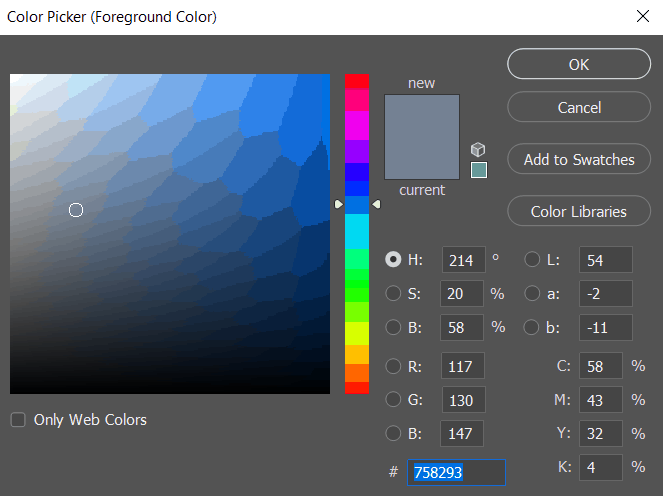
Create a new layer amd make it Clipping mask. After that use Brush Tool(B) Soft Round with foreground color #758293 and paint around fish.
Step 19
Add Adjustment Layer "Black and White" Opacity set to 25%.

Step 20
Now, go to File > Open and select Boy. Then use a Pen Tool(P) and start selecting. When we finish the selection press right click on mouse and “Make Selection” then create layer mask..The simplest path you can draw with the standard Pen tool is a straight line, made by clicking the Pen tool to create two anchor points. By continuing to click, you create a path made of straight line segments connected by corner points.
- Select the Pen tool.
- Position the Pen tool where you want the straight segment to begin, and click to define the first anchor point (do not drag).
- Click again where you want the segment to end
- Continue clicking to set anchor points for additional straight segments.
- The last anchor point you add always appears as a solid square, indicating that it is selected. Previously defined anchor points become hollow, and deselected, as you add more anchor points
- Complete the path by doing one of the following:
- To close the path, position the Pen tool over the first (hollow) anchor point. A small circle appears next to the Pen tool pointer
 when it is positioned correctly. Click or drag to close the path.
 - To leave the path open, Ctrl-click (Windows) or Command-click (Mac OS) anywhere away from all objects. To leave the path open, you can also select a different tool.
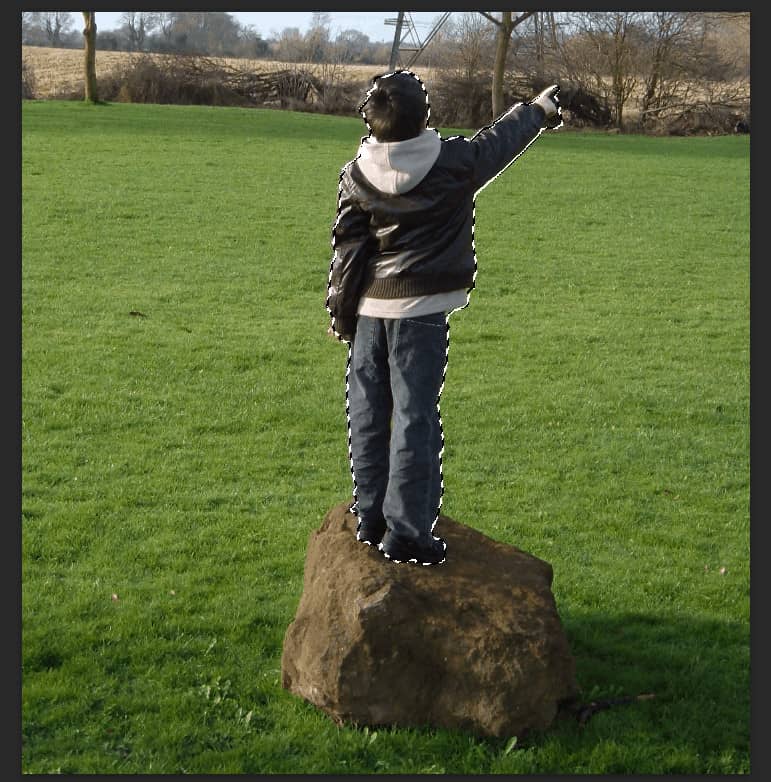
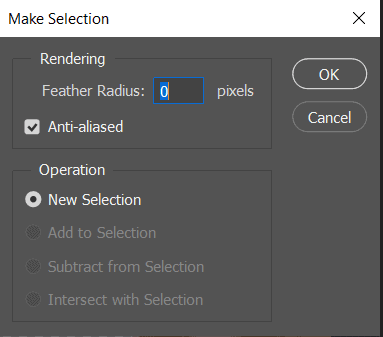
Feather Radius set to 0px and check Anti-alliased. After the selection area has been created, simply copy (Ctrl / Cmd + C) and Paste (Ctrl / Cmd + V) it to our work canvas. Then position the image with the transform tool (Ctrl / Cmd + T). Hold Alt + Shift and resterize like image below. In Photoshop CC only hold Alt to resterize al sides together.
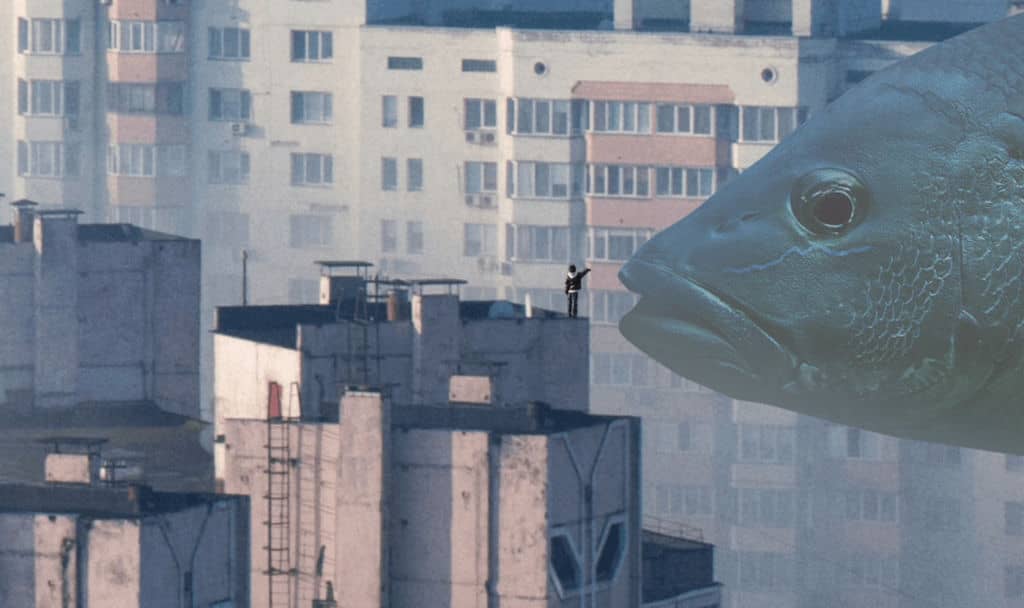
Step 21
Add Adjustment Layer "Levels"
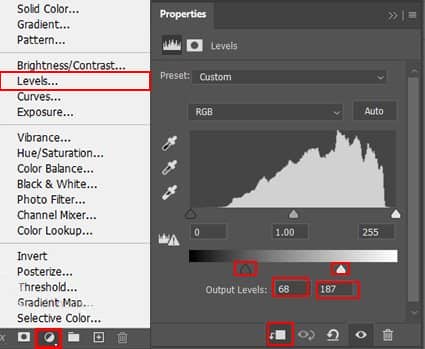
Step 22
Create a new layer and make Clipping Mask. Use Brush Tool(B) Soft Round with foreground color #b0b0b2 and flow 10%. Then start painting, look at picture below.
