Learn how to create a retro-style wallpaper with this Photoshop tutorial! This tutorial will show you how to create a wallpaper with shiny textures, loads of lens flares, and bright colors. Have fun!
Preview of Final Results

Tutorial Resources
Step 1
Create a new document in Photoshop. Make it 1920 by 1200 which is a standard HD Wallpaper size. Now fill the document with black.
Step 2
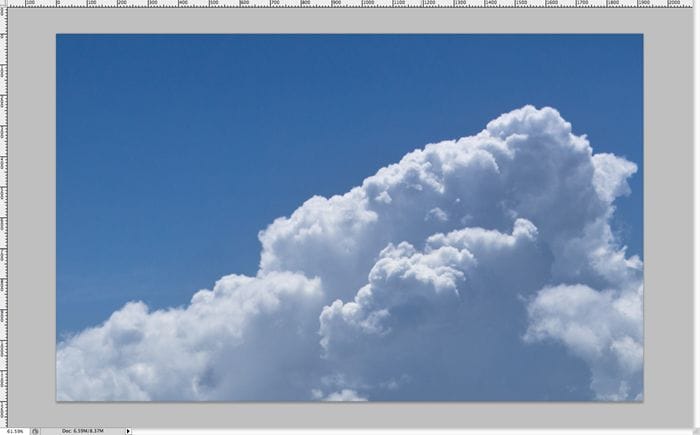
Now open up your mountain/clouds picture and select the bit of clouds that you want in your background, or choose another background that you’d like for your wallpaper.

Step 3
Copy and paste the image you’d like (clouds in this case) into your wallpaper.
Step 4
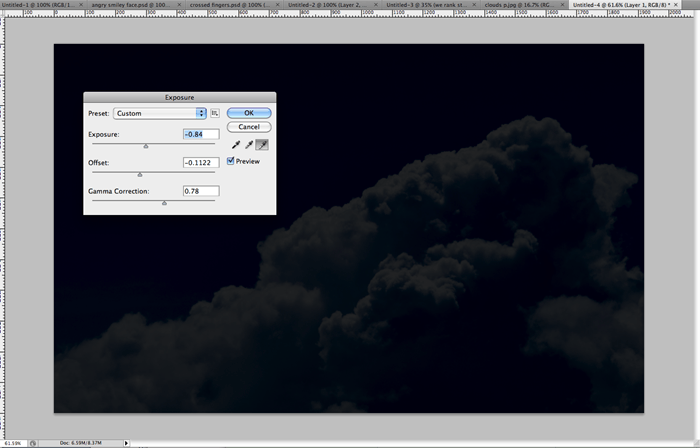
Go to Image>Adjustments>Exposure and bring down the exposure and the offset and bump up the gamma a bit. This will creat some contrast and darken up your image so it’s punchy.
Step 5
In a new layer, use your marque tool and create a rectangle and fill it with white.

Step 6
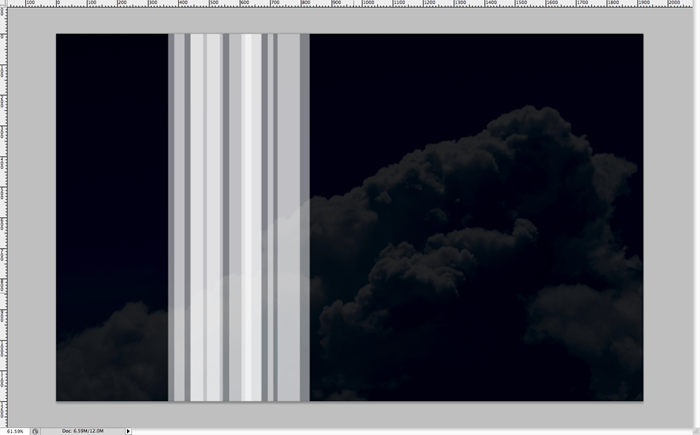
Duplicate this white rectangle layer many times and start lowering the opacities at random levels. This will create something like the image bellow.
Step 7
When you’ve made about 10-20 dupicated layers with random opacities then go ahead and group them (highlight them all and hit ctrl/cmd + G) and then dupicate the group a couple of times to save you time. Then simply spread out the groups of rectangles by clicking and dagging them so they look randomish. This step is purely to save you time, and you can skip it if you want the ultimate random look to your wallpaper, but it will just take you longer.
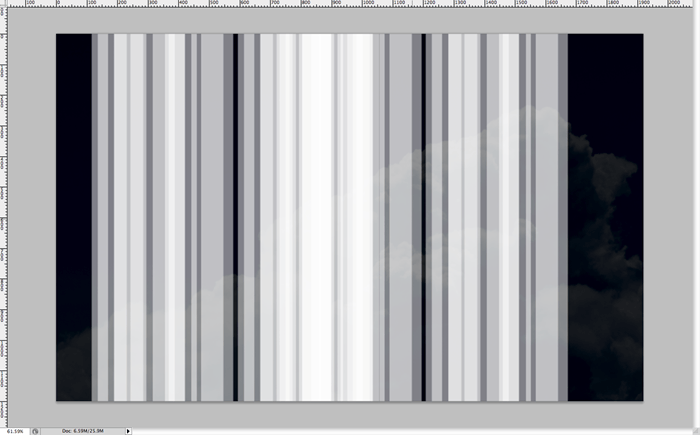
Step 8
When you’re satisfied with your rectangle shape collage, form one final group with all your single rectangle group layers. If you’ve created multiple subgroups, then just group them all so that you can hit ctrl/cmd + T and rotate them all 45% to one side like so.
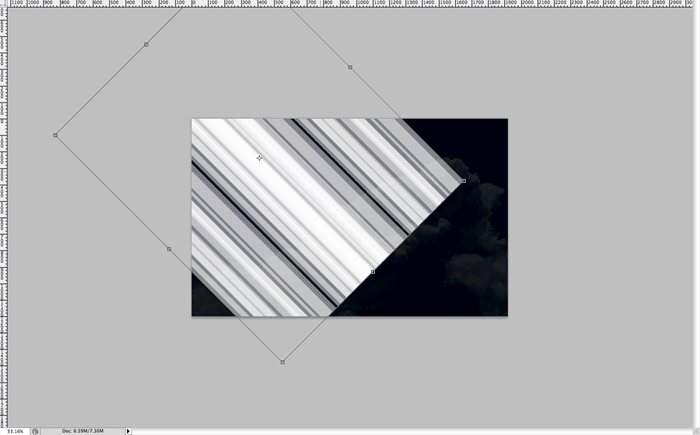
Step 9
This design that we’re doing is a “V” shape, so you need to highlight exactly one half of the wallpaper (to the opposite side you rotated your rectangle group) and create a mask. This will hide the portion that you haven’t selected. Then invert the mask by hiting ctrl/cmd + I. You could also do this step by selecting the side you want to keep and hitting the mask button for the exact same result.
39 responses to “How to Create a Colorful Retro Poster in Easy Steps”
-
step 9 isn’t clear to me how to cut out that half piece from that shape???
-
Great tutorial!
-
your instructions are awful and unclear every single step is a nightmare to complete.
-
I got lost pretty much step 8 then i tried to follow until step 16 then gave up as you make it quite complicated.
“Duplicate the top layer that you just put in screen mode. Remove the layer styles, we just want it to be white. Now set the layer blending mode to “Linear Dodge” or “Add”. Now you should see major highlights like below.”
At what point did you change a blend mode to screen mode on one of the layers? I didn’t see any step for that.
The tutorial may be ok for regular users but for novices, it’s just confusing. -
DON’T TRY THIS TUTORIAL. SPENT TOO MUCH TIME BEFORE GETTING STUCK ON STEPS 19/20. THERE IS A MISSING STEP OR ERROR AND THE PSD DOWNLOAD LINK IS BROKEN!!!!!!!!!!!!!!!!!!!!!!!
-
Its hard to follow.
-
wow ,its nice post.
-
it’s a great work,thanks for sharing………………
-
wow this sucks why
-
Sir I am unable to understand the step no 20 as after invert the color from white the black the result is quietly different so plz help me.
-
On step 9 I masked it and it did not create a triangle I do not know how you got to step 10
-
how do you invert colours from white to black in step 19?
-
Press Ctrl/Cmd+I
-
-
This is hard!
-
the instruction are really confusing , how many layers are we making, mine pic doesn’t even look like your’s
-
wow very nice.
THANK YOU ! -
I don’t understand step 16 ._.
-
Select the top layer then duplicate it by pressing Ctrl/Cmd+J. Remove the layer styles by going to Layer > Layer Style > Clear Layer Styles. Now, in the Layers panel, change the blending mode to “Linear Dodge” or “Add”. Hope this helps!
-
-
Hey nice tutorial, and nice retro effect!
This is what i do following your tutorial. And adding some other complements.
http://prototype-da.deviantart.com/art/ArcHon-Retro-Lines-403478125?ga_submit_new=10%253A1380338295 -
my layer doesn’t look like yours in step 12. I don’t know why.
-
Sadly you totally lost me at 21.
-
Step 21 is simply a repeat of step 20. You just duplicate that top layer one more time and then change the opacity from 50% to 100%.
-
-
yo whadup your thang worked greaaat pardner.aye the feirce wind gods blow and wail outside yonder window
-
First of all, thank you very for this tutorial. With the help of this, our presentation looks more shiny. Thank you.
-
This is wow but need more knowledge on forming layers
thx -
i did this work in photoshop CS but it did’nt work completely. very hard because i could’nt group it neither turn it to 40 degree or delete it…..so hard
-
Wow!
-
Which layer do you duplicate on step 20? The one with the “Linear Dodge” blending mode, the one with the mask or the one with the inverted mask colors?
i duplicate the layer in which we inverted the colors (step 19), but i, on step 21, get a completely different result than you do.
Any help please?
-
On step 20 you should be duplicating your top layer
-
-
It’s Superb! <3 Loved It :)
Here is My Result :
-
you know i cant do that
-
-
i cant understand step 9 -.-
-
Excellentay
-
Thx!! easy and nice
Author is good -
GOOD
-
Too complicated procedure to create Colorful Retro Poster, actually it was confounding way to make it sans instances.
-
mmmmmmmmmm
-
pls mention the tools too
-
-
Beautiful <3


Leave a Reply