In this tutorial, I’ll show you how to create a firing medieval scene with a disintegration effect. You’ll learn how to combine stock images, use debris brushes, work with fire, make a cool atmosphere and create lighting effects.
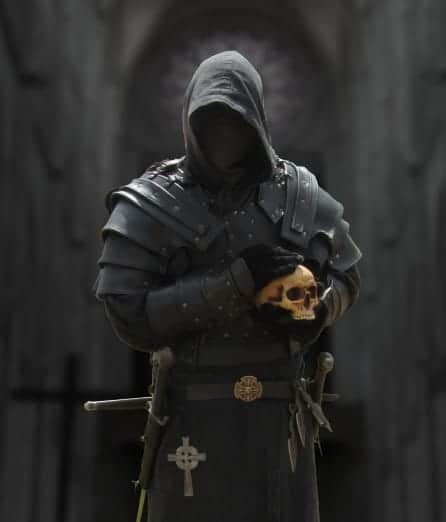
What you’ll be creating
We’ll start this tutorial by adding the background and blur it to create a depth of field. Then we’ll add the knight and apply the debris brushes to him to create a shattered effect. Later we’ll add the fire and create a glowing light for it. After that, we’ll make the fire effect on the knight as well as use several adjustment layers to change the whole contrast and color. We’ll finish it up with more light and fire sparks. You’ll need Photoshop CS3 or newer to follow this tutorial.

Tutorial Resources
Step 1
Create a new document in Photoshop with the settings below:

Step 2
Open the castle stock. Drag it into our white canvas using the Move Tool (V):

To add some depth to the scene, go to Filter > Blur > Gaussian Blur and set the radius to 6 px:

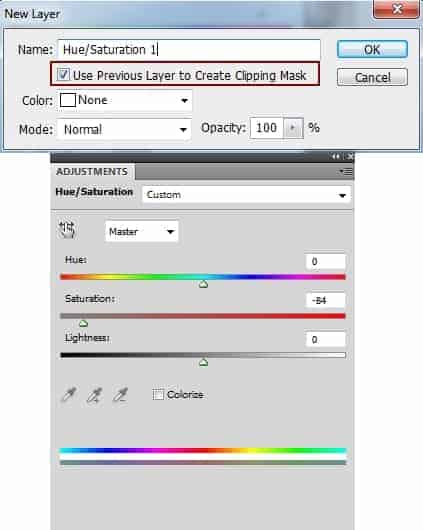
Step 3
I used an adjustment layer and set as Clipping Mask to desaturate the background. Go to Layer > New Adjustment Layer > Hue/Saturation:

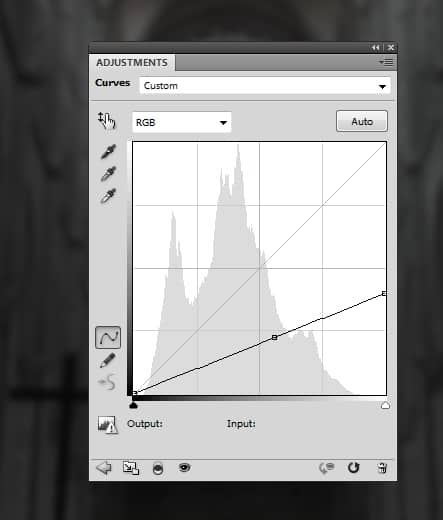
Step 4
I used a Curves adjustment layer (Clipping Mask) to darken the castle background:
Step 5
Place the knight image in the middle section of the image and remove the background using a layer mask.
Step 6
Change the brush kind to the debris ones. Take the brushes you like and start painting on the arms to shatter these areas. I turned off the Curves adjustment layer of the castle to let you see the effect more clearly:

Step 7
To add more debris, on a new layer, use a debrish brush with any colors (I choose white) to paint on the knight body.

Turn off this layer. Hold down Cmd/Ctrl and click the debris thumbnail layer to load its selection:

On the knight layer, right click this selection and choose Layer via Copy. Move the copied part onto the one of the shoulders.

Step 8
Apply the same method to make more disintegration effect for the knight, use a layer mask to erase any unwanted debrises. Here is my result:

Turn on the Curves adjustment layer of the background.
27 responses to “Create a Firing Medieval Scene with Disintegration Effect in Photoshop”
-

This needs to be more step by step
-
Best Photo Manipulation Photoshop Tutorials
-
where can i find this backgrounds
-
How can I find this fire because this link isn’t working.
-
Looks like cgtextures.com is no longer free. You can find some alternatives here: https://www.deviantart.com/thetwistedfate/favourites/49155168/fire-stock
-
-
Thank you
-
why I cant go to last page? there’s something wrong with my browser or this tutorial is not free?
thanks
budie -
Es muy difícil de entender este tutorial.
-
Wow this was amazing.. great tutorial thanks for sharing..
-
Perfect instruction. Really your are brilliant man.
-
Could you possibly make the instructions more step by step instead of expecting us to know what half of this crap is
-
Nice tutorial Jenny
-
This would be amazing but the instructions are not quite in-depth
enough -
“Remove the background using a layer mask.”
How the hell do i do that?? Newbie here so no idea how to do that.. Please don’t make any steps like that in any tutorial.
-
same here man… lol
-
Not sure if serious or not. Add vector mask and use brush on mask to hide. Ie not use eraser on background
Did a quick cutout
http://imgur.com/xsDaURH -
where the material
-
thank you
-
-
Really nice. Thanks!
-
nice. and i will try
-
Excelent! Congratulations!
-
Hi team I reckon this may be a really good project however I just do not understand a word
shame really but I guess I am too old to learn but best of luck to those who can -
awesome works !
-
thanks a nice n detailed tutorial.
-
Nice tutorial
-
This is a real tutorial, thanks for sharing it!
-
nice pic
Leave a Reply to AllureCancel reply