Turn any photo into a dot grid artwork with these Photoshop actions. You'll get great results with dots that change size. They get larger in brighter areas and smaller in darker areas. Free download available.
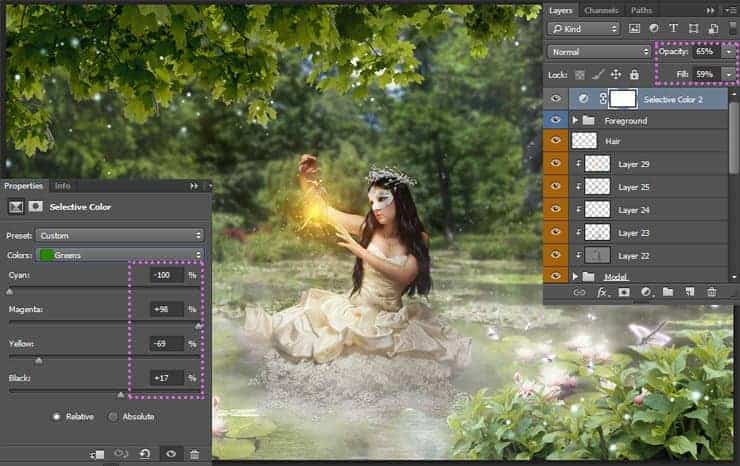
Step 41
In this layer, I created a shadow that then can be applied to adjustment layers and turn the picture into the night. Hold Opt/Alt and click on the "Create a new layer" icon. Set Blending Mode to Overlay, checked "Fill with Overlay-neutral color (50% gray). Next, I use Burn Tool (O) with Exposure: 25%. to draw a shadow. Use the image below to see the location of the shadows. Please note that you need to darken the edges of the image and the background.
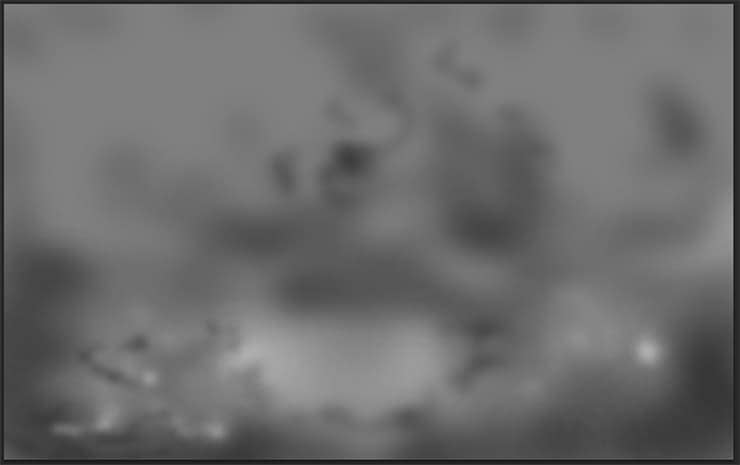
Step 42
Here we come to the final part of the photo manipulation. In this final part I on the example I will show how to accurately and correctly create one beautiful tint. This type of tinting is very popular now. I understand that you need two-three layers and is ready, but it's not always a good solution. Most of the images lose their color and become faceless. Now I will only add adjustment layers and the first to be a "Selective color" (Layer > New Adjustment Layer > Brightness/Contrast... or "Add adjustment layer" icon on the bottom of Layer panel). I'm interested in only two colors - yellow and blue. I want to become a more gentle green color and the shadows are a little warmer.
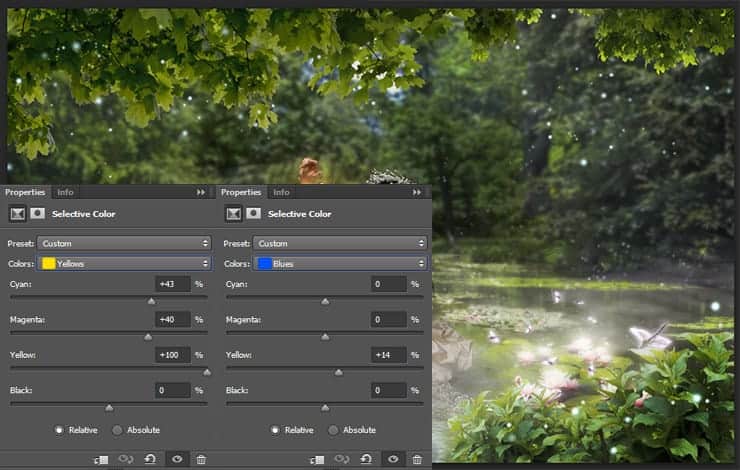
Step 43
Now slightly increase the brightness of the individual colors. Use adjustment layer "Curves" (Layer > New Adjustment layer > Curves...) and edit the green and blue channels. By raising the green channel, we add a little bit magenta. With the blue channel, we increase the yellow color.
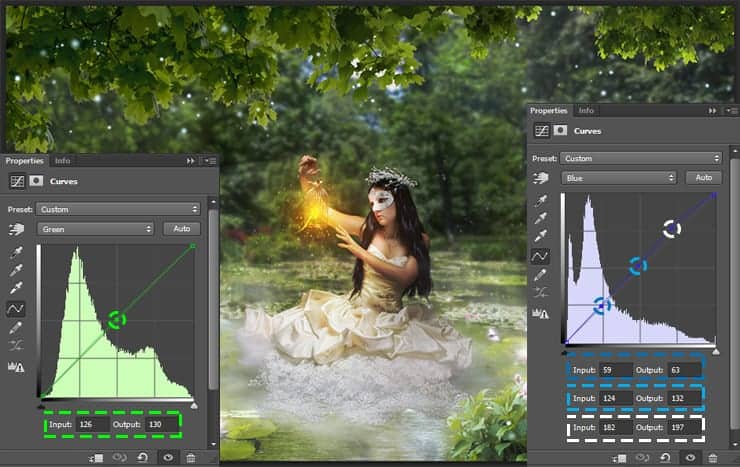
Step 44
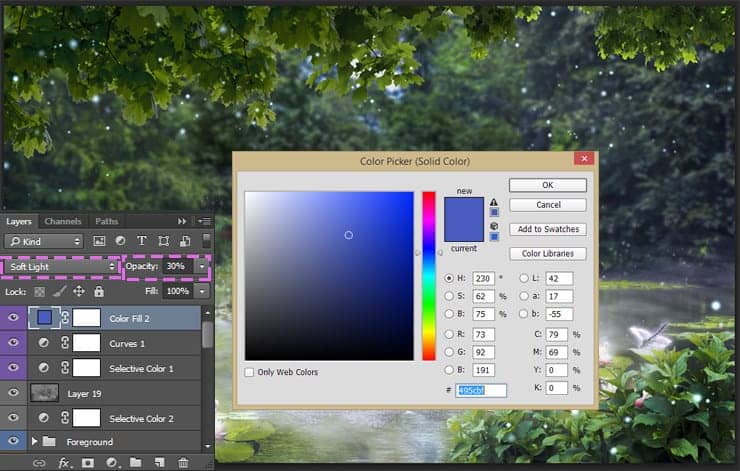
Now add basic color Use "Solid Color" adjustment layer (Layer > New Adjustment layer > Solid...) with color #495cbf. Set Blending Mode to "Soft Light", Opacity around 30%.
Step 45
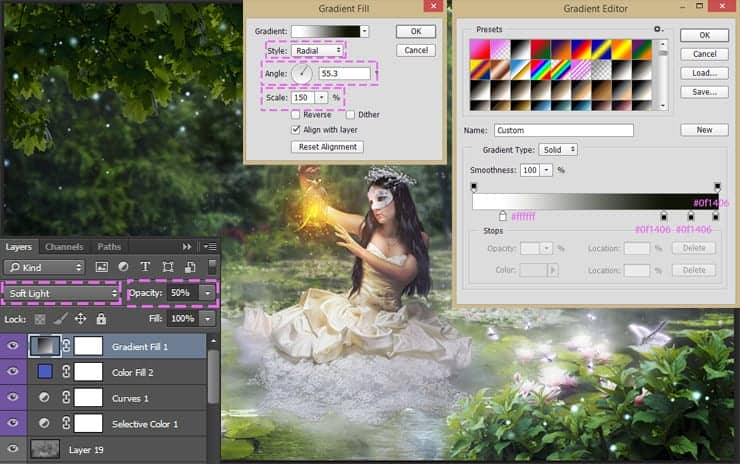
Add spot of color. We concentrate bright area in the center of the image and darken edges of the image (something like a black vignette). Add adjustment layer "Gradient Fill" and set up following gradient #ffffff > #0f1406 > #0f1406 > #0f1406, Mode: Radial, Angle: 55.3 degrees, Scale: 150%. Set Blending Mode to "Soft Light", Opacity around 50%.
Step 46
Next adjustment layer is "Curves" (Layer > New Adjustment layer > Curves...). I reduced dark tones on Red and Blue channels. Use the image below to accurately construct a curves.


12 comments on “Create a Night Fairy Tale of a Mysterious Girl in Photoshop”
Great Tutorial Thank you!
Good photo editing skills.
Really nice best
Nice Tutorial (Y)
Great tutorial! I've done almost all manipulation tutorials online and this one is very nice. It used some different techniques I haven't explored. On step 23, what color do we use on the dress? Mine just says "#"
same here. i just used black and i think it worked out nicely :)
nice working ,, thank you
Thanks a lot for uploading the tutorial. Nice work!
how much percent dodg and burn brother
on the model brother
how much percent dodge and burn sory my bad english
Hi, use about 10 - 25% for Dodge and Burn tools. If needed increase this value.