Download Lightroom presets and LUTs, absolutely free. Use the presets to add creativity and style to your photos.
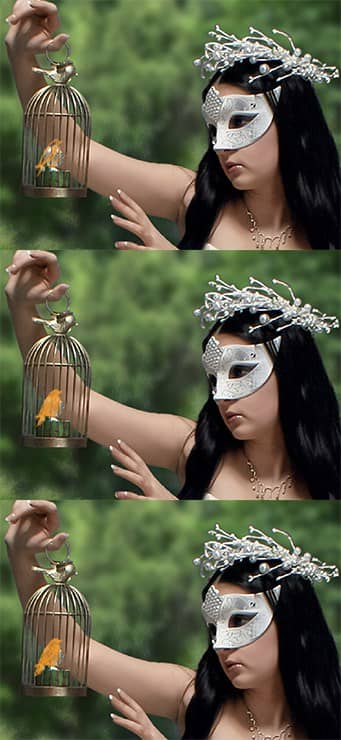
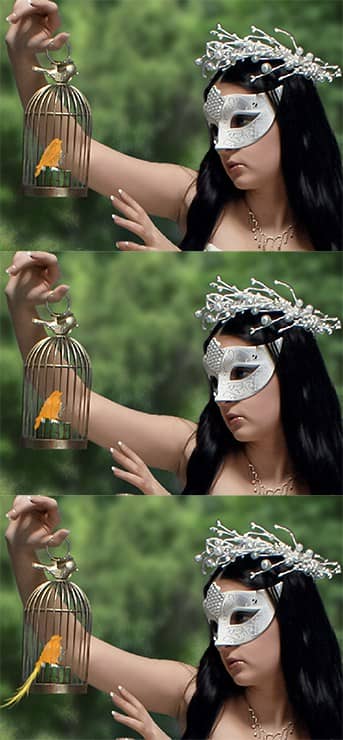
Step 25
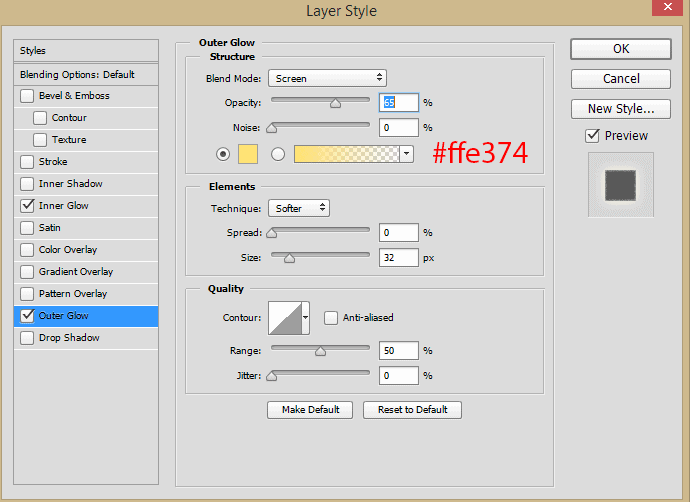
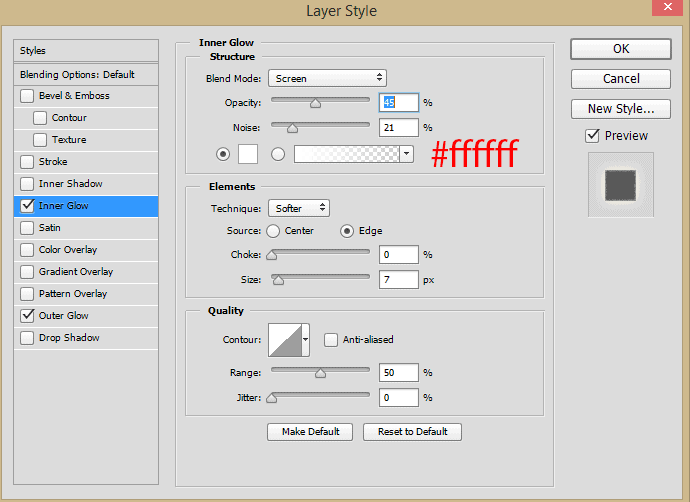
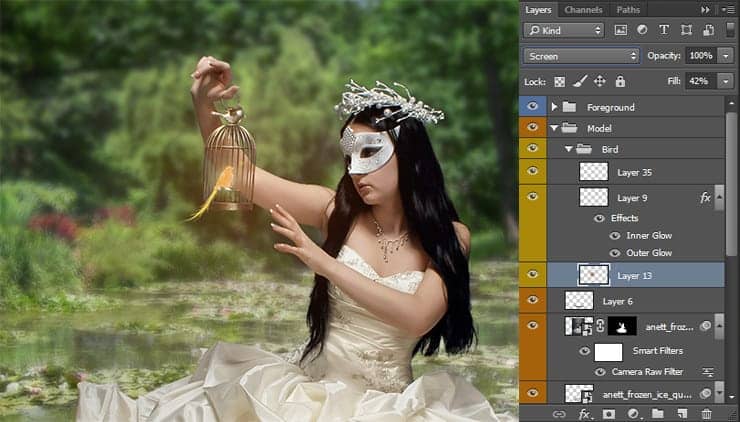
Add a glowing style to a bird ("Fx" icon at the bottom of layer panel or go to Layer > Layer Style > Outer Glow/Inner Glow). Use the image below to set the style settings. But it is not enough to create a real golden bird.
Step 26
Create a new layer below the bird layer. With Brush Tool (B) create a big spot (Soft brush, Size: 500px, Opacity: 100%) of color #9e410d. Set layer Blending Mode to "Screen", Fill to 42%.
Step 27
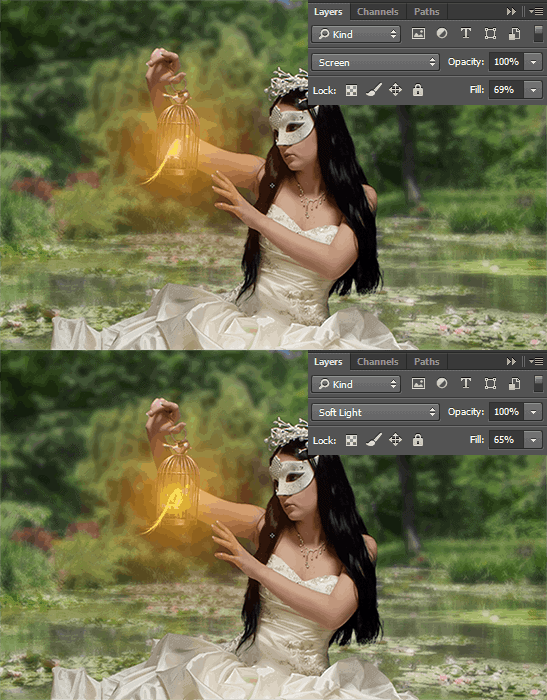
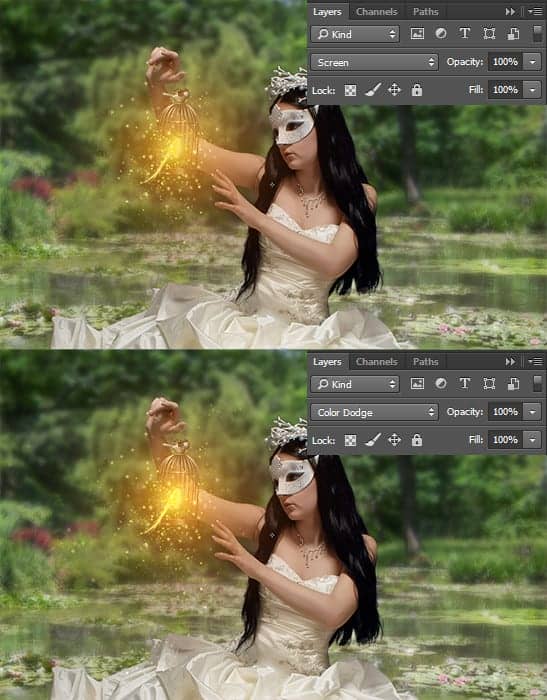
The next bit is tedious but quick. Continue to work with a brush and create a new layer for each effect. So you can control the effect and change it. To quickly change the size, use the left (reduce brush size) and right bracket (increase brush size) on the keyboard. This saves you time. Use the images below to create a glow and sparkle (you'll need a brush that we created in Step 20).
Step 28
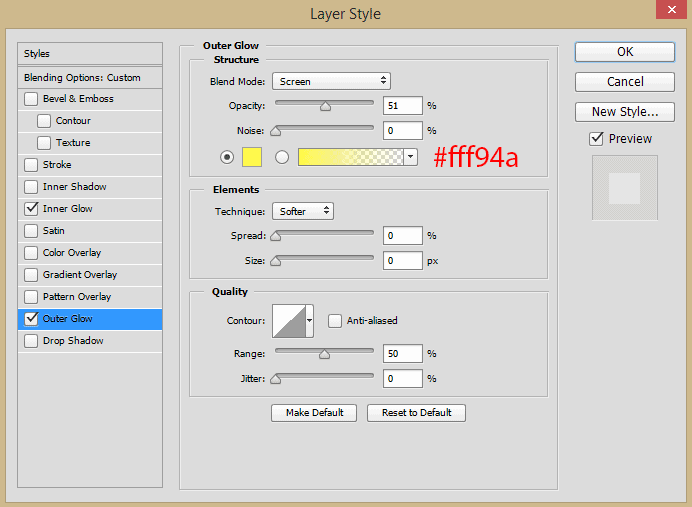
To make the sparks shine, add style "Outer Glow" ("Fx" icon at the bottom of layer panel or go to Layer > Layer Style > Outer Glow) with the settings like on the image below. This adds realism and makes the sparks even more beautiful. Group all layers with model and bird group into one (select layers > /Cmd/Ctrl + G or Layer > Group Layers).
Step 29
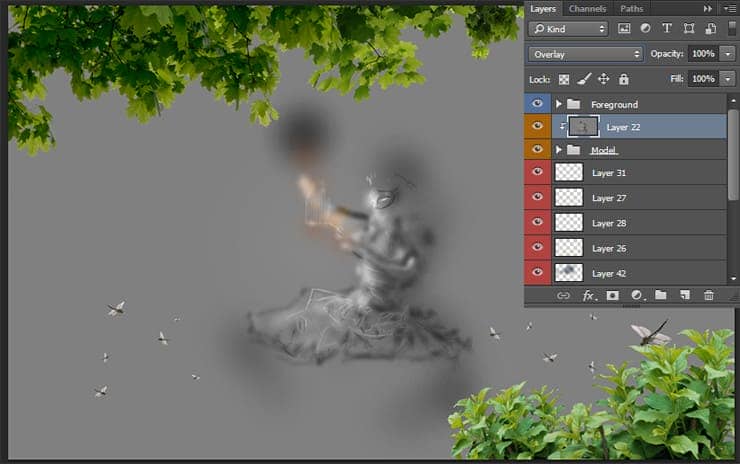
After creating the birds need to be aligned model to the lighting. This is again a series of different layers, but this time you need to work outside the group "Model", and clip layers to the group. Let's start with a map of light and shadow. Hold Opt/Alt and click on "Create a new layer" icon or go to Layer > New > Layer... Set Blending Mode to "Overlay" and mark "Fill with Overlay-neutral color (50% gray)". Then everything is clear use Dodge Tool/Burn Tool (O) or White/Black brush to create shadow and light. Use my image as an example. On this layer, I painted almost every crease to create a glow effect. Create from this layer a clipping mask (Cmd/Ctrl + Opt/Alt + G or hold Opt/Alt and click between layers).
Step 30
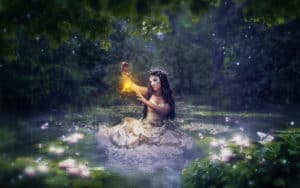
As in the case with the bird, use images below to create a color light from the bird on the model. As I mentioned earlier make from all these layers (except hair layer and thereafter) a clipping mask (Cmd/Ctrl + Opt/Alt + G or hold Opt/Alt and click between layers). With this function, you apply effects only to a "Model" group.


12 comments on “Create a Night Fairy Tale of a Mysterious Girl in Photoshop”
Great Tutorial Thank you!
Good photo editing skills.
Really nice best
Nice Tutorial (Y)
Great tutorial! I've done almost all manipulation tutorials online and this one is very nice. It used some different techniques I haven't explored. On step 23, what color do we use on the dress? Mine just says "#"
same here. i just used black and i think it worked out nicely :)
nice working ,, thank you
Thanks a lot for uploading the tutorial. Nice work!
how much percent dodg and burn brother
on the model brother
how much percent dodge and burn sory my bad english
Hi, use about 10 - 25% for Dodge and Burn tools. If needed increase this value.