Download Lightroom presets and LUTs, absolutely free. Use the presets to add creativity and style to your photos.
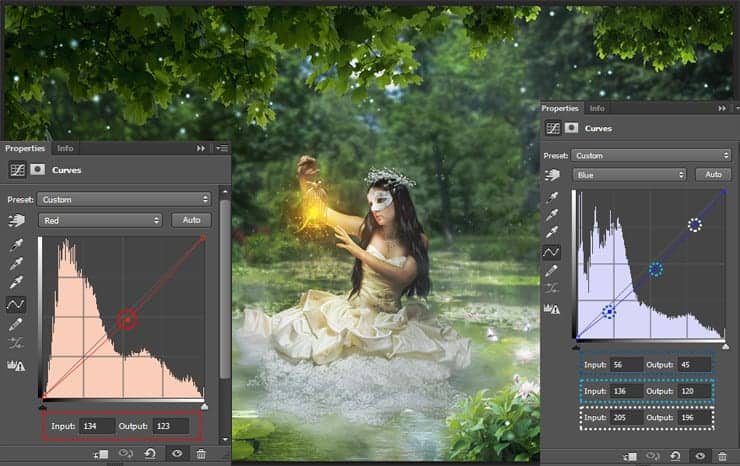
Step 47
Again "Solid Color" layer with color # 28337a and Blending Mode "Overlay", Opacity: 30%. Add a "Brightness/Contrast" adjustment layer (Layer > New Adjustment Layer > Brightness/Contrast... or click on the icon on a Layer panel). Set Brightness: 3, Contrast: 3.
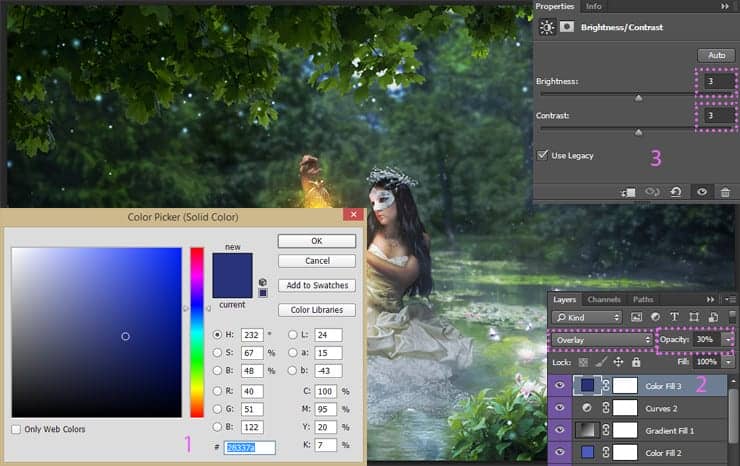
Step 48
Now tinting gradient. This adjustment layer, we add color. Set up following gradient #d3b0ff (Location: 8%) > #2d1899 > #070c25, Mode: Radial, Angle: 67.62 degrees, Scale: 150%. Set Blending Mode to "Soft Light", Opacity around 50%.
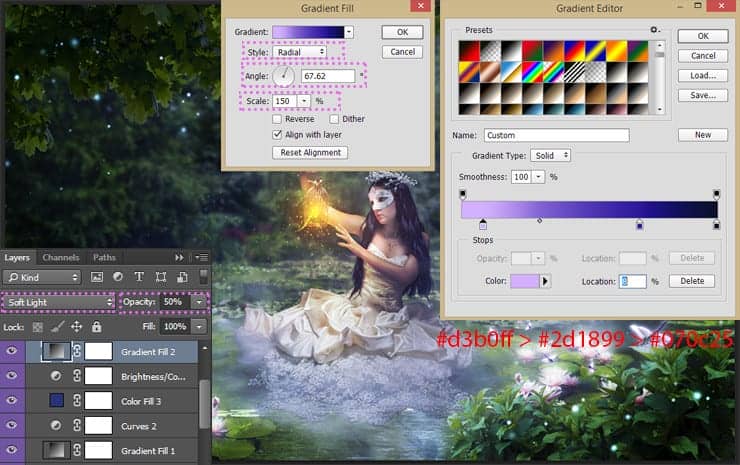
Step 49
Now a little glow. To gently influence the image of warm light on the bird, I used an adjustment layer "Color Lookup", from the drop-down list, select "LateSunset.3DL" preset. Use 3DLUT file and Set Opacity for this layer 55%, Fill to 35%.
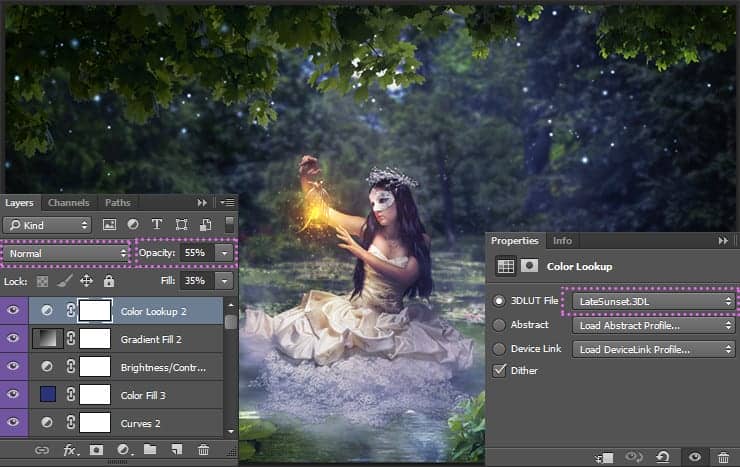
Step 50
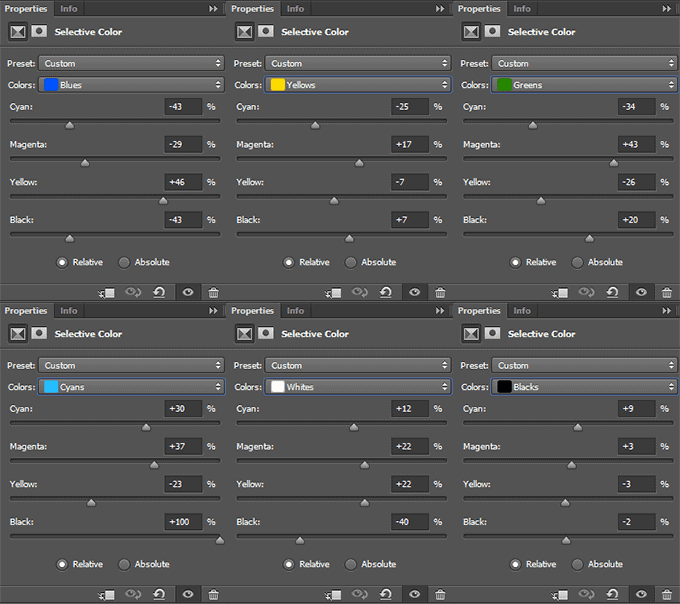
The next adjustment layer is "Selective Color". This layer will help me to change each color separately. Here and try to change the tone of almost all colors. It helped me to achieve a balance of color. List of settings a little big, so I ask you to take attention to pictures below.
Step 51
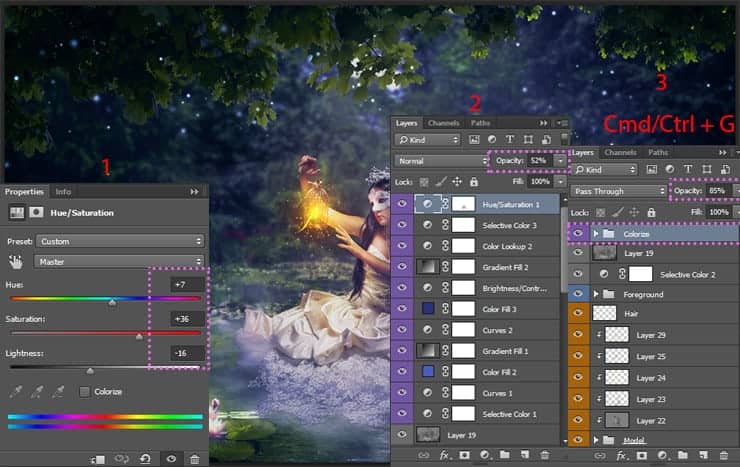
Now, increase the saturation of the entire image. Add a"Hue/Saturation" adjustment layer. Set Hue: +7, Saturation: +36, Lightness: -16. Set layer Opacity to 52%. Group all colorize layers into one group (Cmd/Ctrl + G) and reduce group Opacity to 85%. Like my example, you can create interesting tinting or change this. All of your choice!
Step 52
Now add some blur to create a presence and a nice fairy tale, soft focus. It works very well in the pictures on the theme of a fairy-tale or in the case where the artist needs to create a gentle and soft picture. Create a merged copy of all photo manipulation (Cmd/Ctrl + Opt/Alt + Shift + E), Convert it to Smart Object (right-click on layer > Convert to Smart Object). Go to Filter > Blur > Gaussian Blur. Set up Radius to 15.0 pixels.
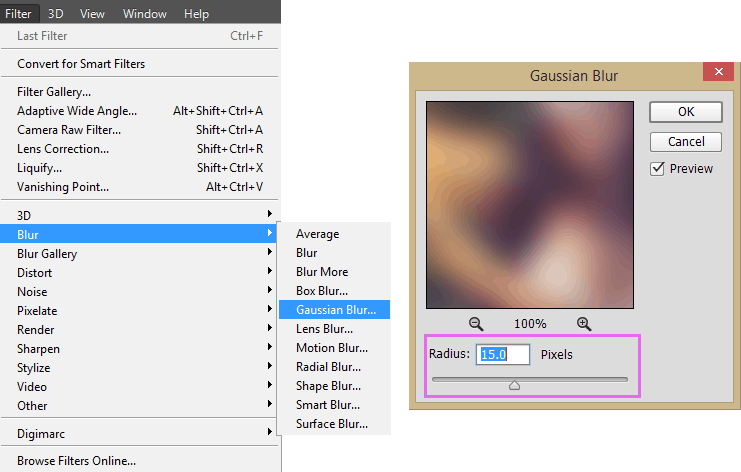
On a smart filter layer mask, with a soft black brush, remove blur from the center. In the figure below you can see where the remains blur. Use different values of brush Opacity to create a smooth transition and to control the amount of blur for each section of the picture.


12 comments on “Create a Night Fairy Tale of a Mysterious Girl in Photoshop”
Great Tutorial Thank you!
Good photo editing skills.
Really nice best
Nice Tutorial (Y)
Great tutorial! I've done almost all manipulation tutorials online and this one is very nice. It used some different techniques I haven't explored. On step 23, what color do we use on the dress? Mine just says "#"
same here. i just used black and i think it worked out nicely :)
nice working ,, thank you
Thanks a lot for uploading the tutorial. Nice work!
how much percent dodg and burn brother
on the model brother
how much percent dodge and burn sory my bad english
Hi, use about 10 - 25% for Dodge and Burn tools. If needed increase this value.