
Fill this selection (Shift+F5) with black and convert it to a Smart Object. Flip it vertically (Edit > Transform > Flip Vertical) and use Cmd/Ctrl+T to transform this shadow and lower its opacity to 70%:

Use a layer mask to reduce the shadow of the further branches from the ground:

Go to Filter > Blur > Gaussian Blur and set the radius to 3 px:

Step 12
On a new layer (under the tree ones) use a soft black brush with the opacity about 60% to paint more shade around the tree bottom:

Step 13
Select the tree, branch and shadow layers and press Cmd/Ctrl+G to make a group for them. Change the group mode to Normal 100%. Create a Curves adjustment layer above the tree layers and down the lightness:
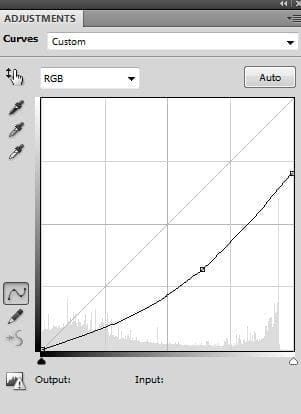
On this layer mask use a black brush to reduce the shade on the parts which are dark already:


Step 14
Make another Curves adjustment layer to brighten the dark parts a little:
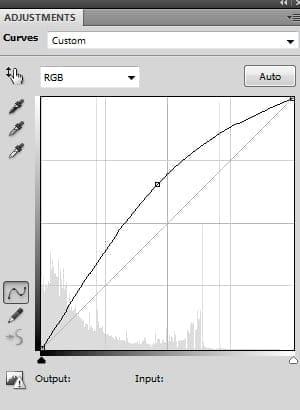
On this layer mask use a black brush to reduce the lightness of the parts which are bright already:


Step 15
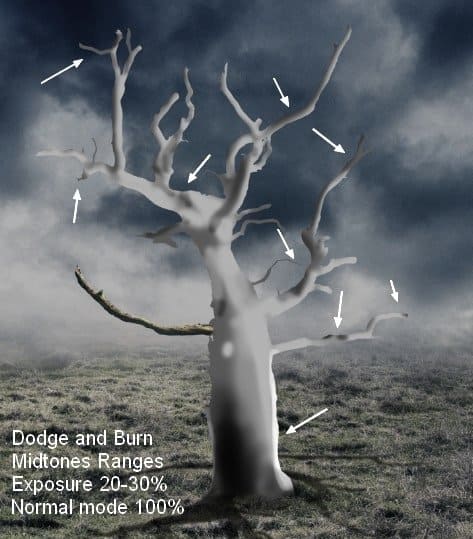
To fix the light on the tree trunk I made a new layer above the tree one, changed the mode to Overlay 100% and filled with 50% gray:

Use the Dodge and Burn Tool (O) with Midtones Ranges, Exposure about 20-30% to refine the light/shade on the tree. You can see how I did it with Normal mode and the result with Overlay mode:

Step 16
Place the mode image beside the tree root and remove the white background using a layer mask (you can use your own image):

Make a new layer under the model one and use a soft black brush to paint the shadow for her:

Step 17
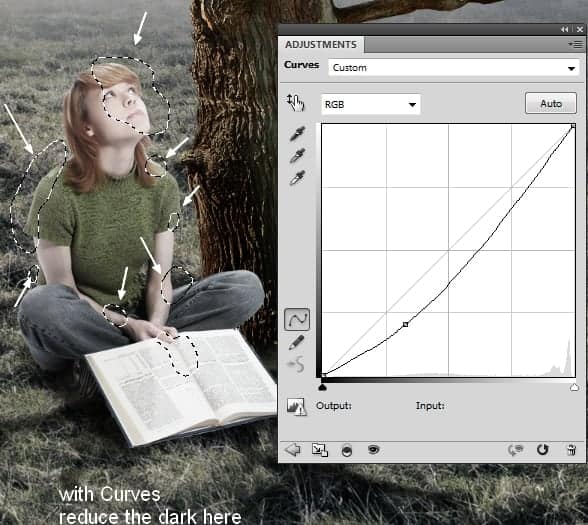
I used Hue/Saturation to reduce the saturation of the model :
Step 19
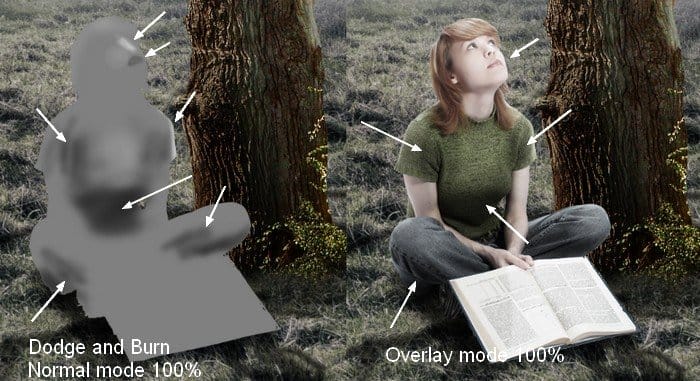
I made a new layer with the same settings like in the step 15. Use the Dodge and Burn Tool to refine the light/shade on the model:
Step 20
It’s time to adjust the contrast and color of the whole picture and change the time from day to night. Create a Curves adjustment layer on the top:

On this layer mask use a soft black brush with the opacity about 20-25% to erase the midground:

Step 21
I used Levels to increase the picture contrast:
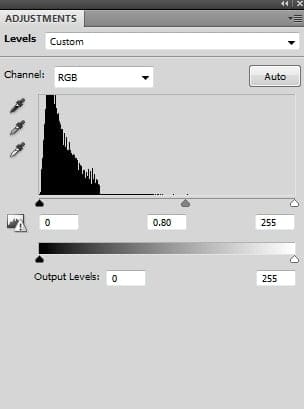
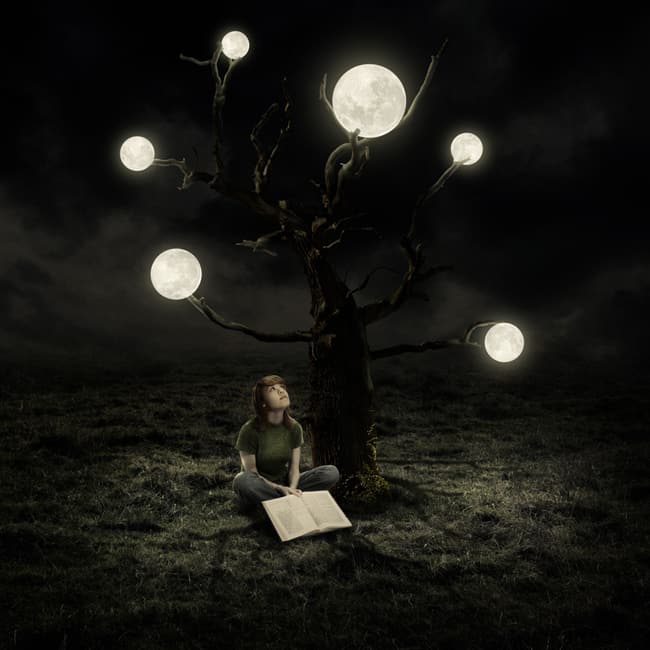
Apply brush masking on the layer mask (the midground and model):
17 responses to “Create a Surreal Artwork of a Tree with Moons in Photoshop”
-
What does it mean by “Curves (Clipping Mask)” in step 7
-
realy nice explained! thanks a lot =)
-
Always love your tutorials Jenny
-
Thank you for a lovely charming lesson. It’s my pic http://j-p-g.net/if/2015/11/28/0852252001448714236.jpg
-
Thank you! Amazing tutorial.
-
Great tutorial.
-
i have seen better, but it could be worse. dunkey aka dunc. west side is my hood
-
realy good its alright
-
very nice …good explanation
-
Thank you so much
-
tutorial is good but shadow is missing on book
-
i dont understand not enough detailsssssss
-
Good tutor.
-
Perfect tutorial *-*
-
how
-
-
Thank you, I liked! My creation:
http://cartes-mireilled.eklablog.com/photomontage-surrealiste-d-un-arbre-avec-des-lunes-a117631138 -
Very good tutorials

Leave a Reply