This Photoshop tutorial will show you how to create a realistic Steam Iron from scratch. You’ll learn how to create realistic shadows & highlights on plastic and metal.
Preview of Final Results

Download the PSD
Steam Iron.zip | 670 KB
Download from Website
Draw a realistic Steam Iron in Photoshop
Step 1 – Create a new image file
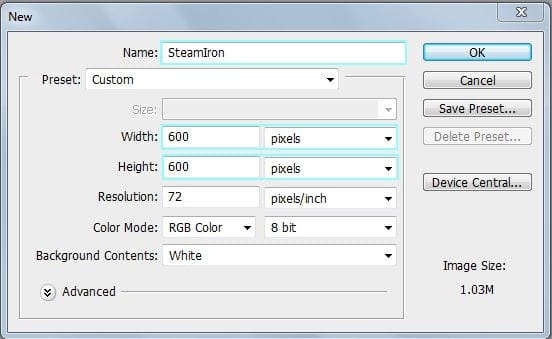
Open Photoshop and create a new image (Ctrl+N or File > New) with the settings shown below.
- Width : 600 pixels
- Height : 600 pixels
- Resolution : 72 pixels/inch
- Background Contents : White
Step 2 – Steam Iron top part
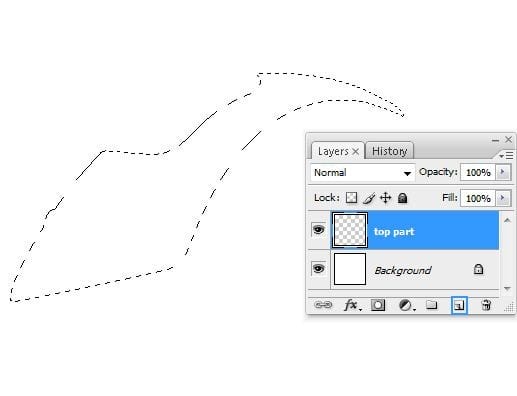
Make a new layer(Ctrl+Shift+N or you can go to Layer->New->Layer or you can press the indicated button in the picture below ). Rename the layer to “top part”. You can rename a layer by pressing right click on it , then selecting “Layer properties” option and in the “Name” box you can enter what name you prefer. From the Tools menu select Pen Tool (P key) and make a selection like in the picture below ( first make a path then press right click on it -> make selection)
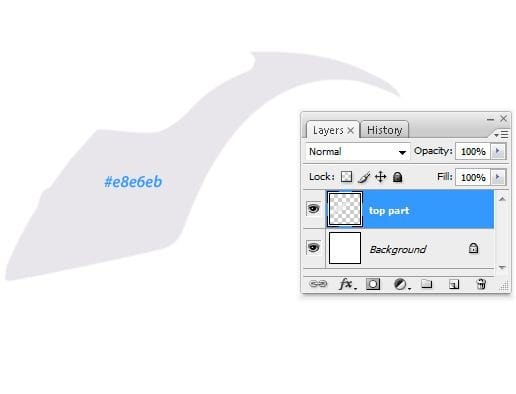
Fill the selection created at the step 2A(right click on the selection->Fill) with a lighten gray , I used #e8e6eb
Step 3 – Adding Shadows
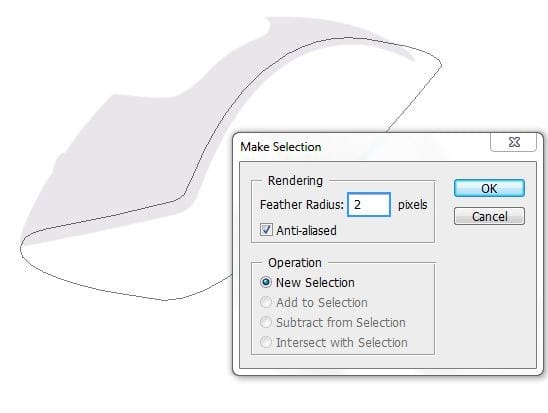
From the Tools Menu select Pen Tool (P) and use it to make a path like in the picture below (3A)
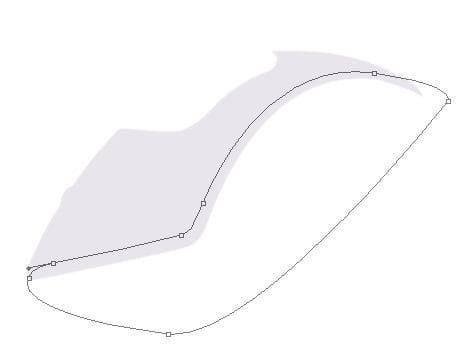
Press right click on the path and choose “Make selection” option , here increase the Feather Radius to ~ 2 pixels (3B)
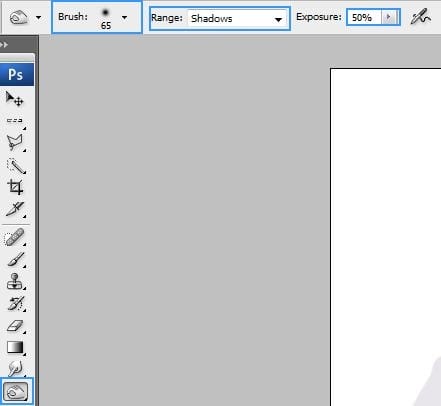
From the Tools Menu select Burn Tool (O) with the next settings :
- Master Diameter : 65 pixels
- Range : Shadows
- Exposure : 50% (3C)
Use Burn Tool (O) in the selection created at the step 3B (3D)

Step 4 – Highlights & More Shadows
Add more shadows using Burn Tool (O) (4A)
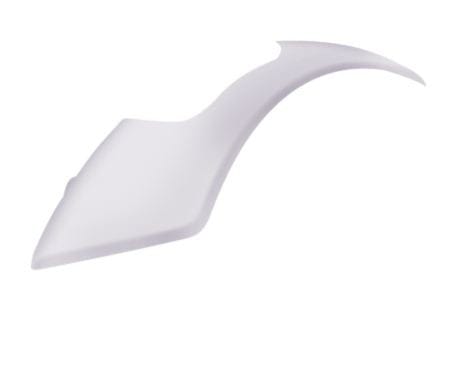
Now , make next settings for Dodge Tool (O) :
- Master Diameter : 74 pixels
- Range : Shadows
- Exposure : 47% (4B)
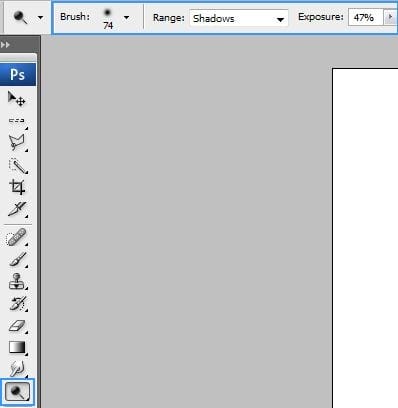
Add some highlights using Dodge Tool in the indicated places (4C)
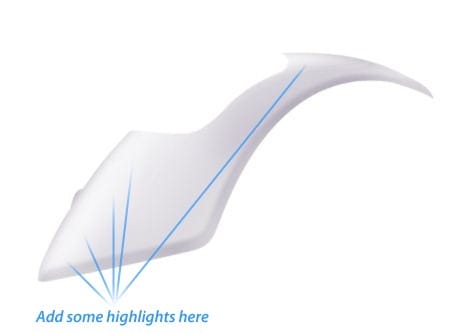
Step 5
Make a new layer(Ctrl+Shift+N or you can go to Layer->New->Layer or you can press the indicated button in the picture below ). Rename the layer to “spray”. You can rename a layer by pressing right click on it , then selecting “Layer properties” option and in the “Name” box you can enter what name you prefer then using Lasso Tool (L) make next selection (5A)
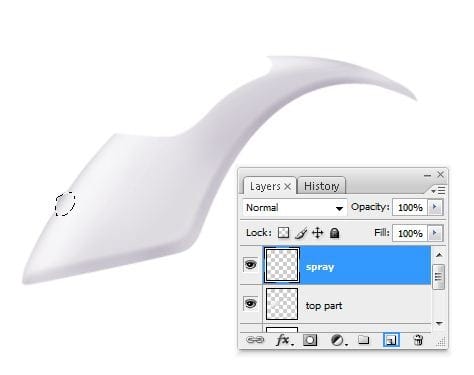
Fill the selection (right click -> Fill) created at the step 5A with a grey color , I used #d0ced3 (5B)
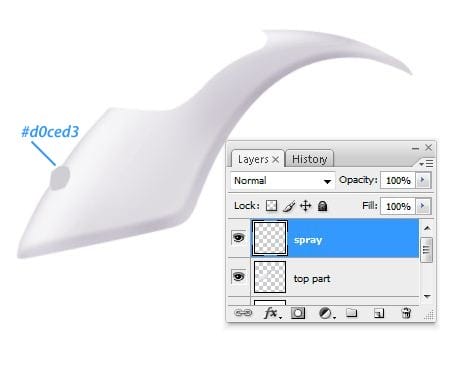
Step 6 – Highlights & Shadows
Make next selection using a selection tool (6A)
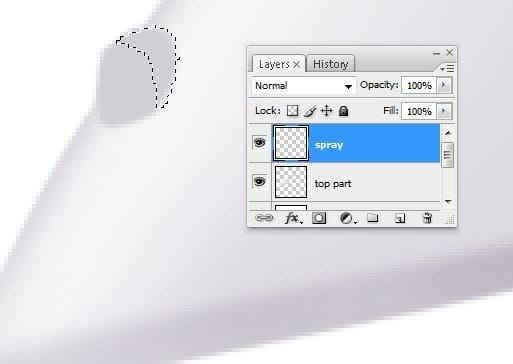
Add some shadows/highlights using Burn/Dodge Tool (O) in the indicated places , then make another selection using Lasso Tool (L) (6B)
One response to “Draw a Realistic Steam Iron in Photoshop”
-
hohoho , I like this ,I want to join you


Leave a Reply to zhaoCancel reply