Learn how to create this realistic modern chair using the Pen and Smudge tools. This tutorial will show you several useful painting and drawing techniques that can be used in other Photoshop drawings.
Preview of Final Results

How to Paint a Realistic Modern Chair Photoshop Tutorial
Step 1
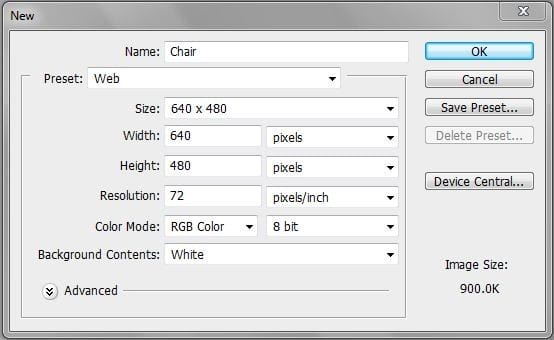
Start by making a new image (File->New) with 640 px (Width) X 480 px (Height) dimension. You can see the exact settings bellow.
Step 2
Select the Gradient Tool (G) from the tools.

Create a new gradient using white (#FFFFFF) and light grey (#C3C3C3) colors. Use the same setting as it´s shown bellow.
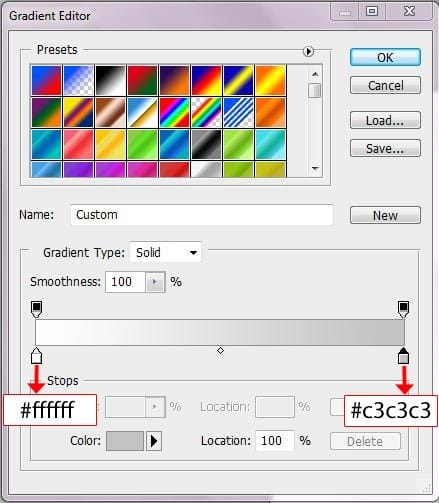
Into the “Background” layer apply the gradient. You should obtain something like in the next picture.

Step 3
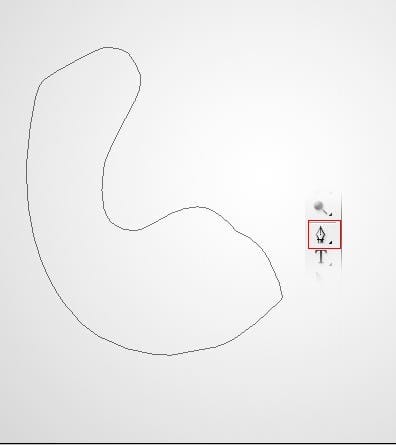
Select the Pen Tool (P) and make a path like in the picture below.
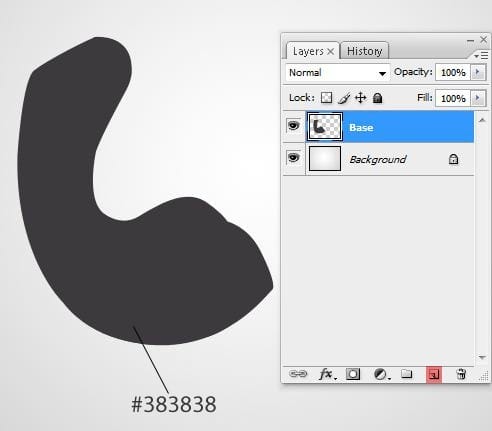
Make a new layer (press Ctrl + Shift + N or you can go to Layer > New > Layer). Rename the layer to “Base”. You can rename a layer by pressing right click on it , then selecting “Layer properities” option and in the “Name” box you can enter what name you prefer. Fill the path with a dark gray color. I used #383838 grey.
Step 4
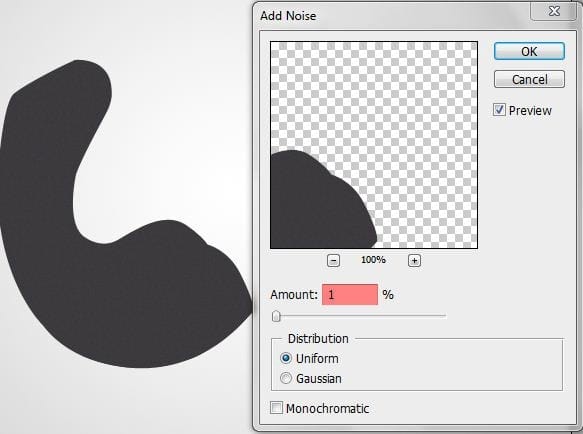
Go to Filter > Noise > Add Noise… and set the dialogue as you can see below.
Step 5
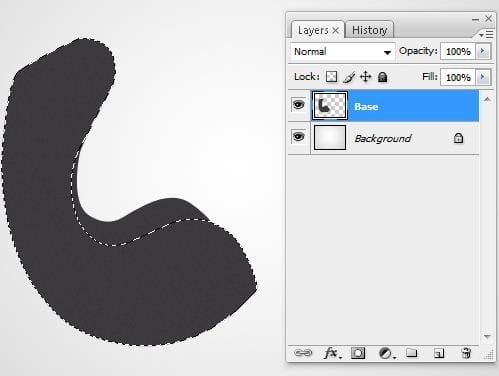
In the “Base” layer , make a selection like in the following picture using the Lasso Tool (L).
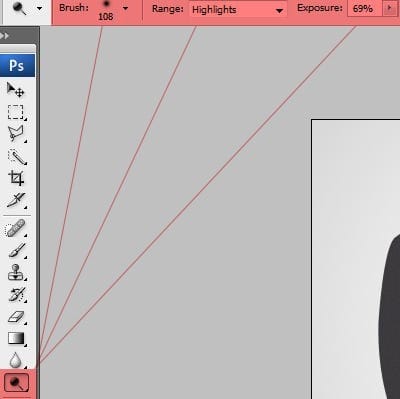
From the Tools menu , select the Dodge Tool (O) with the indicated settings :
• Master Diameter : 108 px
• Range : Highlights
• Exposure : 69%
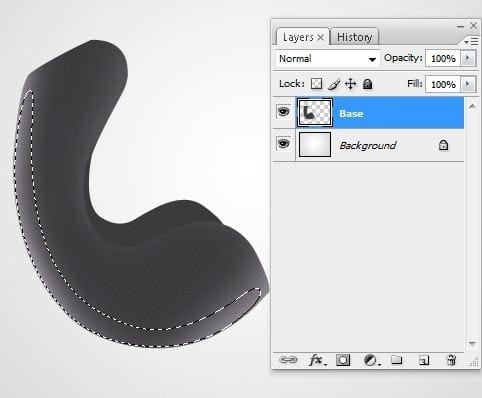
Use the Dodge Tool (O) and add some highlights in the indicated places. You can see where on the picture below.

Step 6
Grab the Lasso Tool (L) and make another selection with similar shape as it´s shown on the picture below. Then go to Select > Modify > Feather … (it may vary in different versions of Photoshop). Set the Feather Radius on 10 pixels.
Add more highlights in the selection using the Dodge Tool (O).
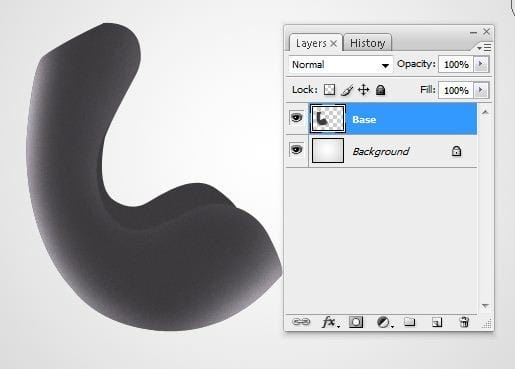
Then go to Filter > Blur > Gaussian Blur… Set the value Diameter on 2.4 pixels and press OK.

Step 7
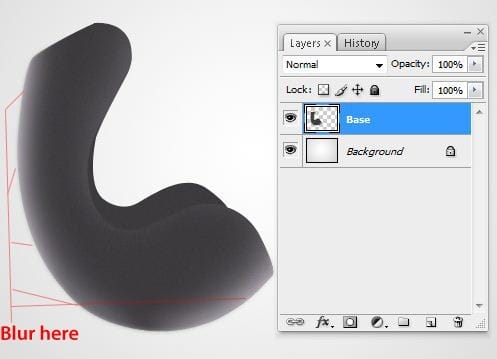
Select the Blur Tool (R) with the settings as shown below.

Use the Blur Tool (R) in the indicated places.
Step 8
Make another selection using the Lasso Tool (L) and then make the selection smoother with Feather as in the previous step.


Leave a Reply