Step 10
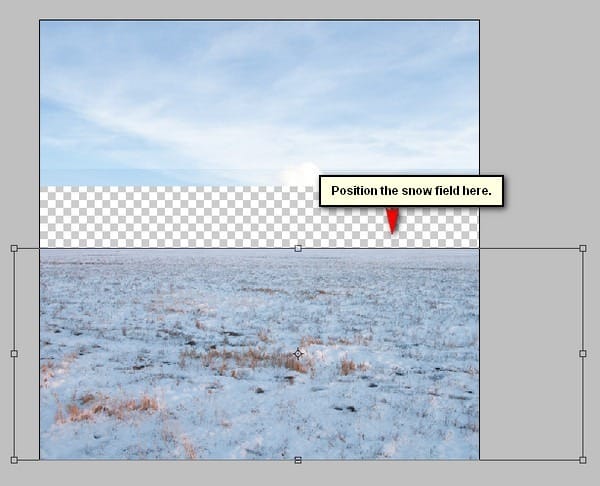
Now, we will be creating the snow covered field. To start, let’s open “Winter Field” by night fate stock. Once open, activate the Move tool (V) and drag it to our canvas. Make sure to put it above the “darken 1” layer. Position it as shown below:

Rename this layer to “ground”. Activate the Transform tool (Ctrl/Cmd + T) and resize it as shown on the images below:


The result:

Step 11
Now, let’s blur the horizon line to give the impression that the snow is thick in the edge of the horizon. Start by activating the Eraser tool (E) and once activated, input the following:
- Brush size: 100px
- Hardness: 0%
- Opacity: 100%
- Flow: 100%

Now, let’s erase:

The result:

Step 12
Now, let’s brighten the horizon – let’s start by creating a new layer (Ctrl/Cmd + Shift + N) on top of the “ground” layer. Name this layer to “brighten”.
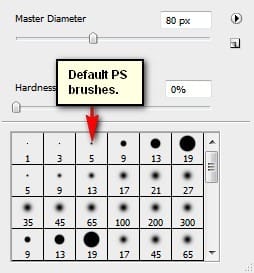
Activate the Brush tool (B) then make sure that the active Brushes are the default brushes. The default Photoshop brushes are shown on the image below, if that’s not what you see, then follow the instructions below:

Right click the canvas while a layer is selected and while the Brush tool (B) is activated and then click on the button highlighted below:

Then click on “Reset Brushes” from the contextual menu.

Now, that that is done input the following settings for our Brush tool (B):
- Brush size: 700px
- Hardness: 0%
- Opacity: 15%
- Flow: 100%
- #: ffffff

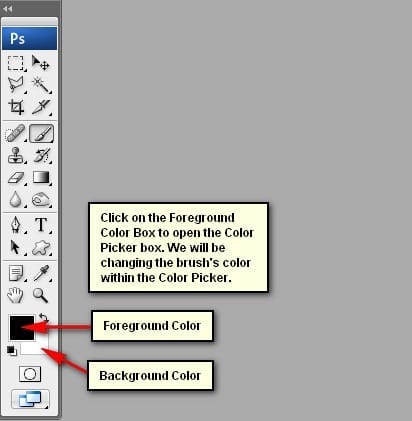
Note: The #: ffffff is the color of the brush. To change it to that, simply do the following:

Once the Color Picker box opens, input the following on the # box:

Now, we’re all set to paint, use the brush as shown on the image below:

The result:

Step 13
Now, let’s create another layer (Ctrl/Cmd + Shift + N) above the “brighten” layer; name it to: “dusk”. Activate the Brush tool (B) and input the following:
- Brush size: 900px
- Hardness: 0%
- Opacity: 15%
- Flow: 100%
- #: fffed5
Once you’re finished, let’s start painting:

The result of that:

Step 14
Create another layer (Ctrl/Cmd + Shift + N) above the “dusk” layer and input “darken 2”. Activate the Brush tool (B) and input the following:
- Brush size: 1500px
- Hardness: 0%
- Opacity: 15%
- Flow: 100%
- #: 000000
Now, use the Brush tool (B) within the following areas:

The result:

Step 15
Next, create another layer again (Ctrl/Cmd + Shift + N) and name it “darken 3”. Activate the Brush tool (B) and input the following:
11 responses to “How to Create a Breathtaking Christmas Artwork in Photoshop”
-
i agree that they are almost the same i think the overlay is a little darker than soft light
-
Intgihss like this liven things up around here.
-
Awesome resources.Huge collection.Great job.Very useful post.Thanks for sharing.
-
That’s a shrewd answer to a tricky qutiosen
-
-
i cant download the snow feild????
-
What a great tutorial!!
Thank you so much -
nice concept and tutorial thank you !
-
very Nice Tutorial
Thank you so much -
You forgot to write about darkening sky in Step 9. Just about layer creating.
-
At step 8, “Change the Blending mode of “sky 2″ to Soft Light” but you changed it to Overlay..
Well, which one is it sir?
-
Soft light is about the same as overlay. Overlay is more contrast and saturation.
-


Leave a Reply