Step 24
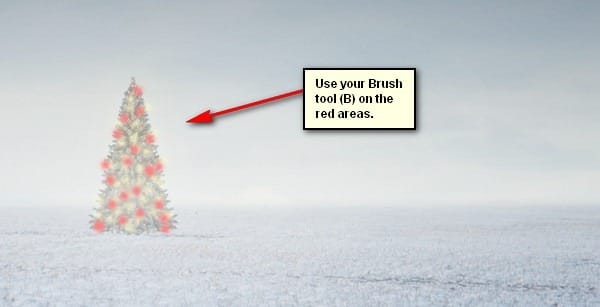
Next, let’s create a new layer (Ctrl/Cmd + Shift + N) which will still be part of our Christmas light decorations, name this new layer as “red lights”. Once created, activate the Brush tool (B) and input the following:
- Brush size: 30px
- Hardness: 0%
- Opacity: 100%
- Flow: 100%
- #: ff8787
Now, paint here:

Next, let’s adjust the Blending options. Right click the “red lights” layer and click on the Blending Options tab from the contextual menu. Once open, click on the Outer Glow tick box and input the following:
- Outer Glow
- Blend mode: Screen
- Opacity: 75%
- Noise: 0%
- #: ff8787
Elements
- Technique: Softer
- Spread: 0%
- Size: 125px

After that, change the Blending mode and Opacity of the “red lights” layer to the following:
- Blending mode: Opacity
- Opacity: 70%

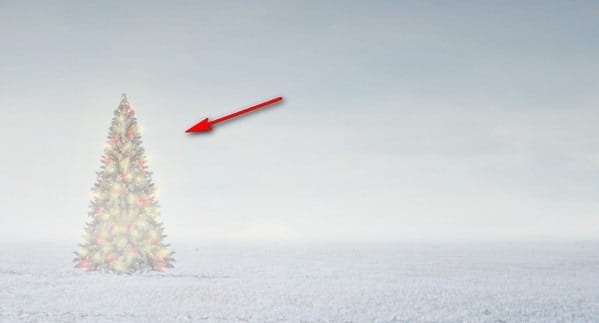
The result of that should be like this:

Step 25
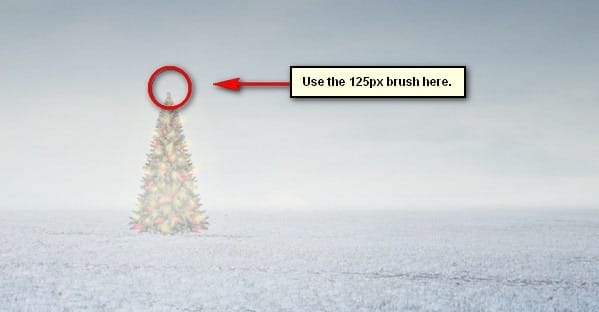
What is a Christmas tree without a star on top? Now, we will create a new layer (Ctrl/Cmd + Shift + N) and name it “star”. Once done, activate the Brush tool (B) and input the following:
- Brush tool: 125px
- Hardness: 0%
- Opacity: 100%
- Flow: 100%
- #: fffedf
Now, let’s paint!

The result of that should be like this:

Step 26
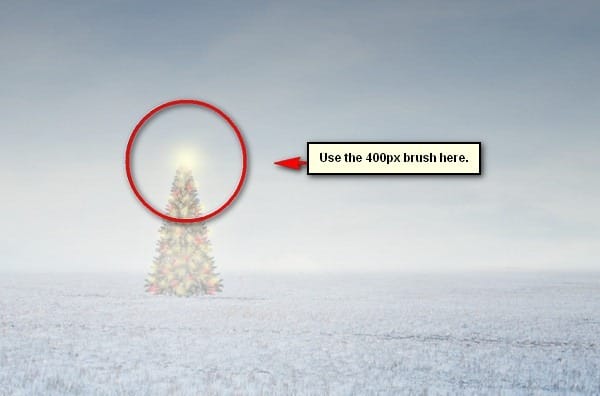
Now, let’s add some glow to the Christmas tree. First, create a new layer (Ctrl/Cmd + Shift + N) and name it “glow”. Once done, activate the Brush tool (B) and input the following:
- Brush tool: 400px
- Hardness: 0%
- Opacity: 100%
- Flow: 100%
- #: fffeeb
Now, let’s paint:

The result of that should be similar to this:

Once you’re done, select all the layers from Step 3 to 4 and name this layer to “Xmas tree”.
Step 27
Now, we will be creating the lonely man treading the winter field approaching the giant Christmas tree. To start, let’s open “Winter walking” by tlst. Once opened, activate the Polygonal Lasso Tool (L).

Now, let’s create a selection area around the third guy on the right. Note: The Polygonal Lasso tool (L) is great in creating straight lines to form polygonal shapes, hence its name;

Step 28
Next, activate the Move tool (V) and drag him to our canvas and position this layer above the “Xmas tree” group. Rename this layer to “man”. Position the “man” as shown on below:

Step 29
Once done, activate the Transform tool (Ctrl/Cmd + T) and resize the “man” as shown below:

Step 30
Next, let’s adjust the Brightness/Contrast of the man. To do that, make sure that the “man” layer is selected and then go to Image > Adjustments > Brightness/Contrast and then input the following:
11 responses to “How to Create a Breathtaking Christmas Artwork in Photoshop”
-
i agree that they are almost the same i think the overlay is a little darker than soft light
-
Intgihss like this liven things up around here.
-
Awesome resources.Huge collection.Great job.Very useful post.Thanks for sharing.
-
That’s a shrewd answer to a tricky qutiosen
-
-
i cant download the snow feild????
-
What a great tutorial!!
Thank you so much -
nice concept and tutorial thank you !
-
very Nice Tutorial
Thank you so much -
You forgot to write about darkening sky in Step 9. Just about layer creating.
-
At step 8, “Change the Blending mode of “sky 2″ to Soft Light” but you changed it to Overlay..
Well, which one is it sir?
-
Soft light is about the same as overlay. Overlay is more contrast and saturation.
-


Leave a Reply