Make skin look perfect in one-click with these AI-powered Photoshop actions.

Step 9
Drag the original rock image into our main document and convert it to a Smart Object. Go to Edit > Transform > Rotate 90 Counter Clockwiseand place it below the rock path above. Set this layer below the path one.
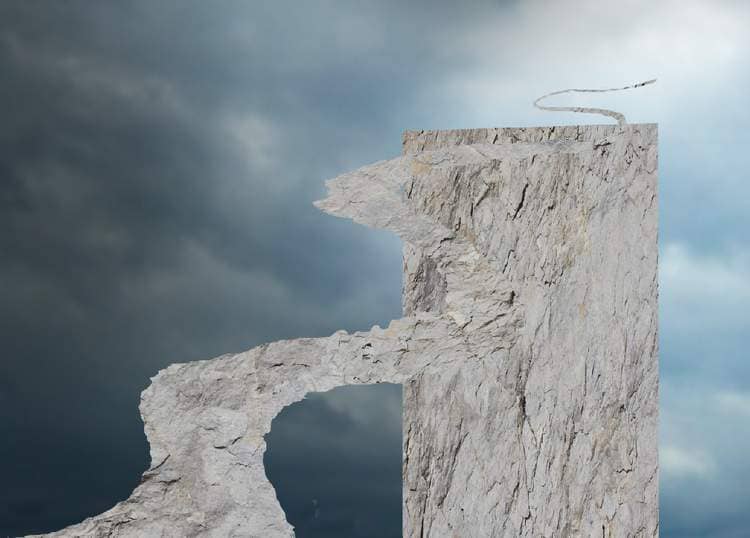
Add a mask to this layer and use a hard black brush to remove the sides of the rock and the part above the path following the form of the path.
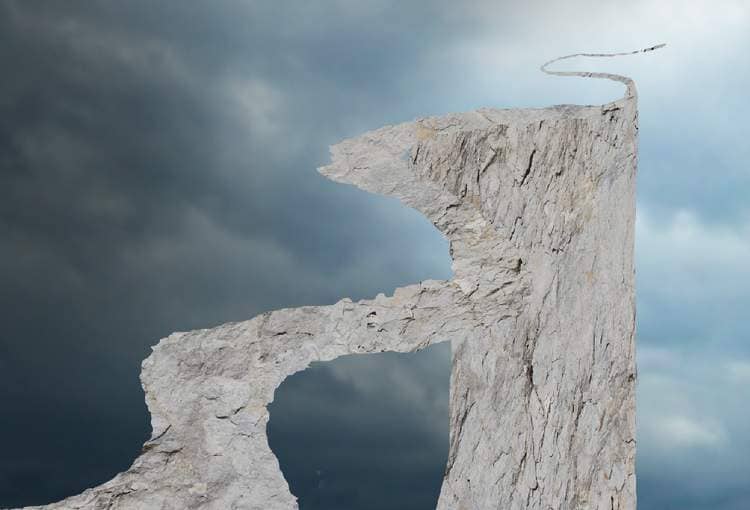
Step 10
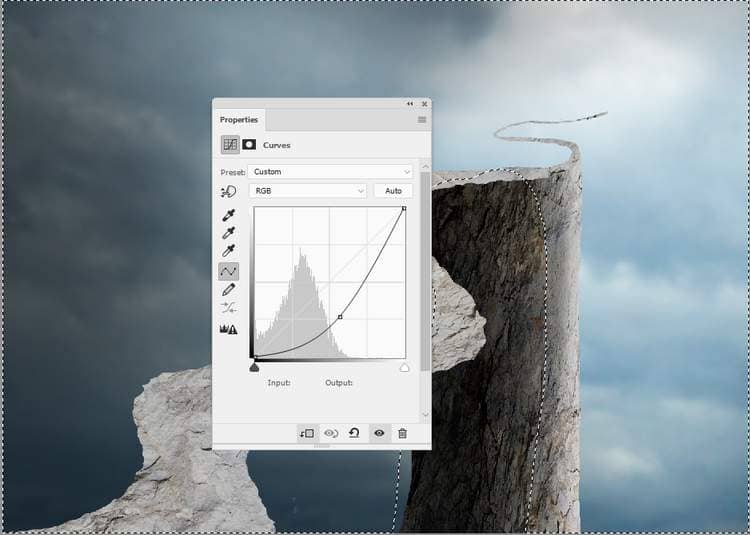
Make a Curves adjustment layer above this rock one and set it as Clipping Mask. Decrease the lightness and on this layer mask. use a soft black brush to erase the dark effect on the right of the rock part to reveal the lightness there .
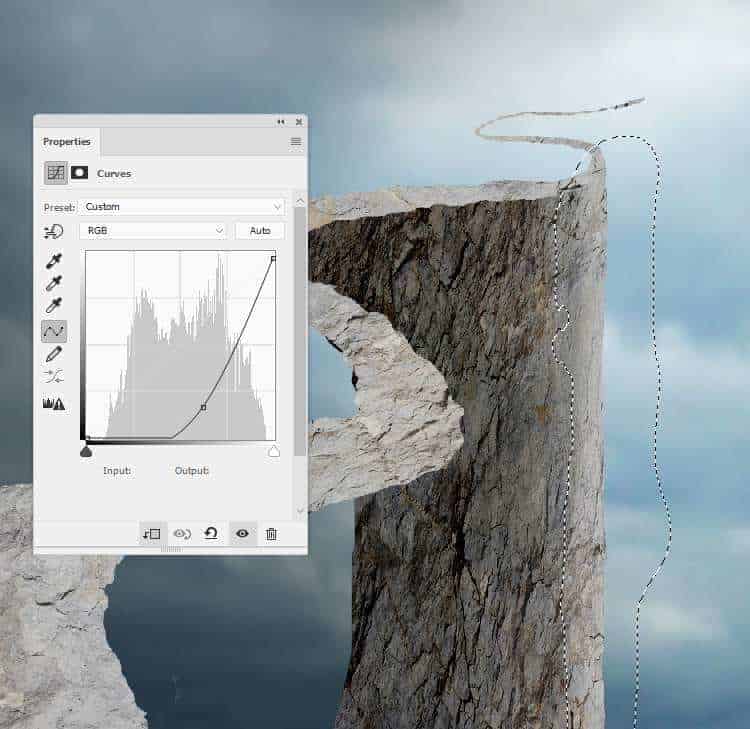
Add another Curves adjustment layer to brighten the right of the rock a bit. On the layer mask, paint on the rest so it won't be affected by this adjustment layer.
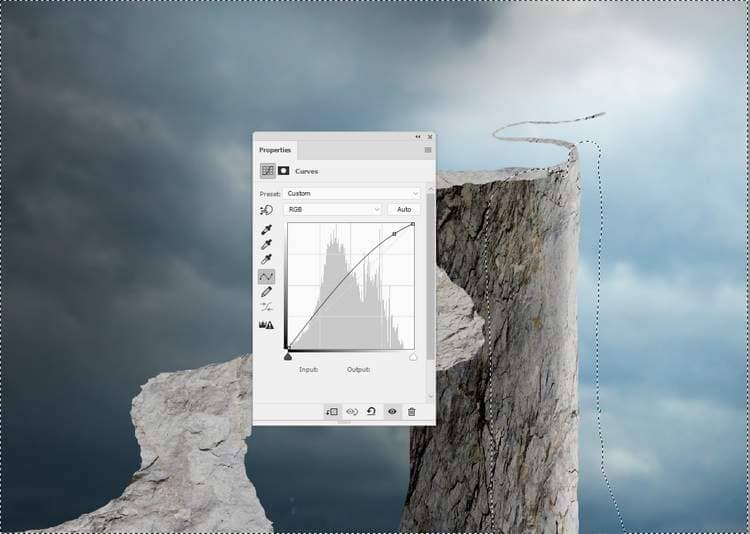
Create anotherCurvesadjustment layer to darken the left more. Paint on the right to keep its lightness.
Step 11
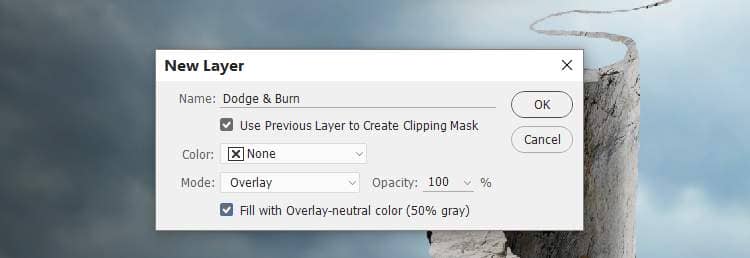
Make a new layer, change the mode to Overlay 100%and fill with 50%gray:
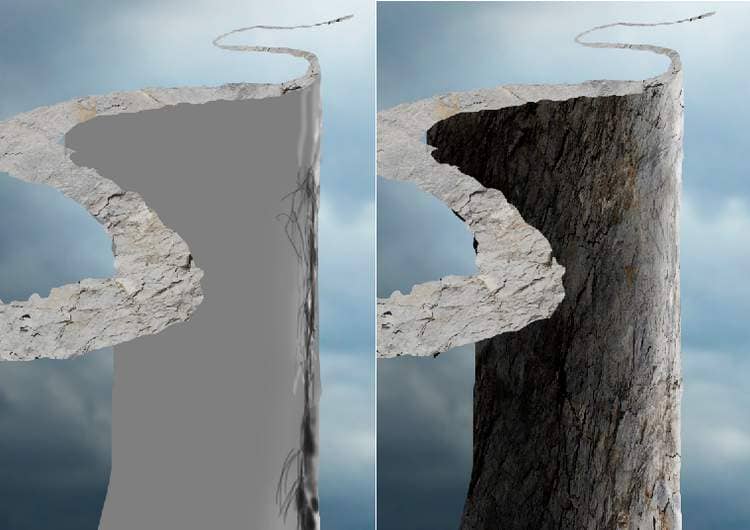
Activate the Dodgeand Burn Tool (O) with Midtones Range, Exposureabout 15-20%to paint more details for the contour of the right. You can see how I did it with Normal mode and the result with Overlaymode.
Step 12
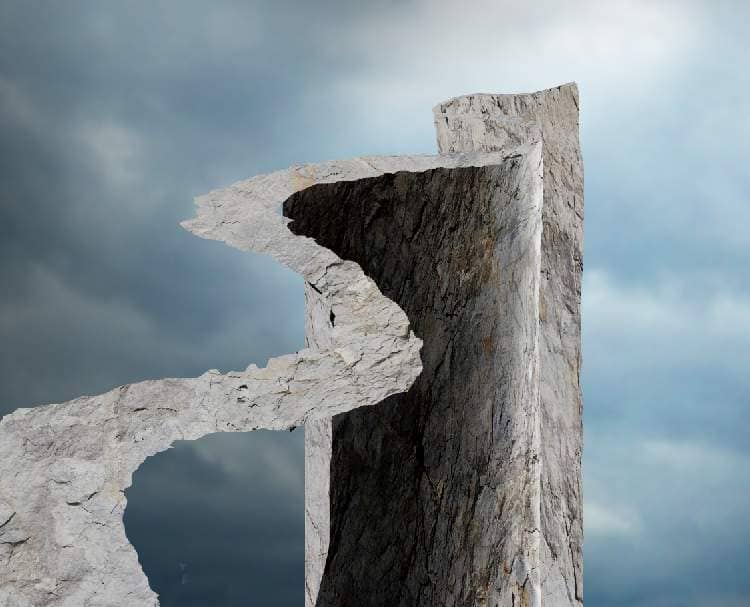
Drag the rock image again into our main document and set this layer below the first one. Move it rightward to fill in the end of the road.
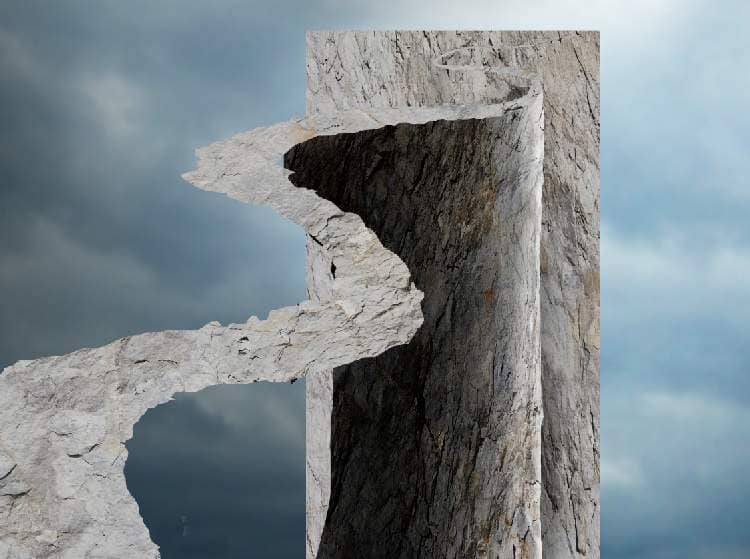
Add a mask to this layer and use a hard black brush to remove the unwanted details outside the road.
Step 13
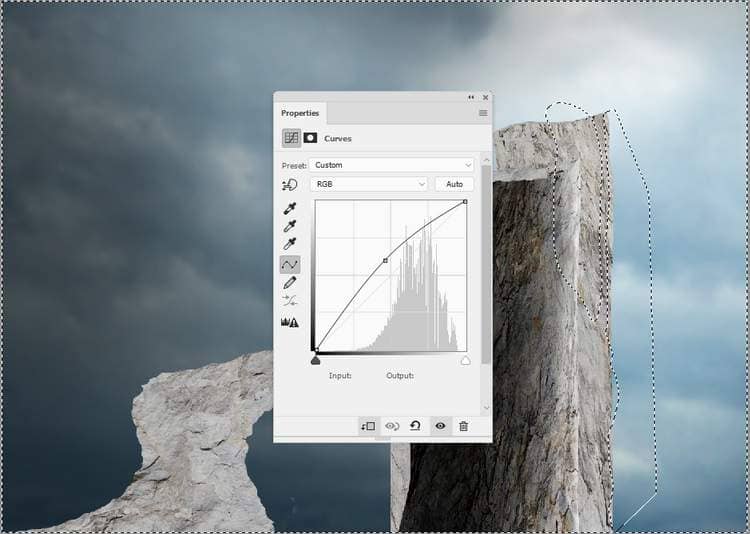
Create a Curvesadjustment layer and set it as Clipping Mask. Increase the lightness a bit and on the layer mask, paint on the contour of the rock part so it won't be brightened too much by this adjustment layer.
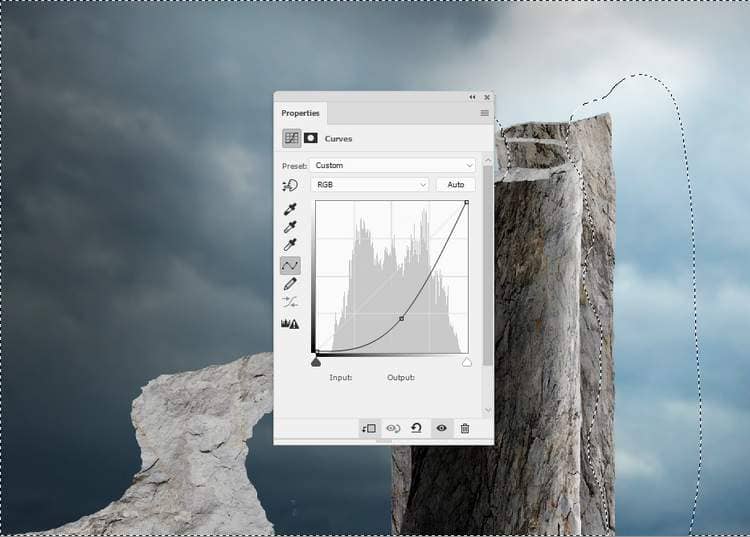
Make another Curvesadjustment layer to increase the contrast of the rock more. Paint on the contour part and the top or any details you feel too dark.
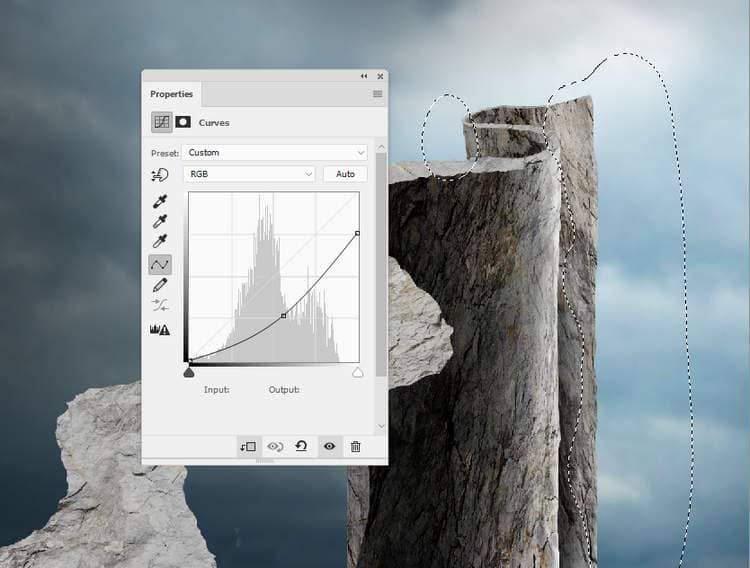
Continue making another Curvesadjustment layer with the same purpose. The selected area shows where to paint on the layer mask.
Step 14
Make a new layer, change the mode to Overlay 100%and fill with 50%gray. Use the Dodgeand Burn Toolto refine the light and shadow of the rock part.


5 comments on “How to Create a Conceptual of Life Photo Manipulation with Photoshop”
so imformative
Thank you for sharing your methods! I didn't follow the tutorial but I looked at your steps and it helped me understand how it's done.
Very insightful! Thanks.
WONDERFUL!! Thank you!
It was so wonderful totally loved it 😊