Turn any photo into a dot grid artwork with these Photoshop actions. You'll get great results with dots that change size. They get larger in brighter areas and smaller in darker areas. Free download available.
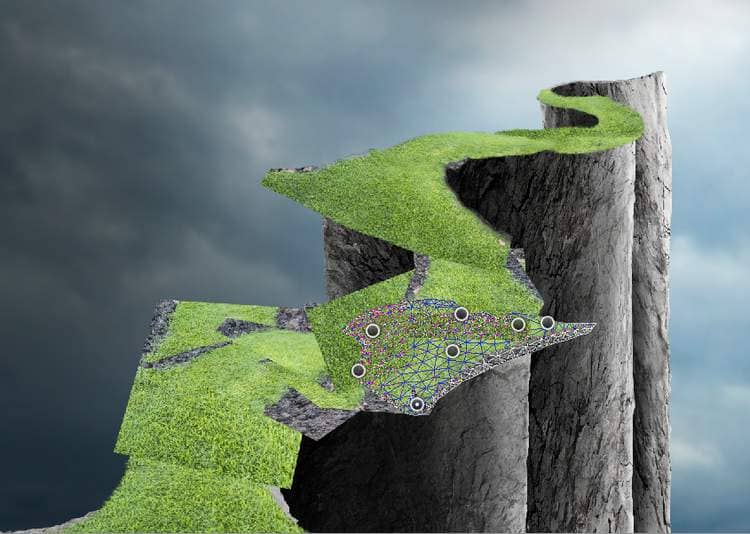
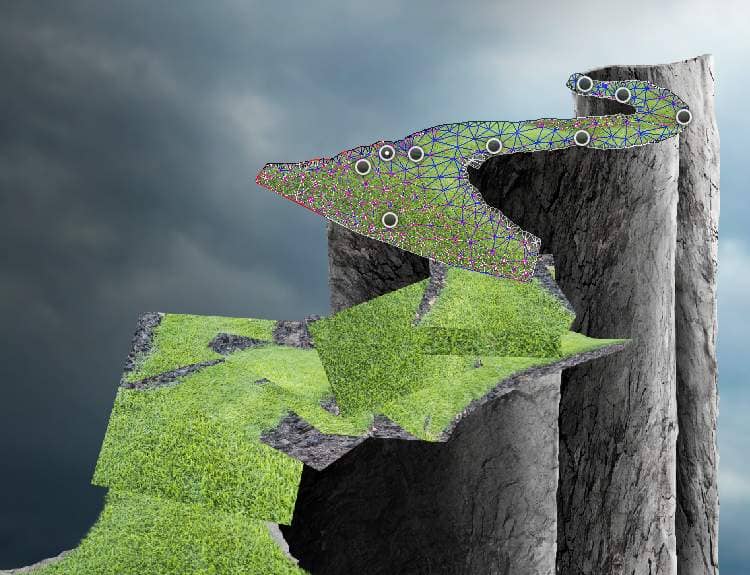
Add a mask to each of these layers and remove the uneccessaryparts. Hide the road layer and we'll have the result below:


Step 25
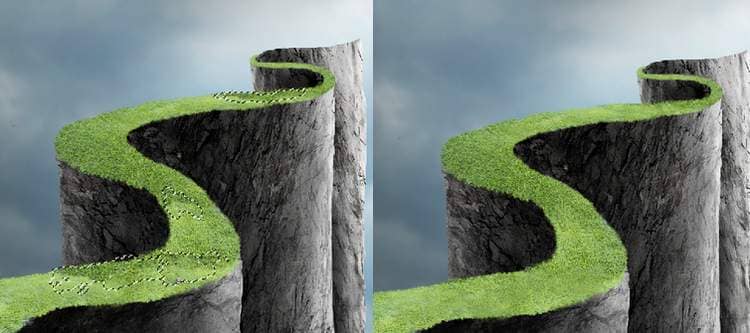
There are some unwanted details on the grassy road. Create a new layer and use the Clone Tool (S) to remove the indicated details.
Step 26
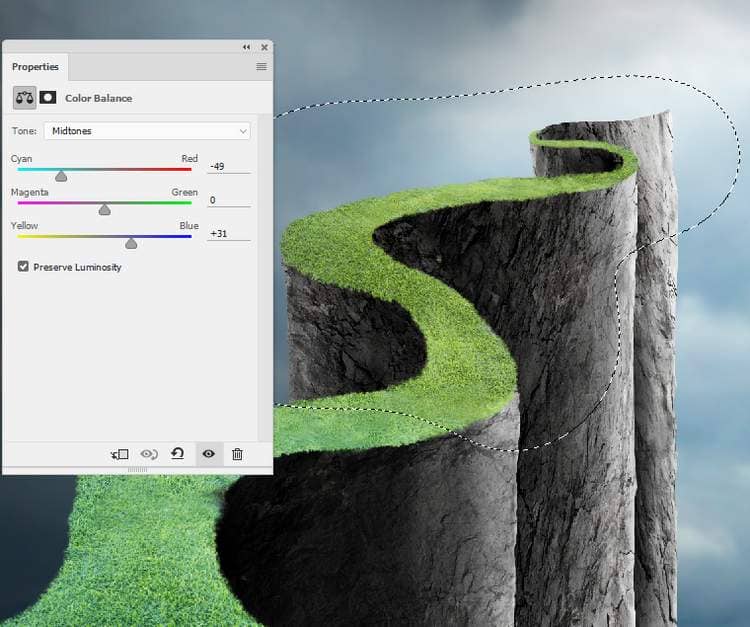
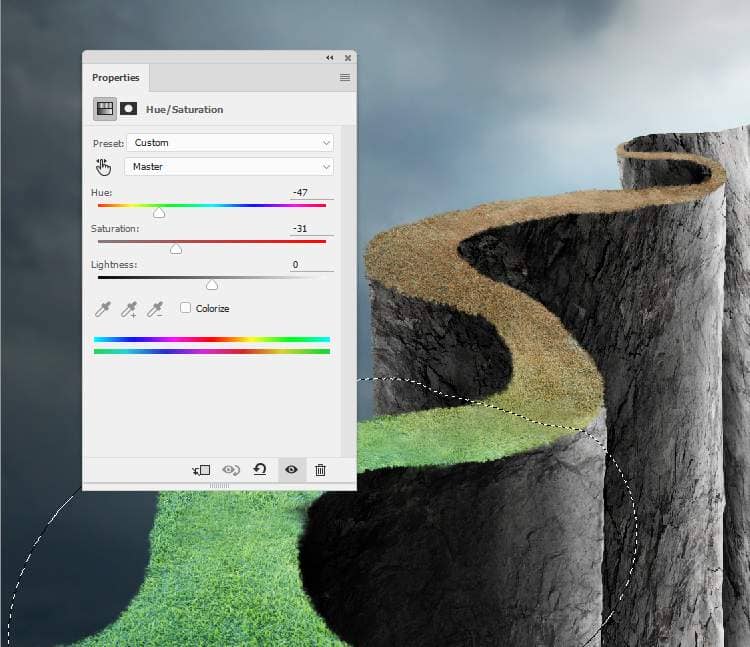
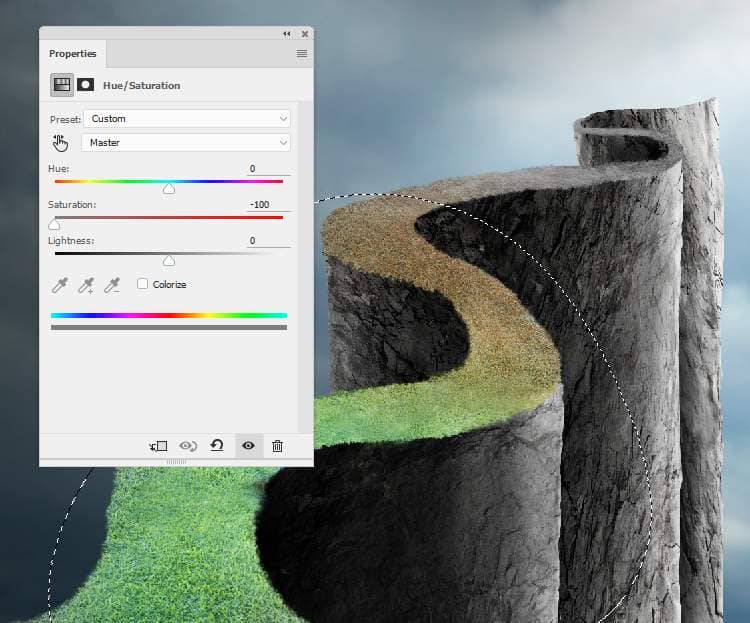
Create a group for the grass layers and the cloning one. Make a Color Balanceand two Hue/Saturationadjustment layersto change the color of the grass. We've aimed to make the change of the road's color to show the process of life. Paint on the part on the foreground to show the fresh green color to express the start of life.
Step 27
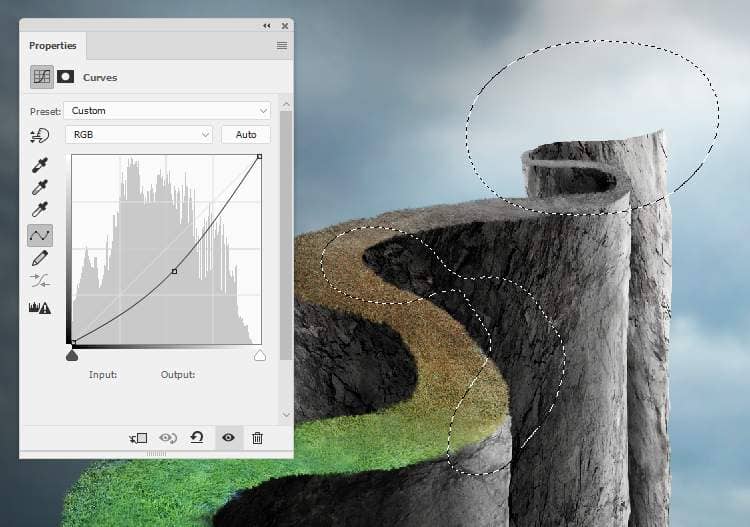
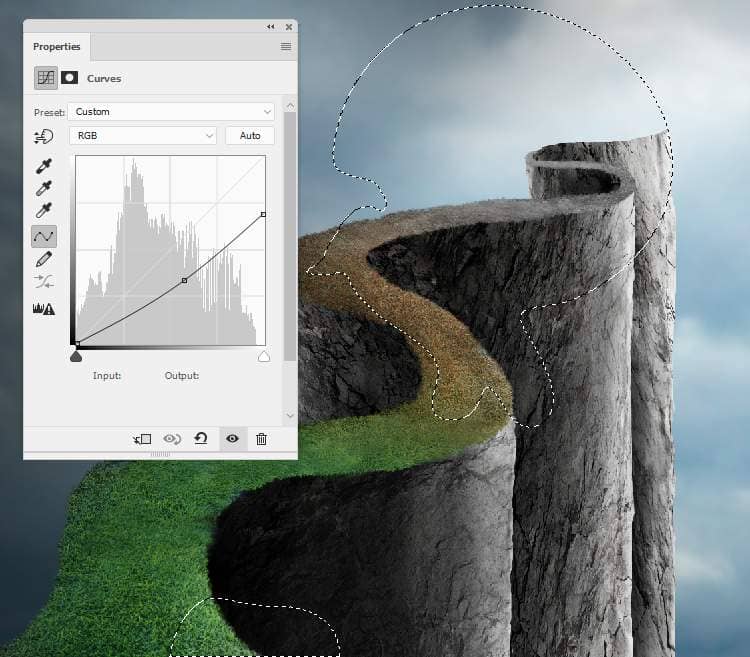
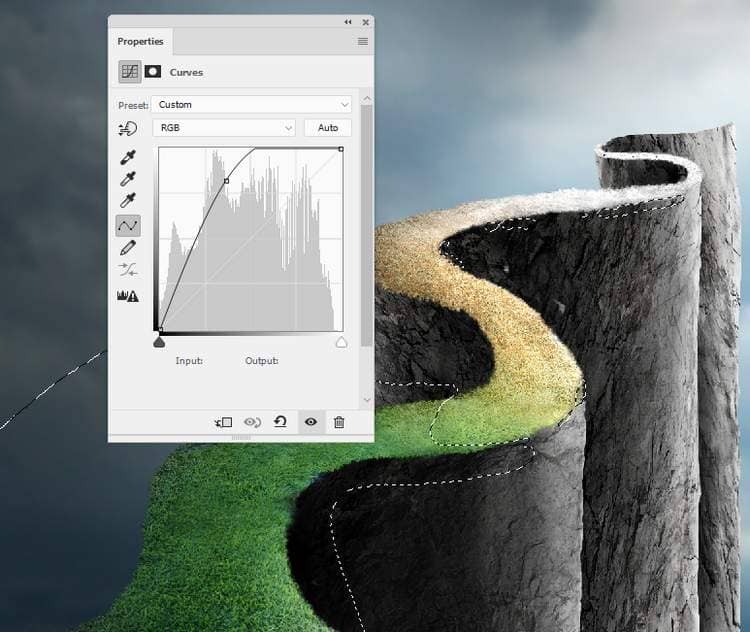
Create three Curvesadjustment layers to change the light and shadow of the road. The selected areas show where to paint on the layer mask.
Step 28
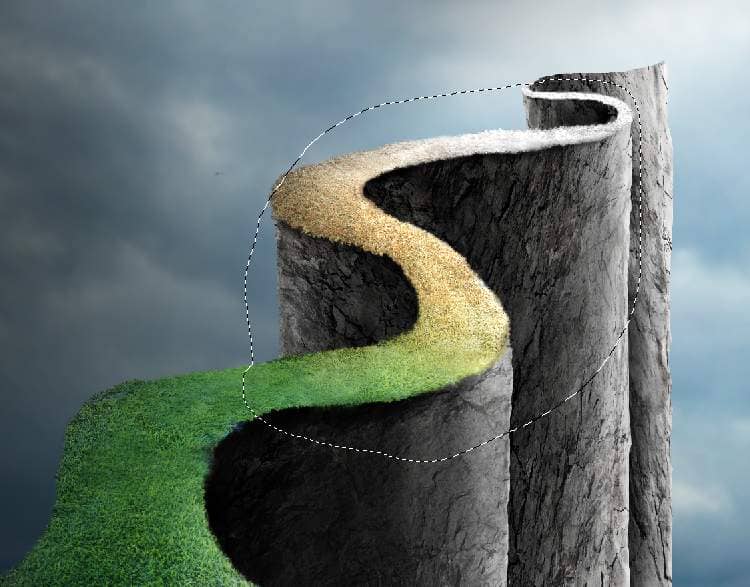
Make a new layer below the grass's group. Use a soft black brush with the opacity abut50%to paint shadow of the road on the rock wall.
Step 19
Create a new layer on top of the layers and use a medium-soft white brush to paint along the end of the road to show the end of life.

Step 30
Cut out the man from the original image and add him to the position near the end of the road. Use a layer mask to erase his left hand a bit.

Step 31
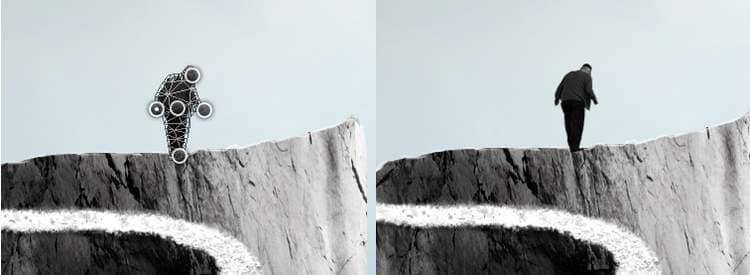
Use the Puppet Warpto change the pose of this man a little.
Step 32
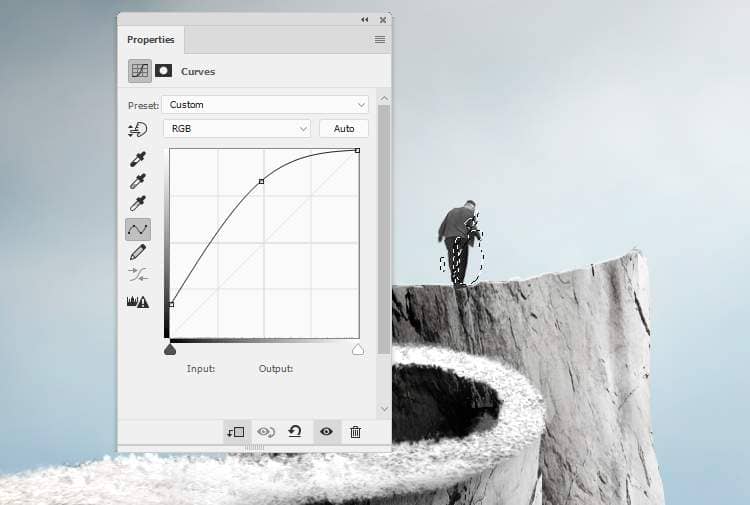
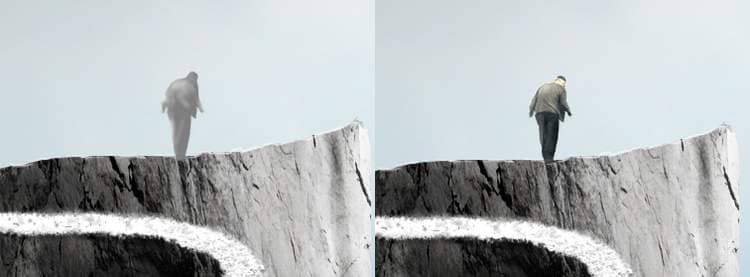
Create a Curvesadjustment layer to brighten the man. On this layer mask, paint on the hidden side of the man so it won't be brightened by this adjustment layer.
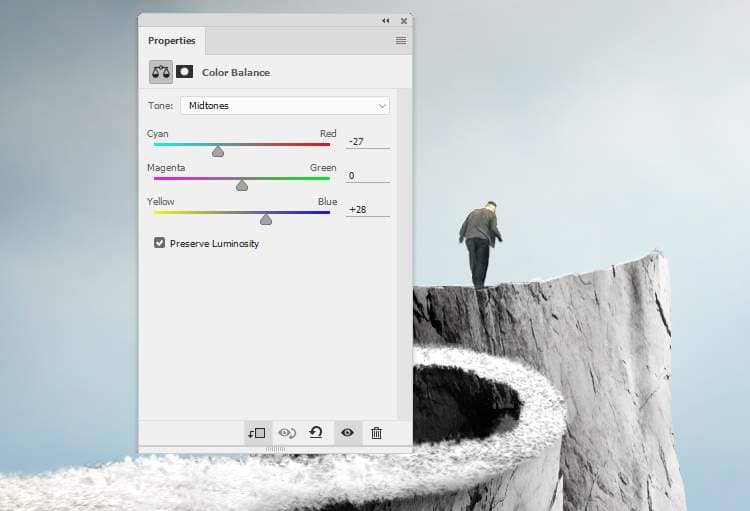
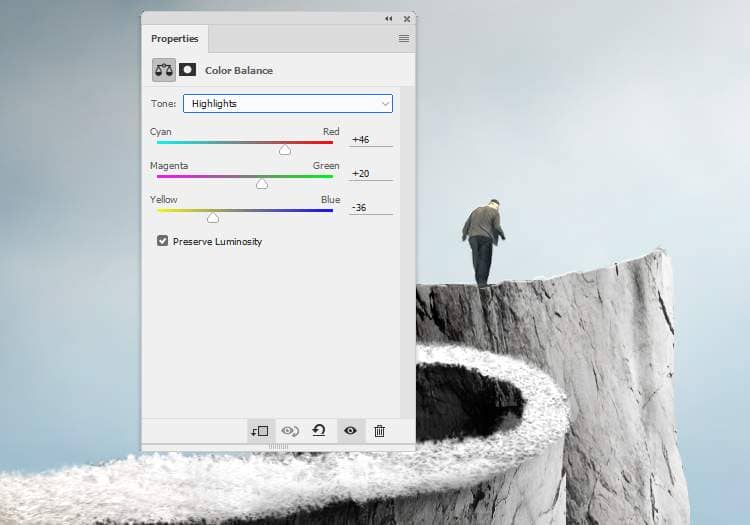
Make a Color Balanceadjustment layer and change the Midtonesand Highlightsvalues:
Step 33
Create a new layer, change the mode to Overlay 100%and fill with 50%gray.. Use the Dodge Toolto brighten the back of the man.
Step 34
Make a new layer and use a hard brush with the color #2f251d,, the size is 2 px to paint a stick for the man. Hold the Shiftkey and drag straightly from the right man's hand down to the road. Duplicate this layer to make the stick thicker and more visible.

Step 35
Press Dto turn the foreground and background to the default colors (black and white). Add a new layer and go to Render > Filter > Clouds. Convert this layer to a Smart Object.


5 comments on “How to Create a Conceptual of Life Photo Manipulation with Photoshop”
so imformative
Thank you for sharing your methods! I didn't follow the tutorial but I looked at your steps and it helped me understand how it's done.
Very insightful! Thanks.
WONDERFUL!! Thank you!
It was so wonderful totally loved it 😊