
Set the layer Blend Mode to Liner Dodge and the Opacity to 50%, next go to Filter > Blur > Gaussian Blur and set the radius to 25px.

Now create a layer mask to this layer, pick your Brush Tool (B) Size about 900px Hardness 0%, make sure your Foreground color is set to black, and start brushing over the edges of the ground light we created, we don’t want to overcome with the light on the ground, that’s the purpose behind this step.(Red color in the image below shows where you should use the brush tool)

Step 19
Duplicate the Liner Dodge layer, then change the Blend Mode to Color Dodge and set the Opacity to 100%.

Create a Hue/Saturation Adjustment Layer, check on the colorize box and set the Hue to 48, Saturation to 100 and the Lightness +30 (Don’t forget to clip the adjustment layer to the color dodge layer).

Step 20
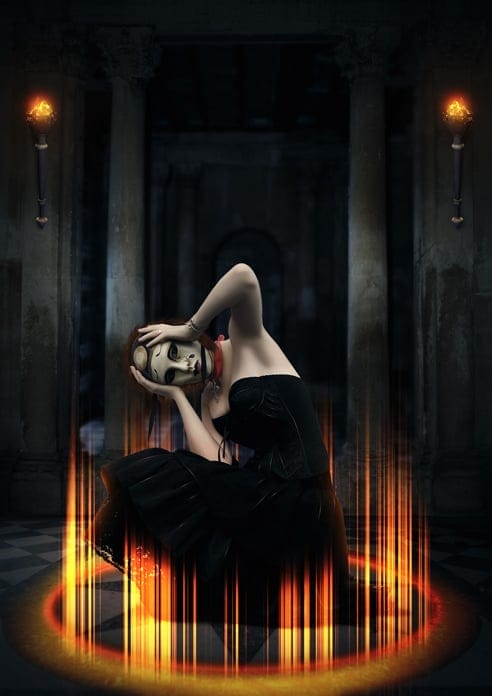
Time to work with the model, go to File > Place and choose the model image to place it in the document as a smart object.(Place it as shown in the image below)

Create a selection around the model using any selection tool you are familiar with (Pen Tool, Lasso Tool ….etc), when done selecting the model click on the Layer Mask icon to mask the Model out of the background.(include the model hair with your selection because we are going to paint the hair anyway).


Step 21
We have to erase these white parts that is showing on the model dress, to do this we are going to use the Mask Edge method.

Double click on the mask box to open the Mask dialog box then click on Refine mask and set the Radius on 5 and check on the Smart radius box.

Now use the Refine Mask Tool on the white parts as shown in the image below (the usage of this tool like the Brush tool usage).
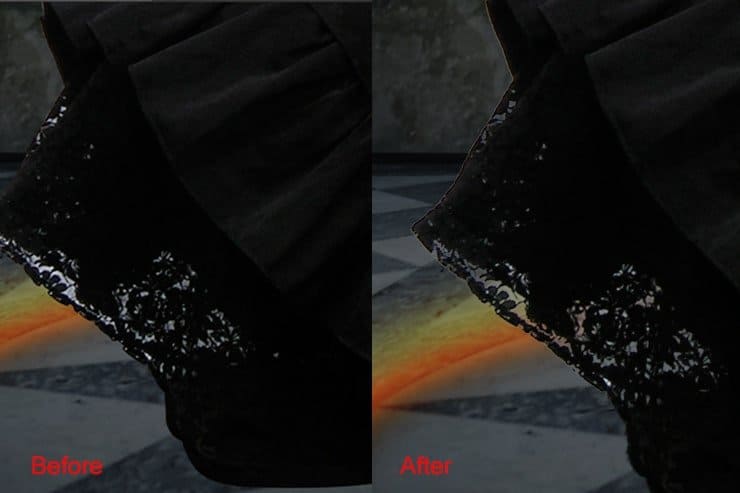
Here is a before and after so you can see the result.

Step 22
Let’s add the model shadow, start by creating a new layer under the model layer and rename the layer to Shadows, next pick the Brush Tool (B) Size 100px Hardness 0% and set the Brush Opacity to 50% Flow 50%, make sure your Foreground color is set to black. Now start brushing under the model skirt to create a shadow effect.(as shown in the image below).
5 responses to “Create a Dark Spiritual Ritual Scene of a Girl in Photoshop”
-

Had a hard time getting the mixer brush tool, never delivered as smooth a surface as the tutorial displays. (Step 27)
Also, the gradient noise for the beam isn’t as sharp after motion blur applied.
Besides that, great descriptive tutorial. Thanks.
-
thank you for sharing. Your dahtuger is precious. I hope the world is always good to her. your link to the book has a 404 error. no book there so is your site down?
-
Too many step images are missing/failing to load – review your upload before announcing it. This could have been an great tutorial as an inspirational learning project.
-
some images may not load properly
-
Quite a few of the step images are missing/failing to load :-( Otherwise this is an awesome tutorial.
Leave a Reply