Step 32
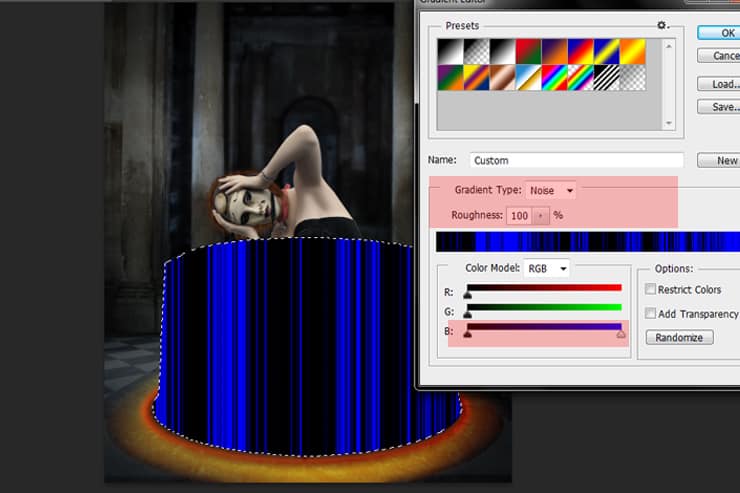
Create a new Layer and name it Beam, use the Elliptical Marquee Tool (M) and the Lasso Tool (L) to make a selection as shown in the image below.

Pick the Gradient Mao Tool (G), set the Gradient Map type to Linear and the Preset to Noise as shown in the image, and create a gradient in a horizontal line as shown in the image below.

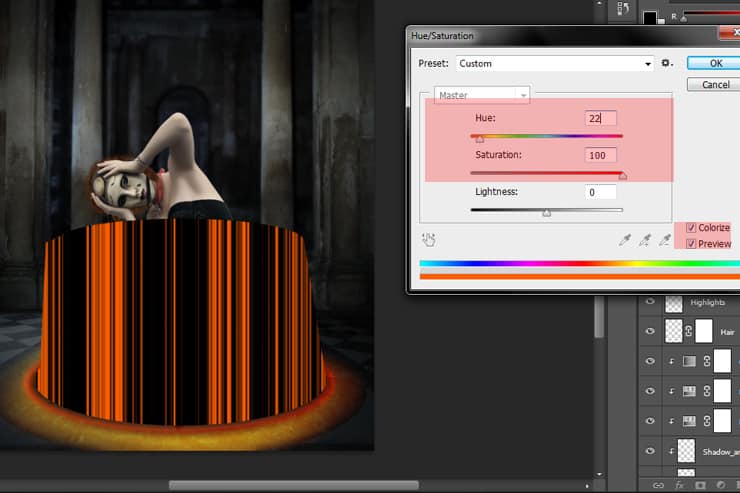
Now go to Image > Adjustments > Hue/Saturation, check on the Colorize box and set the Hue to 22 and Saturationto 100%.

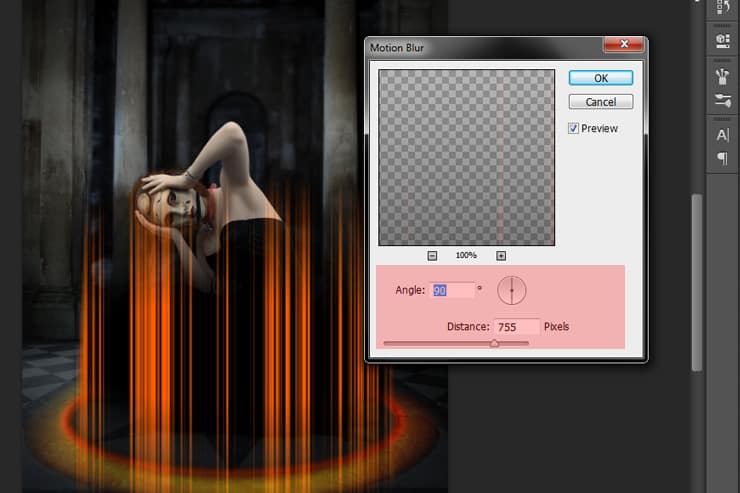
Next go to Filter > Blur > Motion Blur and set the angel to 90% and the Distance to 755.

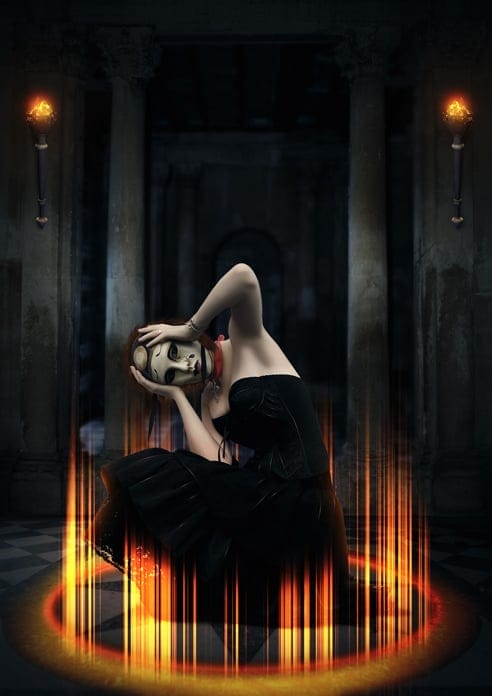
Create a Layer Mask for the Beam layer, pick the Brush Tool (B) Size about 1900px Hardness 0%, make sure your Foreground color is black and use the Brush and Mask to hide the top part of the beam as shown in the image below, when done change the Blend Mode of the beam layer to Linear Dodge(Red Color shows where you should use the Brush Tool on the Mask Layer).

Step 33
Duplicate the beam layer and place it under the model layer to make the beam looks like it’s surrounding the model, use the Layer Mask to unhide the back parts of the beam that we hide in the main beam layer.

Step 34
Go back to the main beam layer, duplicatet the layer (Ctrl+J), change the Blend Mode to Color Dodge, go to Image > Adjustment > Hue/Saturation, check on the Colorize box and set the Hue to 24 Saturation to 10 and Lightness to +11.

Step 35
On top of all layers that are clipped to the model layer, create a new layer and rename it to Liner_Dodge then clip it to the model layer as the the other blending and shadows layers, next change the Blend Mode to Linear Dodge, pick the Brush Tool (B) Size 600px and Hardness 0% with a #ff7200 color and paint over the edges of the model skirt as shown in the image(Red color in image below shows where you should paint).

Step 36
Go to File > Place and add the Torch image, place it as shown in the image below, when done create a layer mask to the Torch layer and use the Mask to hide the text under the Torch and to hide the top part of the Fire, we are going to add our own fire.
5 responses to “Create a Dark Spiritual Ritual Scene of a Girl in Photoshop”
-
Had a hard time getting the mixer brush tool, never delivered as smooth a surface as the tutorial displays. (Step 27)
Also, the gradient noise for the beam isn’t as sharp after motion blur applied.
Besides that, great descriptive tutorial. Thanks.
-
thank you for sharing. Your dahtuger is precious. I hope the world is always good to her. your link to the book has a 404 error. no book there so is your site down?
-
Too many step images are missing/failing to load – review your upload before announcing it. This could have been an great tutorial as an inspirational learning project.
-
some images may not load properly
-
Quite a few of the step images are missing/failing to load :-( Otherwise this is an awesome tutorial.


Leave a Reply