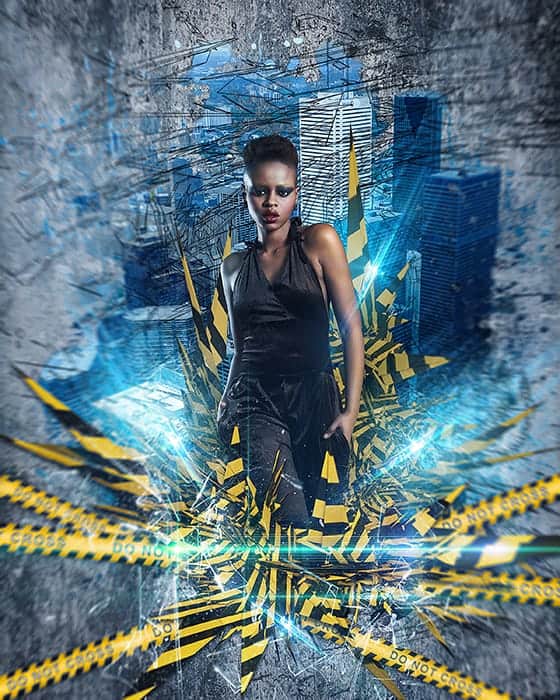

Step 28
Take a Horizontal Type Tool (T). Place the cursor on the first black line on the left and write “Do Not Cross”. In “Character” panel (Window > Character) set Font to “Arial Bold”, Size around 37.99 pt, Color to black. Press “All Caps” button to make all letters are capital.

Step 29
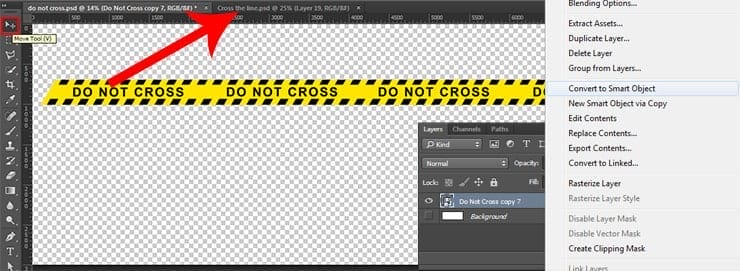
With Move Tool (V) and Opt/Alt key duplicate inscription until is no free space on the tape (Or you can use Cmd/Ctrl + J and move inscription). Hold Shift to keep inscription at one line. Select All layers and make from it a Smart Object (right click > Convert to Smart Object). With Move Tool (V) move tape in the document with the photo manipulation.
Step 30
Duplicate ribbon two times (Cmd/Ctrl + J or Layer > Duplicate layer…) and with Free Transform Tool (Cmd/Ctrl + T or Edit > Free Transform) position ribbons as shown in the image below. You can change the location or size of ribbon as you want. Select all ribbon’s layers and group them (Cmd/Ctrl + G or Layer > Group Layers).

Step 31
The tape does not look realistic, so I used the layer styles to add gloss and texture. Start from “Inner Shadow” (Layer > Layer Style > Inner Shadow…). Set Opacity: 50%, Distance: 0, Choke: 5% and Size: 51px. Go next, checked “Satin” and there set color: #ffffff, Blend Mode “Screen”, Opacity: 90%, Distance: 80 and Size: 65px.


Add a bit of texture. Checked “Pattern Overlay” and make following settings – Blend Mode “Multiply”, Opacity: 20%, Scale: 100%. Click on pattern thumbnail go to settings (small gear on right side) and from list load “Texture Fill 2” pack, use “Stucco 3” pattern. At the end add a drop shadow. Set Opacity: 35%, Distance: 12px, Spread: 0%, Size: 13px and click OK to apply layer style.


Step 32
Make Right click on layer with style > Copy Layer Style. Select the remaining two layers and without style and paste it (right click > Paste Layer Style). I strongly do not recommend you to add style to the group, because it will not work on all layers, but only the figure of the ribbons.

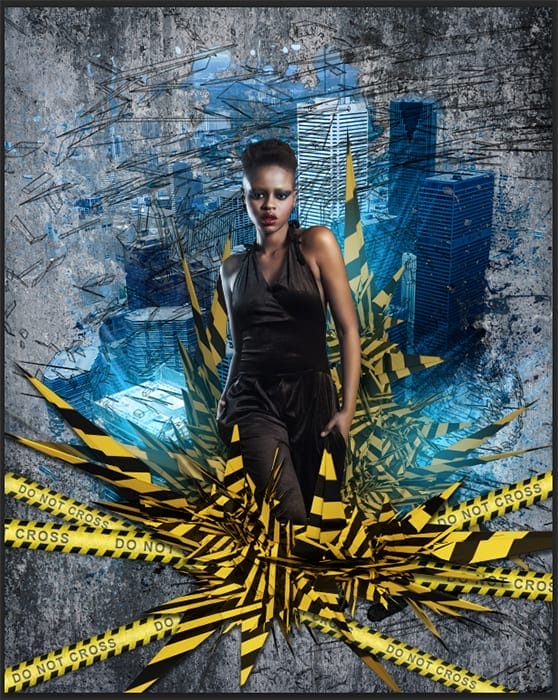
Step 33
Color of ribbons slightly differ from the colors on an abstract render so I used an adjustment layer “Hue/Saturation” (Layer > New Adjustment Layer > Hue/Saturation…) with the settings – Hue: -8, Saturation: +16 and be sure to clip this layer to a “Ribbon” group.
10 responses to “Create this Poster Design with Abstract Effects in Photoshop”
-

Thanks on your marvelous posting! I genuinely enjoyed reading it, you might be a great author.I will ensure that I bookmark your blog and will eventually come back someday. I want to encourage yourself to continue your great work, have a nice holiday weekend!
-
I’m new to photoshop and mentioned in step 10 I’m supposed to look for a brush spot thumbnail, but I don’t know what or where it is.
-
In Step 37 I cannot open Filter > Filter Gallery and I wonder why
-
Go to the Image > Mode menu and check if your image is in RGB mode and 8-bits/channel color.
-
-
Love this lesson, i learnt several new techniques. Made the same and one with different photo’s
-
you can download Kaos Brush Set 2.0 here: http://www.brushking.eu/563/kaos-brush-set-20.html
-
Very nice !!!!!!!
-
Brush Kao Set can’t open :(. Please! check link again.
-
Brush Kao Set can’t open :(. Plz, test link again
-
Great tut, thanks.
But Kaos Brush Set 2.0 – Outof4mmo… the page you were looking for doesn’t exist.
Leave a Reply