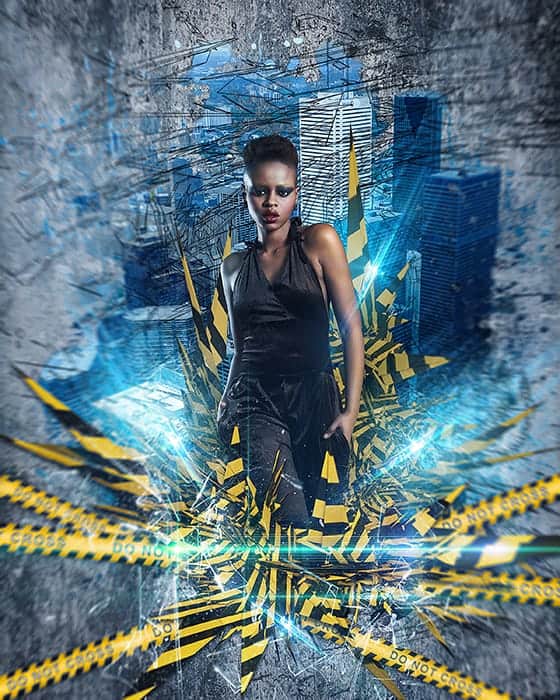
Step 17
Place image “Line1” above model layer (File > Place…/Place Embedded) and with Free Transform Tool (Cmd/Ctrl + T or Edit > Free Transform) increase it’s size. To accent render the foreground add an adjustment layer “Brightness/Contrast” with the settings Brightness: +34, Contrast: +80 and clip this layer to a render.

Step 18
Add a drop shadow to a foreground render image. Go to Layer > Layer Style > Drop Shadow or use “Add a layer style” icon on Layer panel. Set Opacity: 65%, Distance: 17px, Spread: 9%, Size: 16px and click OK to apply changes. This will make render a more realistic.

Step 19
Now time to effects. The first thing that we can do is glowing lines. They look beautiful and elegant. First you need to create a splatter brush with hard round form. In Brush Presets panel select Hard round brush and go to Brush panel (F5). Use images below to create a brush. After it’s done set brush color to white, Opacity: 100 and Size to 30px.

Step 20
Create a new layer (Cmd/Ctrl + Shift + N) under group “C4D” and draw a small cluster of strokes. Go to Filter > Blur > Motion Blur… Set Angle: -50, Distance: 800. Repeat filter several times until lines become smooth (Cmd/Ctrl + F or Filter > Last Filter). By blurring the lines almost invisible, so duplicate this layer a few times (Cmd/Ctrl + J or Layer > Duplicate Layer…) until the texture will be slightly visible.

Step 21
Then will integrate all the layers with the lines in one layer (select layers > Layer > Merge Layers… or Cmd/Ctrl +E). Set Layer blending mode to “Screen”. Use Free Transform Tool (Cmd/Ctrl + T or Edit > Free Transform) to resize it that lines become smaller and use Rotate Tool to change direction of lines. Make two more copies of lines and place it around render and model.

Step 22
Merge all layers with lines(Cmd/Ctrl + E). Now add a glow to the lines by using layer styles “Inner Glow” and “Outer Glow” (“Fx” icon at the bottom of layer panel or go to Layer > Layer Style > Inner Glow/Outer Glow). For “Inner Glow” set Blend Mode to “Normal”, Opacity to 100%, Color ##77d7ff, Choke to 0% and Size to 10px. In “Outer Glow” tab change Opacity to 100% and add Noise around 25%. Set Color #0077f1, Spread: 2% and Size: 16px.
10 responses to “Create this Poster Design with Abstract Effects in Photoshop”
-
Thanks on your marvelous posting! I genuinely enjoyed reading it, you might be a great author.I will ensure that I bookmark your blog and will eventually come back someday. I want to encourage yourself to continue your great work, have a nice holiday weekend!
-
I’m new to photoshop and mentioned in step 10 I’m supposed to look for a brush spot thumbnail, but I don’t know what or where it is.
-
In Step 37 I cannot open Filter > Filter Gallery and I wonder why
-
Go to the Image > Mode menu and check if your image is in RGB mode and 8-bits/channel color.
-
-
Love this lesson, i learnt several new techniques. Made the same and one with different photo’s
-
you can download Kaos Brush Set 2.0 here: http://www.brushking.eu/563/kaos-brush-set-20.html
-
Very nice !!!!!!!
-
Brush Kao Set can’t open :(. Please! check link again.
-
Brush Kao Set can’t open :(. Plz, test link again
-
Great tut, thanks.
But Kaos Brush Set 2.0 – Outof4mmo… the page you were looking for doesn’t exist.


Leave a Reply