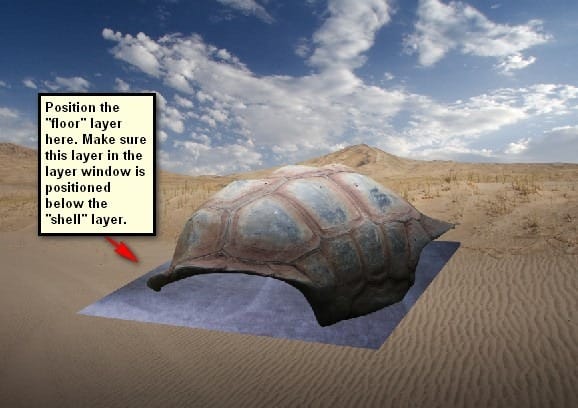
Step 21
Activate the Transform tool (Ctrl/Cmd + T) and then resize the “floor” as shown below:
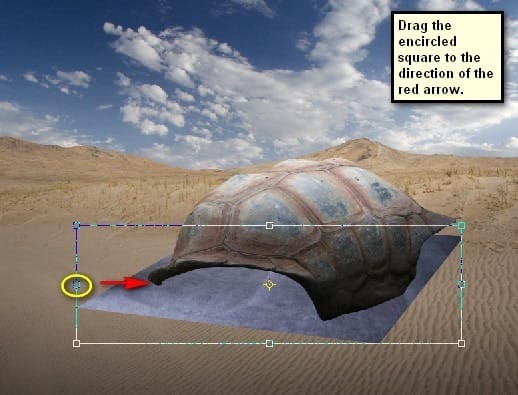
The result:
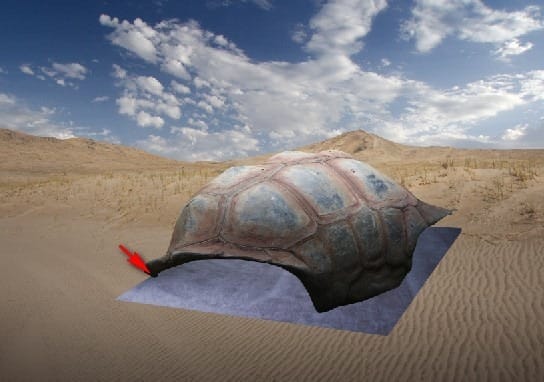
Step 22
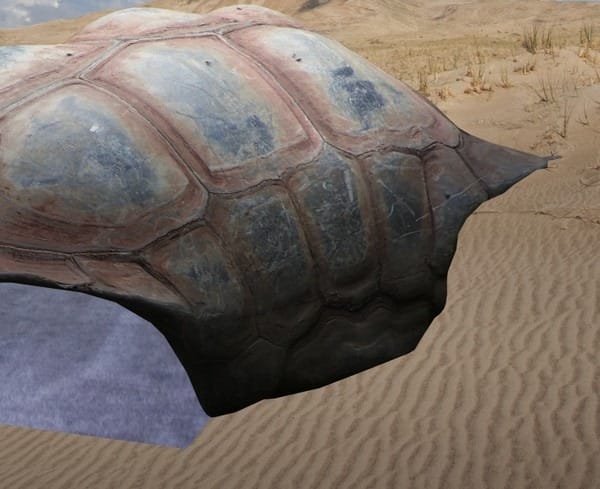
Next, activate the Polygonal Lasso Tool (L), we are going to cut the extra areas to make the floor look like it really is inside the tortoise shelter.
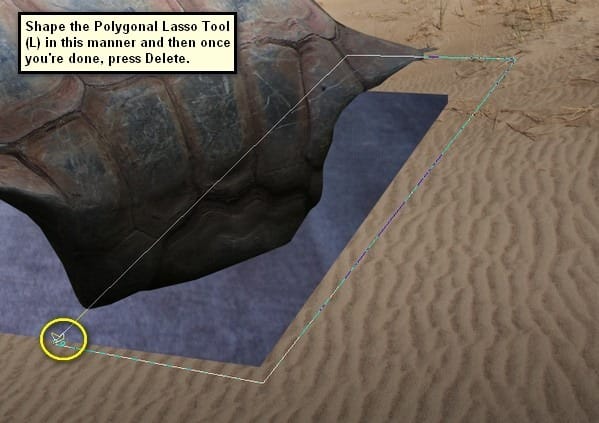
The result of that should be like this:
Step 23
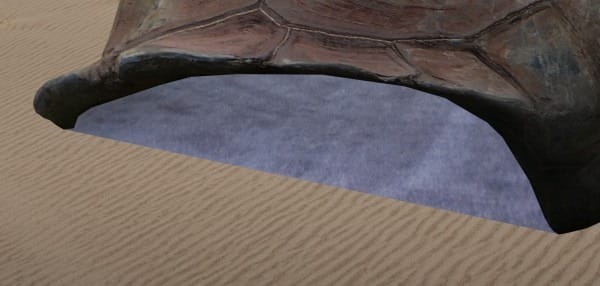
Next, activate the Polygonal Lasso Tool (L) again and then create a selection area over the following areas of the “floor”.
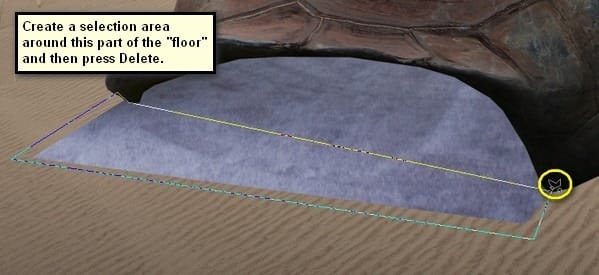
The result:
Step 24
Next, we will make this floor blend well with the tortoise shelter by adding shadows on the inside. To start, create a new layer (Ctrl/Cmd + Shift + N) above the “floor” layer and name it “darken inside”. Right click on this layer from the layer window and then click on the “Create Clipping Mask” option from the contextual menu.
Activate the Brush tool (B) and then input the following values:
- Brush size: 300px
- Hardness: 0%
- Opacity: 50%
- Flow: 100%
- #: 000000
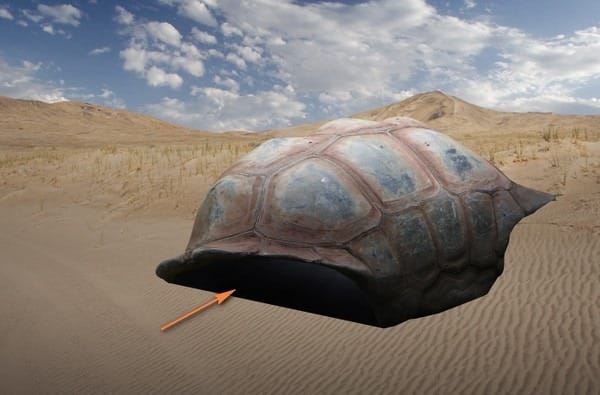
Now, let’s start painting:
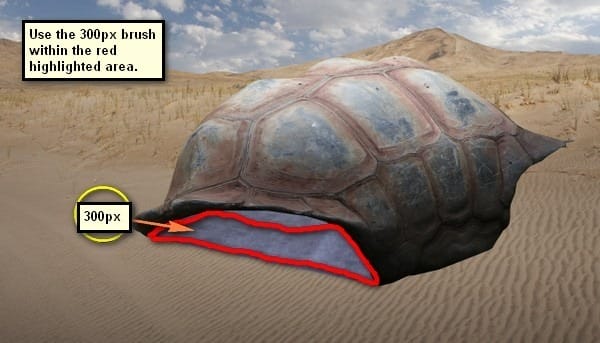
The result of that should be similar to this:
Step 25
Now, we will be creating the shadow of the tortoise shelter.
To start, let’s create a new layer (Ctrl/Cmd + Shift + N) and name it “shadow”. Put this layer below the “floor” layer so that the brush paint would just be shown below the tortoise shelter.
Activate the Brush tool (B) and input the following values:
- Brush size: 15px
- Hardness: 0%
- Opacity: 100%
- Flow: 100%
- #: 000000
- Zoom level: 100%
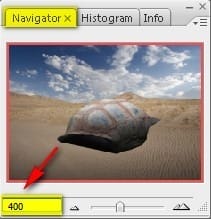
Note: To change the zoom level, simply change the zoom values at the Navigator window. See image below:
Now, let’s paint:
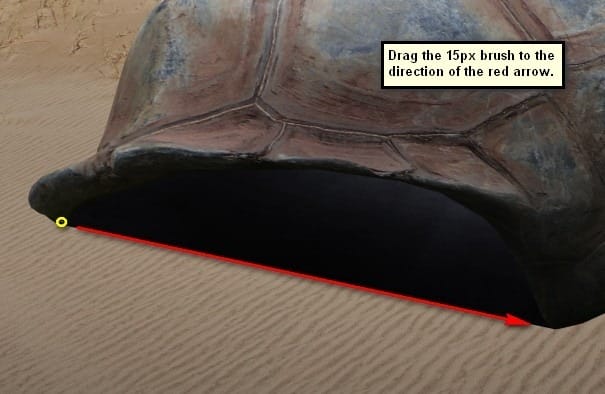
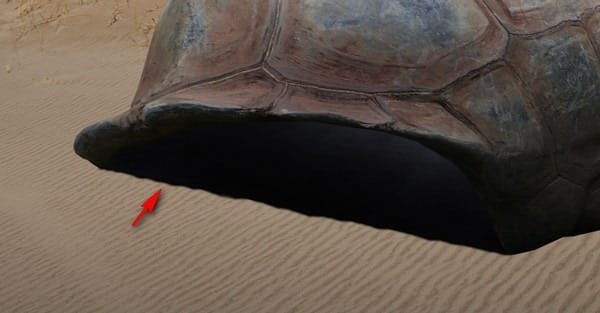
The result:
Step 26
Next, let’s create another layer (Ctrl/Cmd + Shift + N) above this layer and name it “shadow 2”. Activate the Brush tool (B) and input the following:
- Brush size: 40px
- Hardness: 0%
- Opacity: 50%
- Flow: 100%
- #: 000000
- Zoom level: 100%
Paint here:
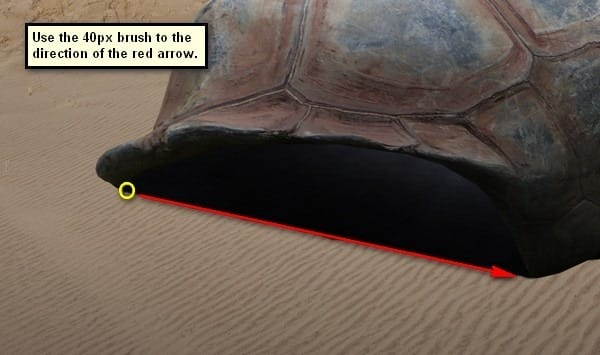
The result of that should be like this:
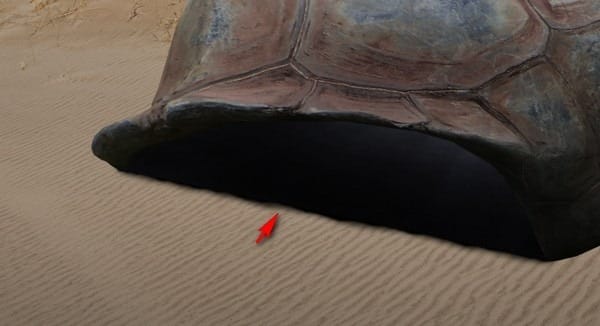
Create another layer again (Ctrl/Cmd + Shift + N) and name it “shadow 3”. Activate the Brush tool (B) and input the following:
- Brush size: 20px
- Hardness: 0%
- Opacity: 100%
- Flow: 100%
- #: 000000
- Zoom level: 100%
Paint here:
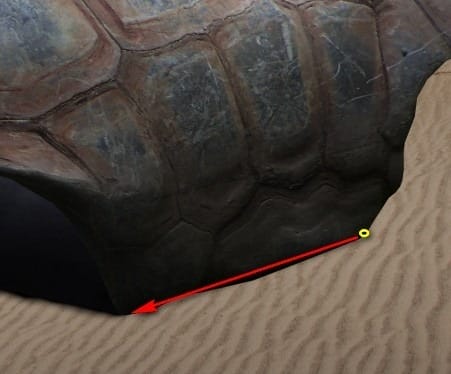
The result of that should be like this:
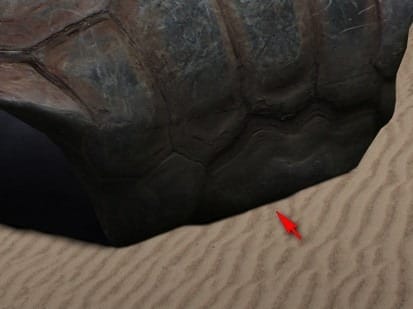
Step 27
Create another layer (Ctrl/Cmd + Shift + N) but this time, name it “shadow 4”. Activate the Brush tool (B) and input the following:
- Brush size: 300px
- Hardness: 0%
- Opacity: 50%
- Flow: 100%
- #: 000000
- Zoom level: 100%
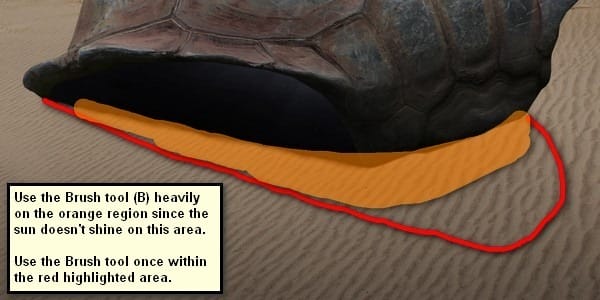
The result should be similar to this:
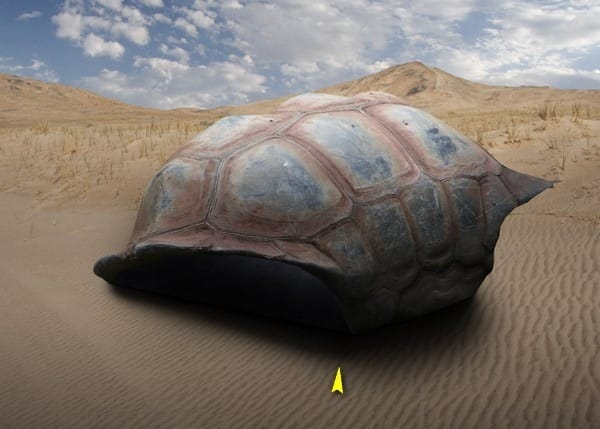
For our last shadow layer, name it “shadow 5”. Activate the Brush tool (B) and input the following:
- Brush size: 500px
- Hardness: 0%
- Opacity: 15%
- Flow: 100%
- #: 000000
- Zoom level: 100%
Paint here:
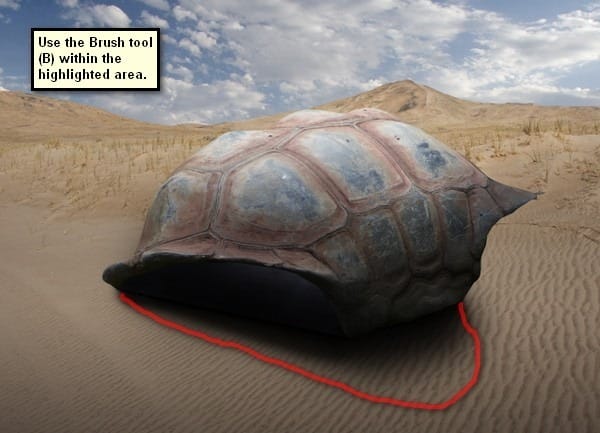
The result of that should be similar to this:
3 responses to “How to Create a Sci-Fi Giant Tortoise Shelter Photo-Manipulation”
-
Some of these tutorials are extremely good, magazine like. Thanks for sharing!
-
Links are broken :/
-
This tutorial is really interesting and easy to understand.Thanks for shari

Leave a Reply