
Create a stack of glossy photos. In this tutorial, you will learn how to place images into a document, add layer styles, and add a glossy shine to the photos.
Place the Images
Step 1
Create a new document. I created a 8×10 300dpi document.

Step 2
Place (File> Place) the photos you would like to include in the stack of photos.

Step 3
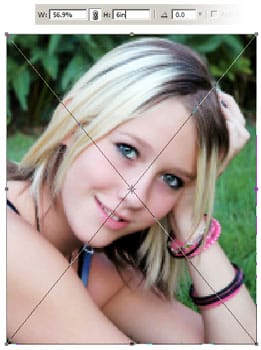
The image should be placed in the document with the transform controls activated. Adjust the image size. Hold the Shift key to maintain the aspect ratio while scaling the image
Step 4
Repeat step 2 and 3 for all the photos you would like to include with the artwork.

Step 5
Use the Transform tool (Image> Transform> Rotate or Ctrl+T) to rotate the photos. You can arrange the photos by moving the layers to different positions in the layers pallet. I moved the photo of the cup to the top layer so that it’s the top photo of the stack.
Add a Drop Shadow and Border
Step 6
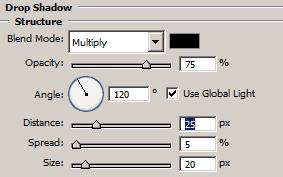
Select the layer with the image on the bottom of the stack and add a Drop Shadow layer style (Layer> Layer Style> Drop Shadow). Adjust the settings to achieve your desired drop shadow.
{mostip}Don’t click OK yet!{/mostip}

Step 7
In the same Layer Style window, select the Stroke style. You should see the properties where you can adjust the stroke. Change the Position to “Inside” and the Color to white then adjust the size to create the border. Click OK when done.
Step 8
Right mouse click on the layer we’ve added the layer style to and select “Copy Layer Style”. Then select the layer above, right mouse click and select “Paste Layer Style”. Repeat this for the other layers so that all the layers (except the background layer) have the same layer style.
Step 9
To make the drop shadows look more realistic, double-click on the layer style icon of each layer and modify the drop shadow. Increase the distance of the drop shadow according to the layer order. For example, my document has 4 layers. I left the distance of the drop shadow on the first layer to 20. But I increased the distance by 5 as the layer order increases:
2nd layer: 20px
3rd layer: 25px
4th layer: 30px
5th layer: 35px
Step 10
Your document should look similar to this with a white border and drop shadow on each of the images.
3 responses to “Glossy Photos”
-

sweet bro #2022
-
Exellent………………….
-
simple and nice
Leave a Reply to bassamCancel reply