Luminar AI lets you turn your ideas into reality with powerful, intelligent AI. Download the photo editor and see how you can completely transform your photos in a few clicks.

Step 12 - Adding Lights to the Belt
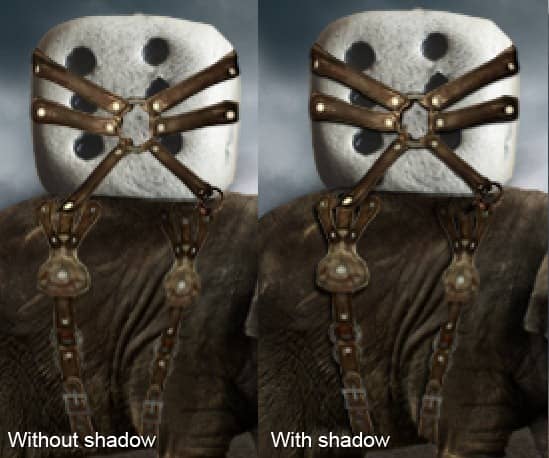
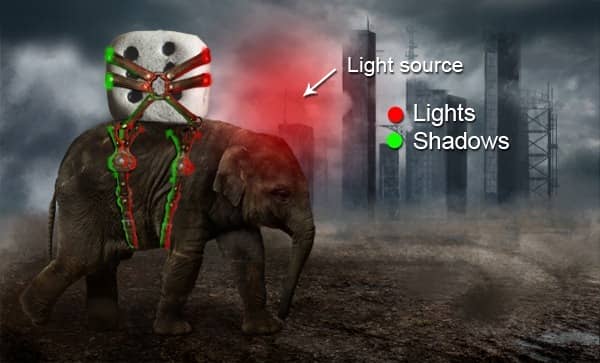
When you’re doing manipulations it’s really important to choose where the light source is so that you can add light and shadow to the objects in your image properly. Let’s take a look at the picture below which shows where the light source is and how it affects the belt.

To add light and shadow, create a new layer above the BELT. Name it BELT LIGHTS and create a clipping mask from it. Select the Gradient Tool (G) and pick solid #808080 grey color and fill the layer with it. Select the Brush Tool (B), choose a white color, and start painting the light. You can experiment with different opacities to get a more natural result. Then pick a black color and paint the shadows.
Step 13 - Adding the Woman
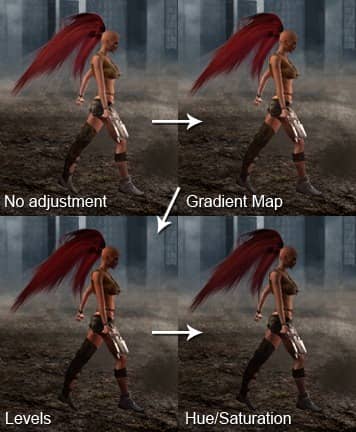
Download the picture of the woman and drag it into the manipulation. Resize it if necessary. Name the layer WOMAN and place it on top of your layers. Change the color balance and contrast of the woman to fit to the image properly. First increase the contrast of the woman a little. To do this, add a new adjustment layer Gradient Map above WOMAN, and choose Black, White gradient and press OK. Create a clipping mask from that layer. Then change the Blending Mode from Normal to Luminosity.
Make the woman a bit darker. Add adjustment layer Levels and set the Input Levels on 0; 0,78; 255. Press OK and create a clipping mask. De-saturate the woman to match the rest of the image. Add an adjustment layer Hue/Saturation and set the value Saturation to -20. Press OK and create another clipping mask. You can see how the adjustment layers affect the woman in the image below.

Step 14 - Changing Lights and Shadows on the Woman
The render of the woman was made to fit the overall light scene of the manipulation, but it would be better to make the contrast between light and shadow even greater. Add a new layer on top of the layers. Select the Gradient Tool (G) and fill the layer with solid #808080 grey color. Change the Blending Mode of the layer to Overlay. Select the Brush Tool (B) and pick a white color, lower the opacity of the brush to about 15% and start painting over the areas of woman’s body where the light should be lighter. Once you’re satisfied with the result, select the black color and paint gently over the shadows.


3 comments on “How to Create an Amazing Apocalyptic Photo Manipulation in Photoshop”
Thanks for the tutorial, I really enjoyed it.
sir, your works is very nice.....
sorif,
hello Jarka Hrncárková thank you so much for this tutorial I've try it and I'll teach it to my students also thank u so much... :)